10 Best Plants For The Bathroom

Turn your functional bathroom into something a bit more exciting with a few carefully chosen plant friends.

That steamy shower environment might actually be perfect for certain greenery to thrive…yep, really!

Beyond just looking beautiful, bathroom plants can help purify your air and bring a natural touch of calm to your daily routine. Think mini spa vibes, minus the expensive renovation.

I’ve rounded up 12 plants that don’t just survive but actually love bathroom life – from humidity-loving tropicals to low-light champions. These picks are surprisingly easy to care for.

1.Peace Lily
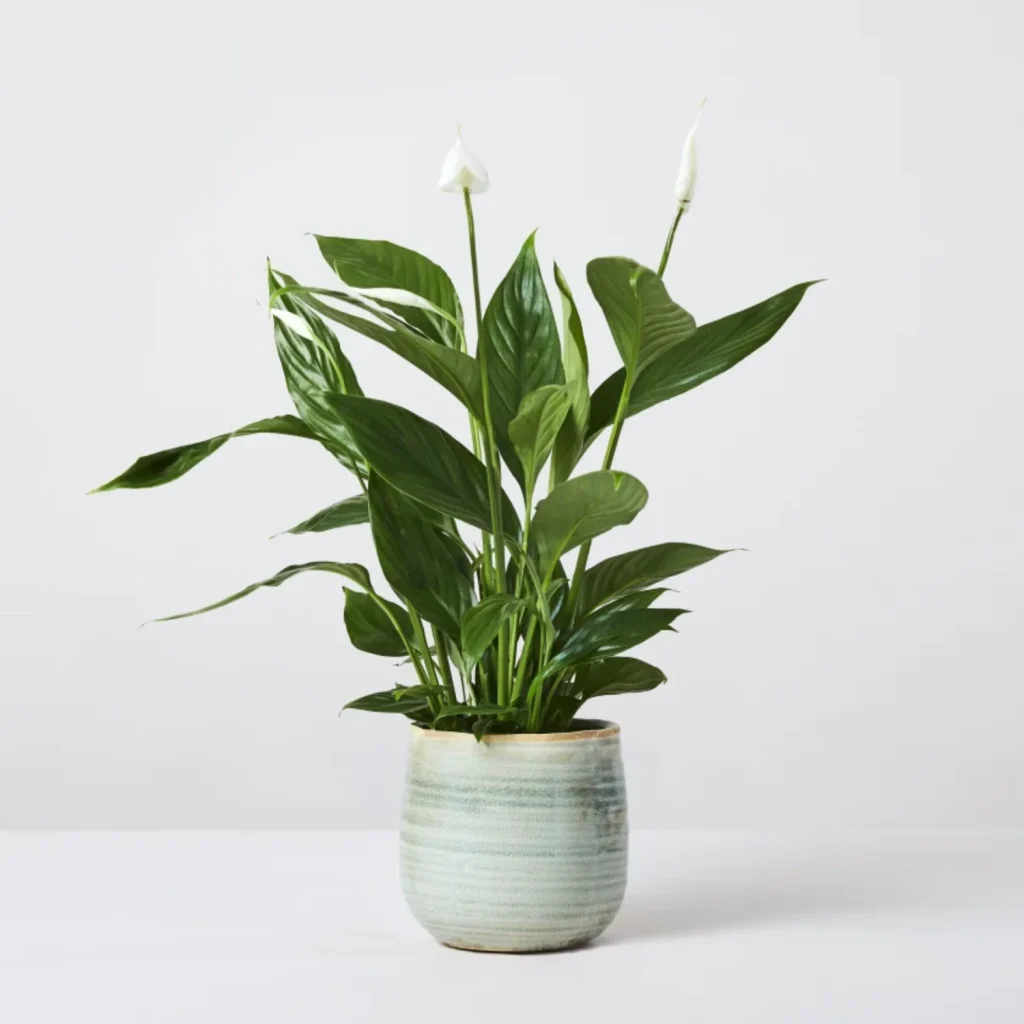
The Peace Lily is like the elegant multitasker of the plant world. With its glossy leaves and classic white blooms, it’s become a tried-and-true favourite for good reason.

This graceful plant doesn’t just sit pretty on your bathroom shelf, it’s also hard at work filtering indoor air pollutants, all while thriving in those typically tricky low-light bathroom conditions.

2.Aloe Vera
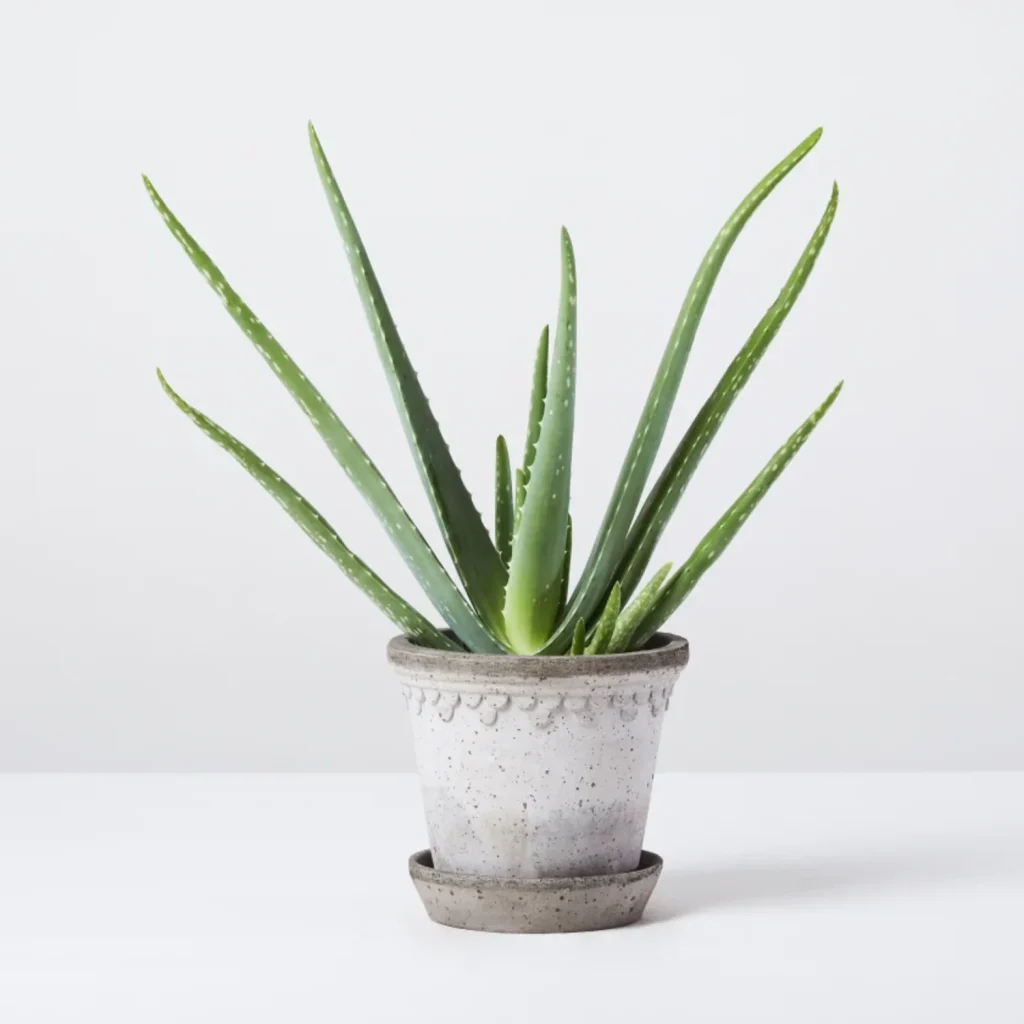
Aloe vera is an unfussy succulent that asks for little attention while offering plenty in return – from its modern, sculptural form to its practical healing benefits.

Beyond its easy-care nature, Aloe doubles as a natural first-aid essential, with its soothing gel ready whenever you need it. A sunny spot in your bathroom is all it needs to thrive.

3.Snake Plant
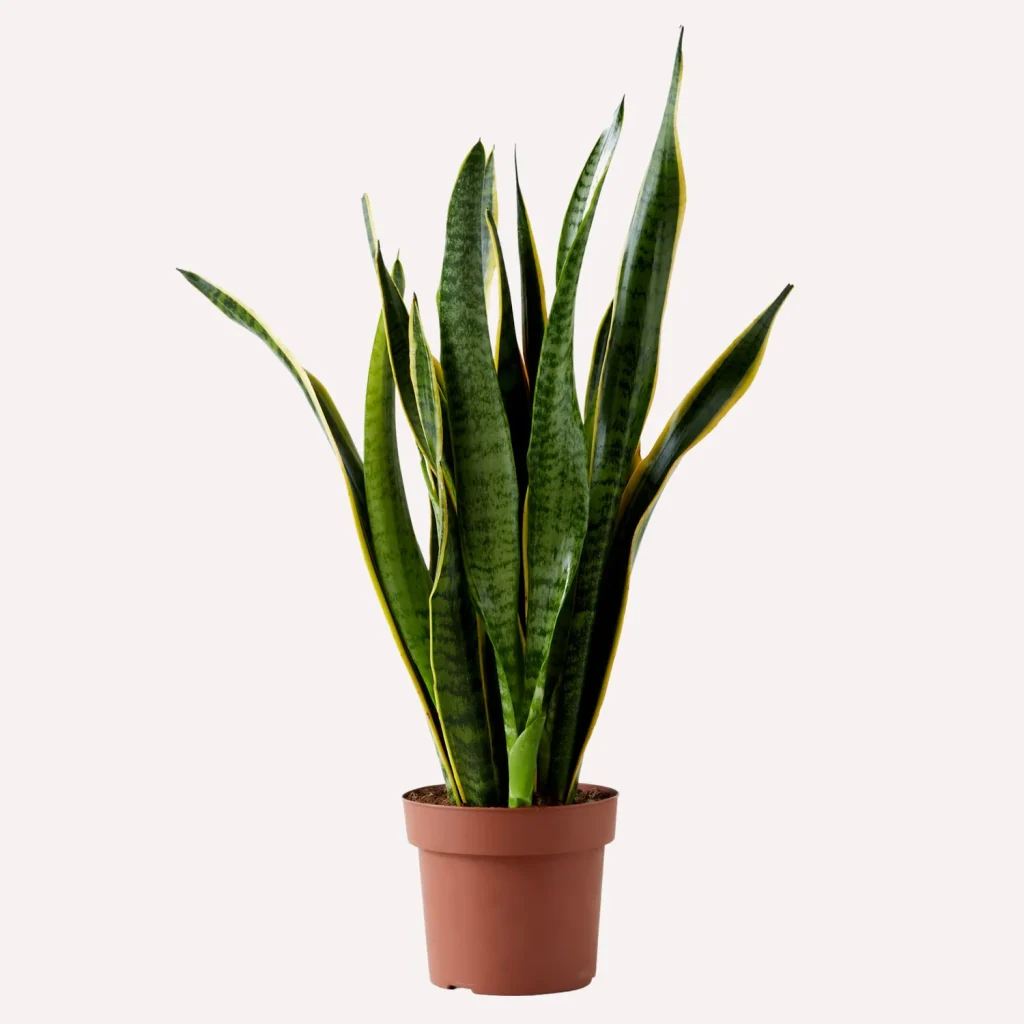
The Snake Plant might possibly be the most laid-back addition to your bathroom lineup. This architectural beauty stands tall and striking, yet asks for almost nothing in return.

Perfect for busy plant parents, it thrives even in those darker bathroom corners where other plants might sulk.

Better yet?

If you decide to catch a few z’s while you soak, your Snake Plant is working overtime, releasing fresh oxygen and filtering out unwanted indoor pollutants.

4.Boston Fern
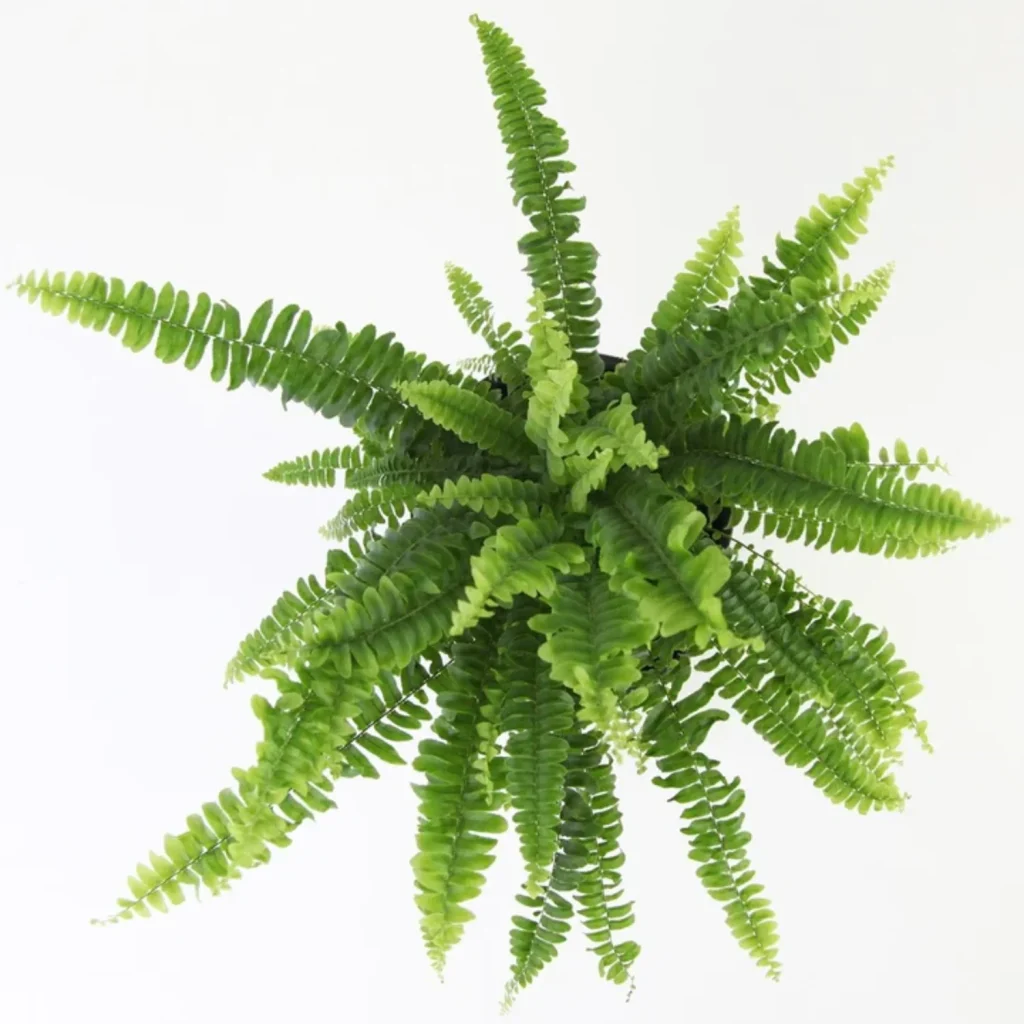
Looking to add a touch of lush greenery? The Boston Fern is your go-to bathroom companion.

This classic beauty actually loves what most plants don’t – your bathroom’s naturally humid environment.

Those feathery fronds aren’t just for show (though they do bring an effortless tropical feel). While thriving in indirect light, this fern quietly works as a natural air purifier, helping to keep your space fresher.

5.Spider Plant
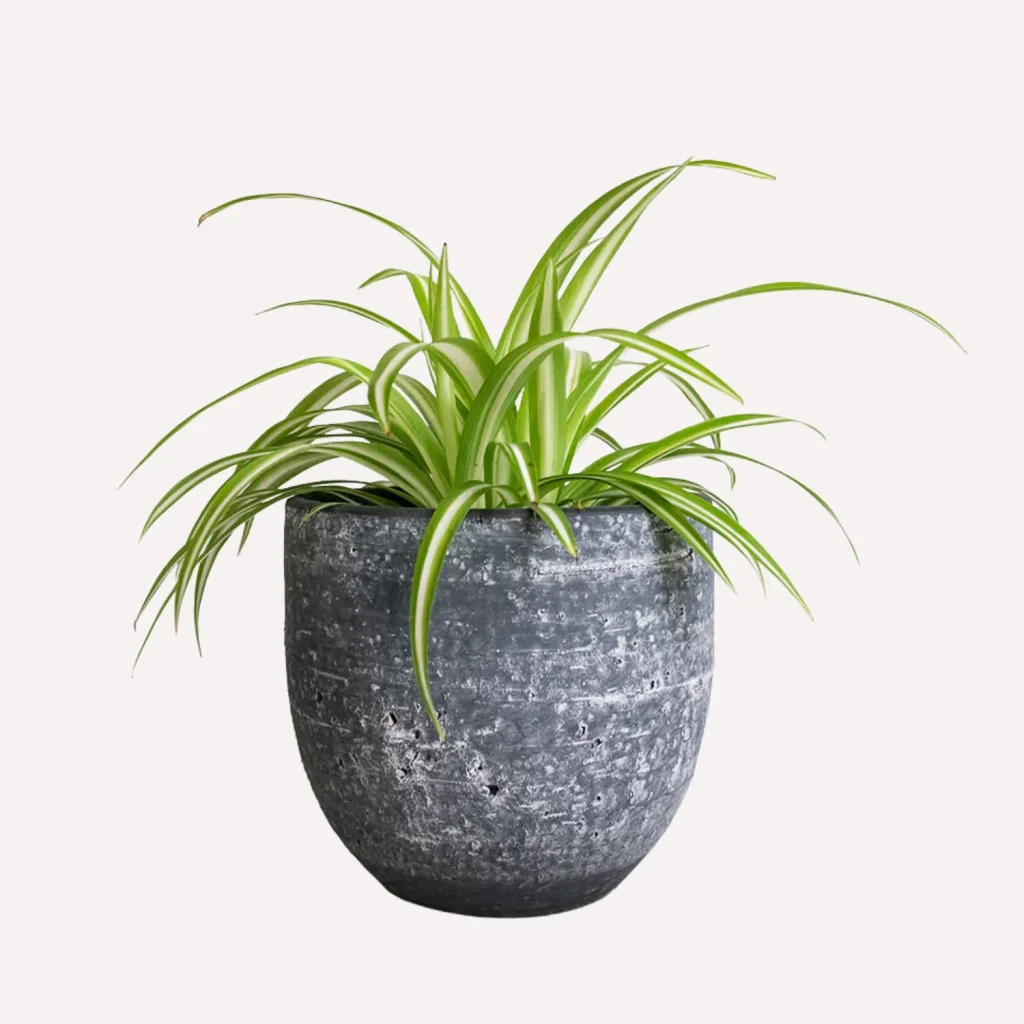
The Spider Plant brings a bit of playful elegance to your bathroom with its arching leaves and dangling “babies.”

Easy-going by nature, it’s the kind of plant that makes you look like a pro gardener without trying too hard.

Those cascading strands aren’t just for show – this resilient plant is quietly cleaning your air while adding a touch of natural movement to your space.

It handles lower light like a champ, making it perfect for bathroom life.

6.Cast Iron Plant
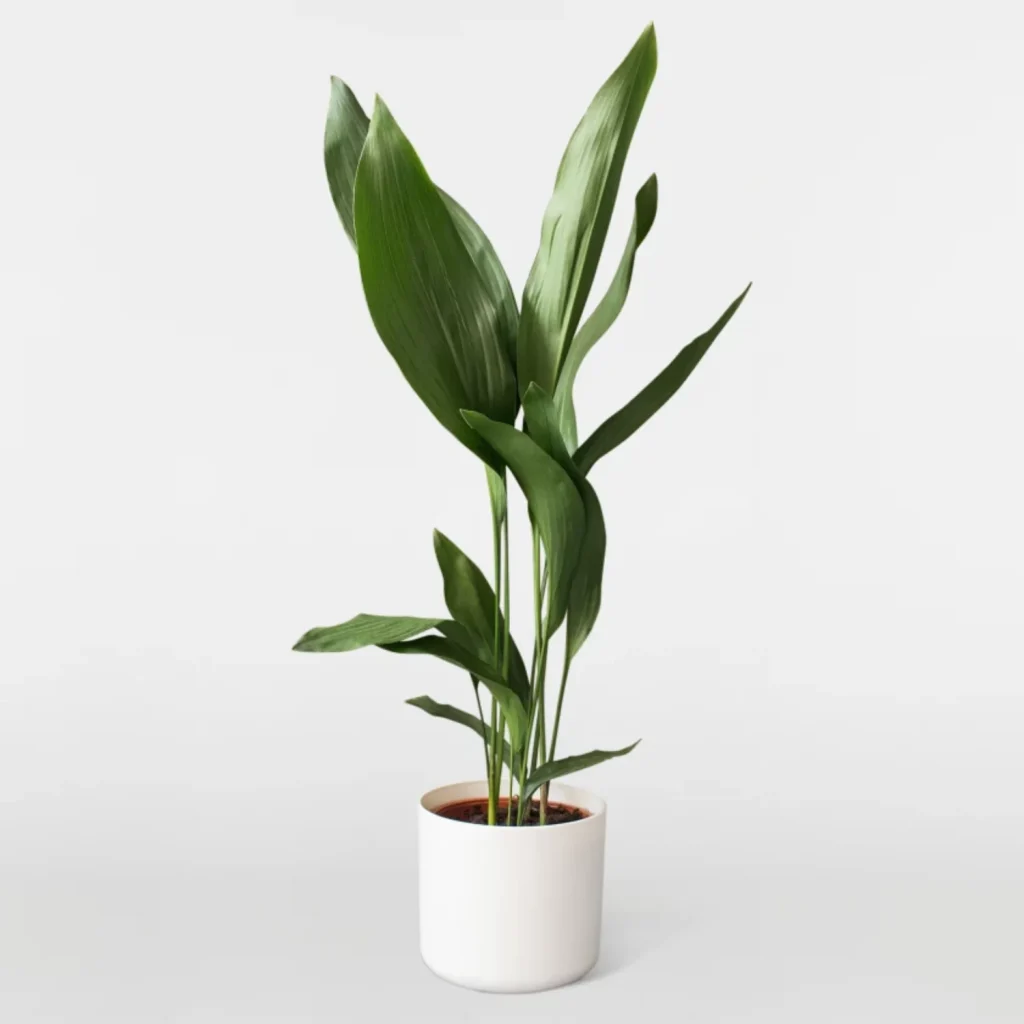
The Cast Iron Plant is a no-nonsense bathroom plant that lives up to its sturdy name. True to its reputation, this resilient plant handles just about anything bathroom life throws its way.

For those of us who appreciate low-maintenance greenery (or perhaps have accidentally neglected a plant or two), this tough beauty thrives even when forgotten.

Its deep green leaves bring a calm, grounding presence to your space without demanding much in return.

7.ZZ Plant
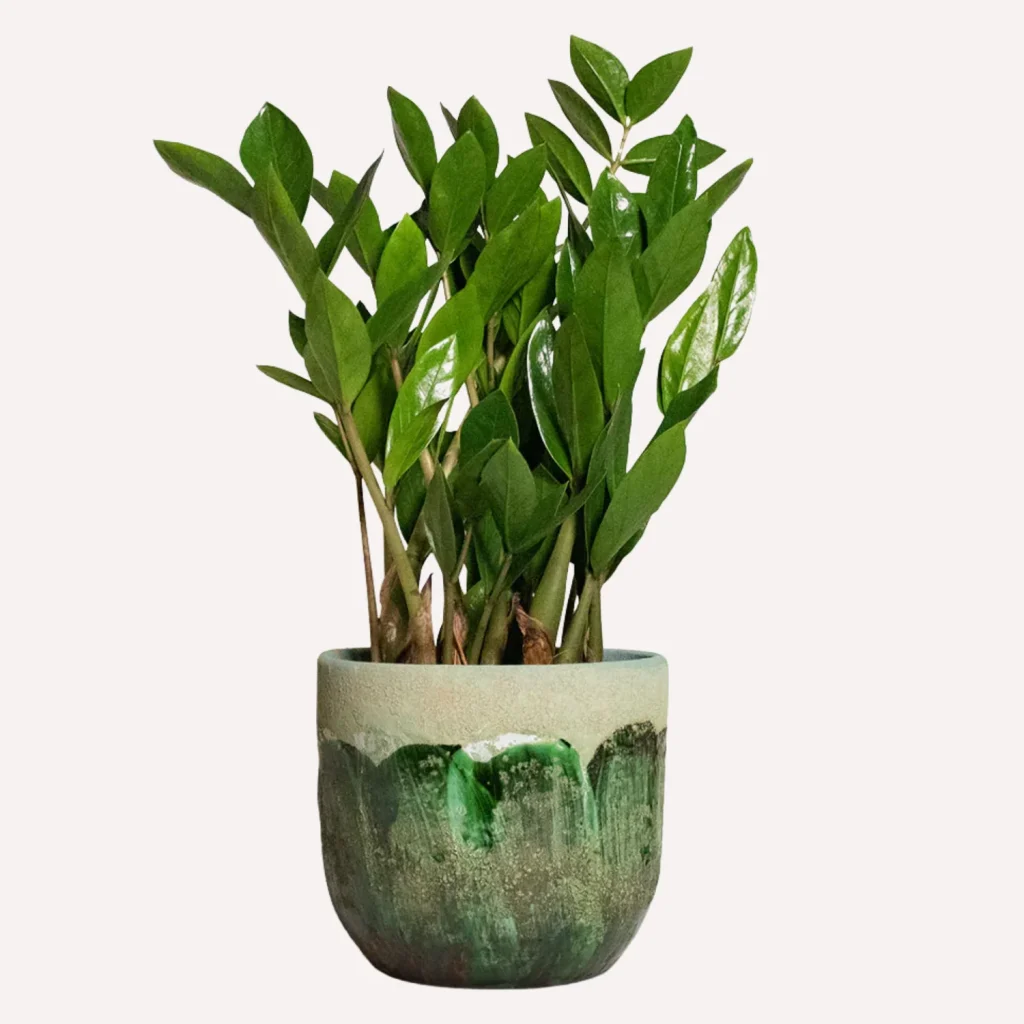
Meet the ZZ Plant – the definition of effortless cool in the plant world. With stems that grow like polished wands and leaves so glossy they almost look artificial, it’s nature’s answer to modern design.

Fun fact: this plant is so resilient it was originally discovered thriving in the dry grasslands of East Africa!

This beauty actually prefers those tricky bathroom conditions that make other plants complain. Its thick, potato-like rhizomes store water like a natural survival pro, meaning it won’t throw a fit if you forget to water it for weeks.

While you’re going about your daily routine, it’s quietly filtering out household pollutants and making your space a bit healthier.

8.English Ivy
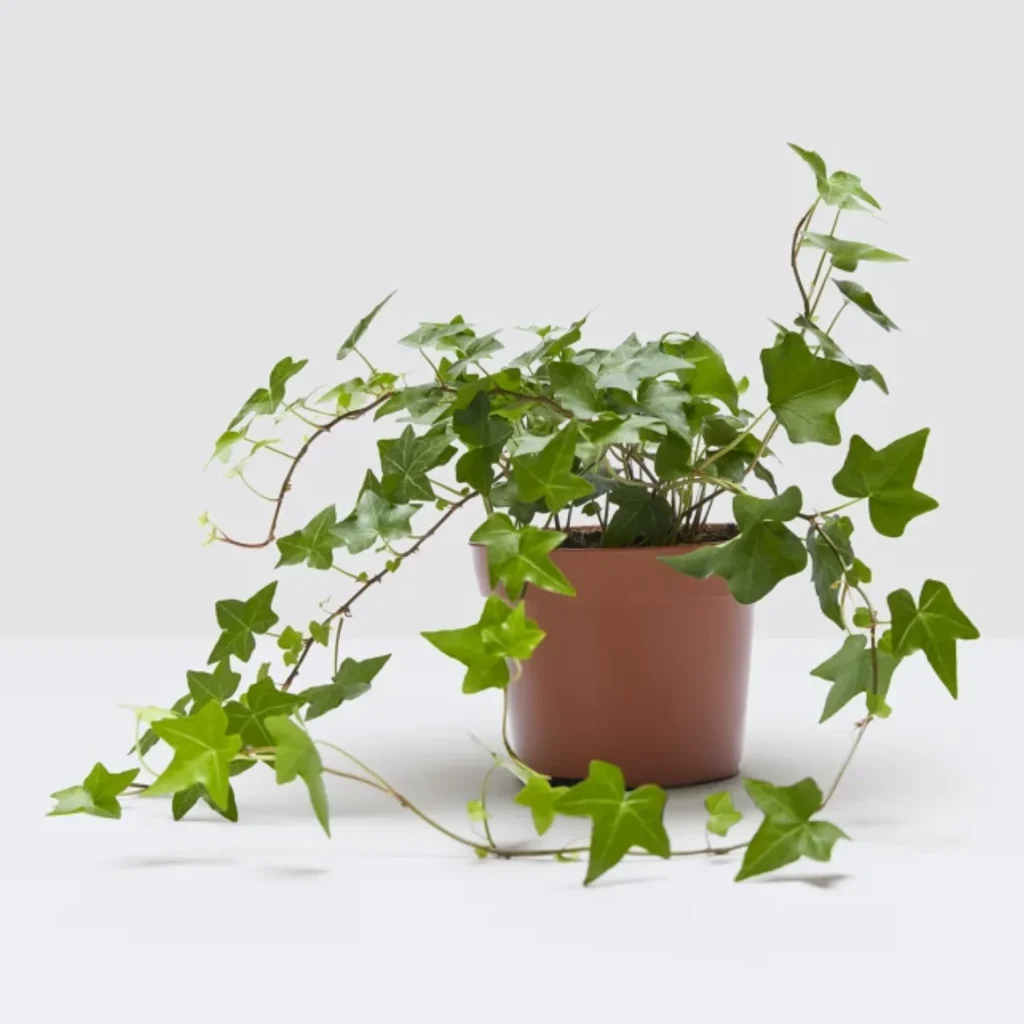
Enter English Ivy – the charming climber who’s more than just a pretty face. This classic beauty has a secret superpower: it’s actually one of nature’s best defences against bathroom mould and mildew.

Those elegant trailing vines aren’t just adding a touch of European cottage charm to your space.

While some plants merely tolerate humidity, English Ivy embraces it. Place it on a high shelf or in a hanging basket, and watch as it creates graceful cascades that can transform your bathroom into something straight out of a cosy English garden.

Its delicate leaves come in varieties ranging from deep forest green to variegated patterns that catch the light.

9.Golden Pothos
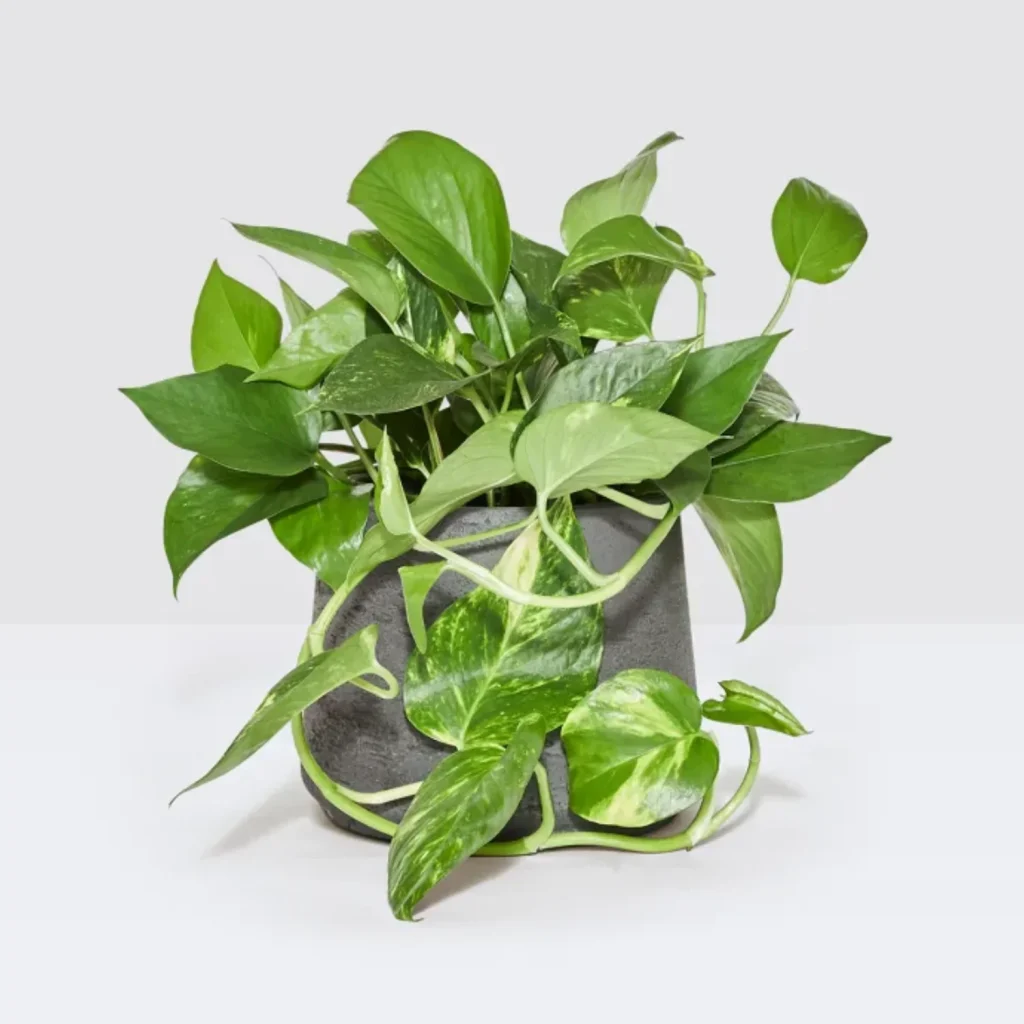
Golden Pothos is the easygoing vine that brings a touch of sunshine to your bathroom.

With heart-shaped leaves marbled in green and gold, this trailing beauty transforms plain bathroom corners into something special.

Give it a perch on a high shelf or in a hanging basket, and watch as it creates graceful cascades that soften your space.

This gorgeous plant will enjoy your bathroom’s steamy environment, using that extra moisture to keep its leaves lush and vibrant.

10.Lucky Bamboo
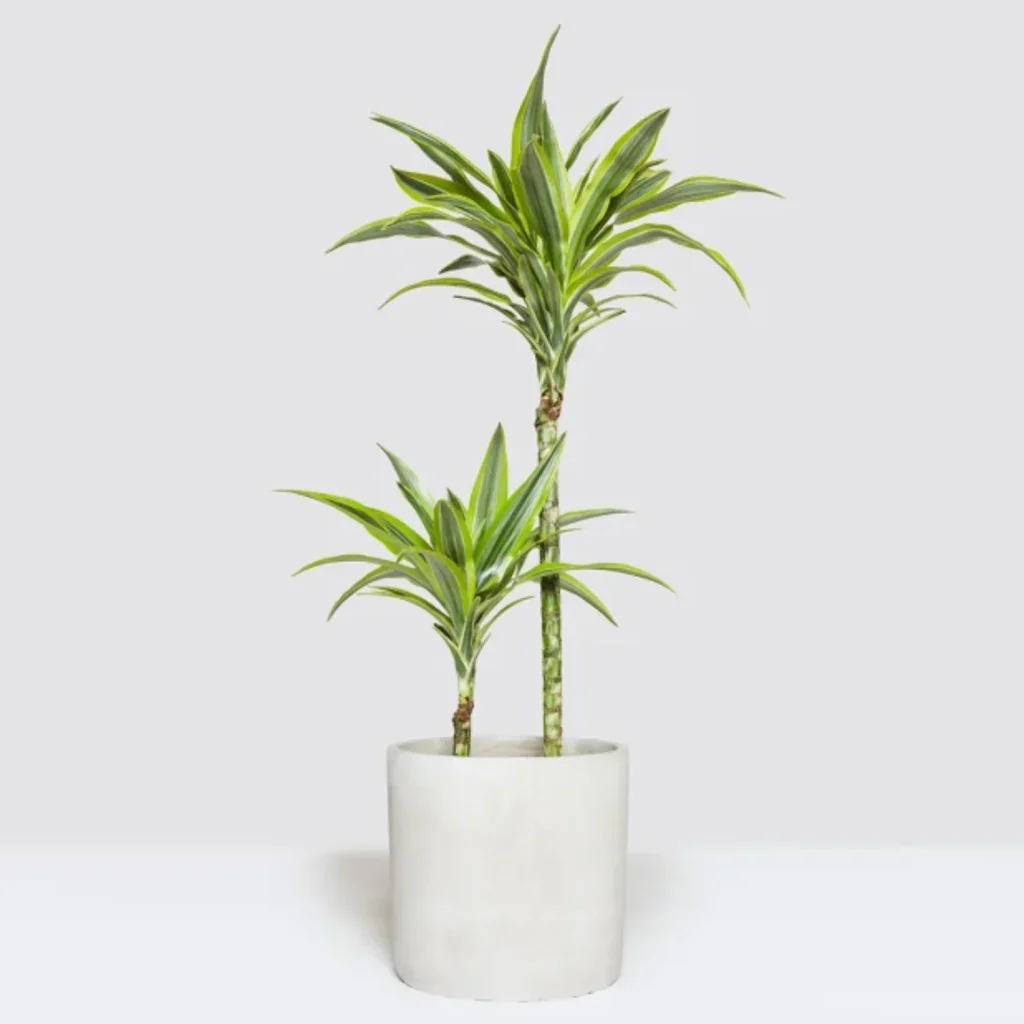
Lucky Bamboo is the graceful overachiever that brings a hint of zen to your bathroom.

Despite its name, it’s actually not bamboo at all – it’s part of the Dracaena family, known for its adaptable nature and striking spiral stems.

While soaking up your bathroom’s natural humidity (no extra misting needed), it’s busy filtering out everyday pollutants and freshening your air. You can grow it in water or soil, and it can even be shaped into spirals and other artistic forms as it grows.

Perfect for adding a touch of tranquillity to your space, Lucky Bamboo has been considered a symbol of good fortune in Asian cultures for thousands of years.

Home-decor Lifestyle
Is Argan Oil Good For Curly Hair?

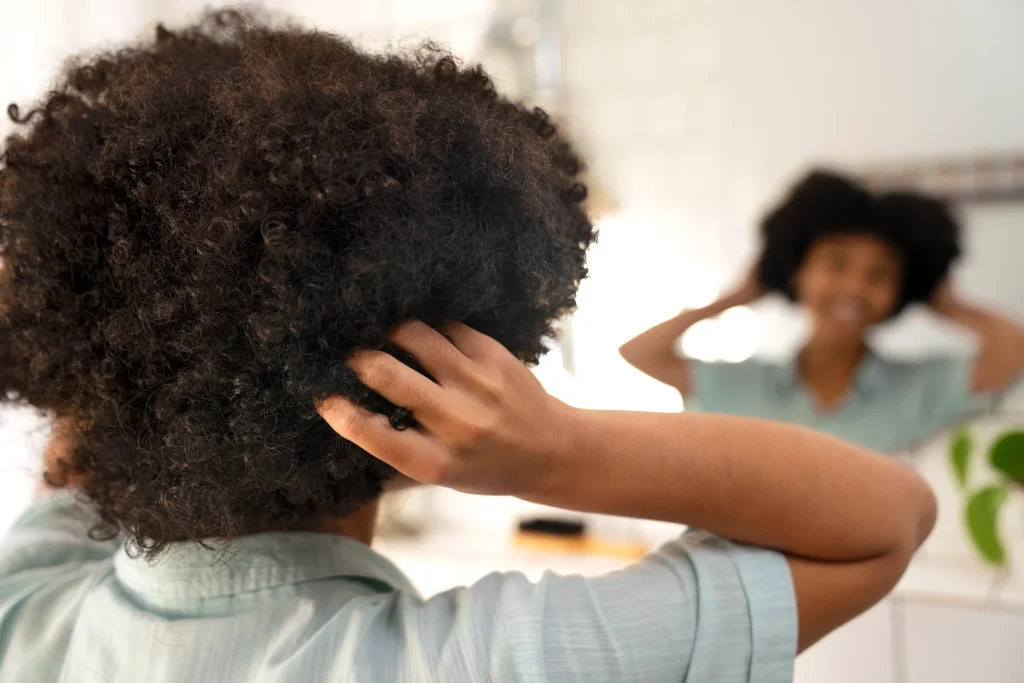
Let’s give curly hair its crown for a moment – it’s beautiful and unique, but sometimes it feels like it has a mind of its own.

If you’re part of the curly crew, you know the eternal quest for that perfect product that can tackle dryness, define curls, and tame frizz without weighing down your precious coils.

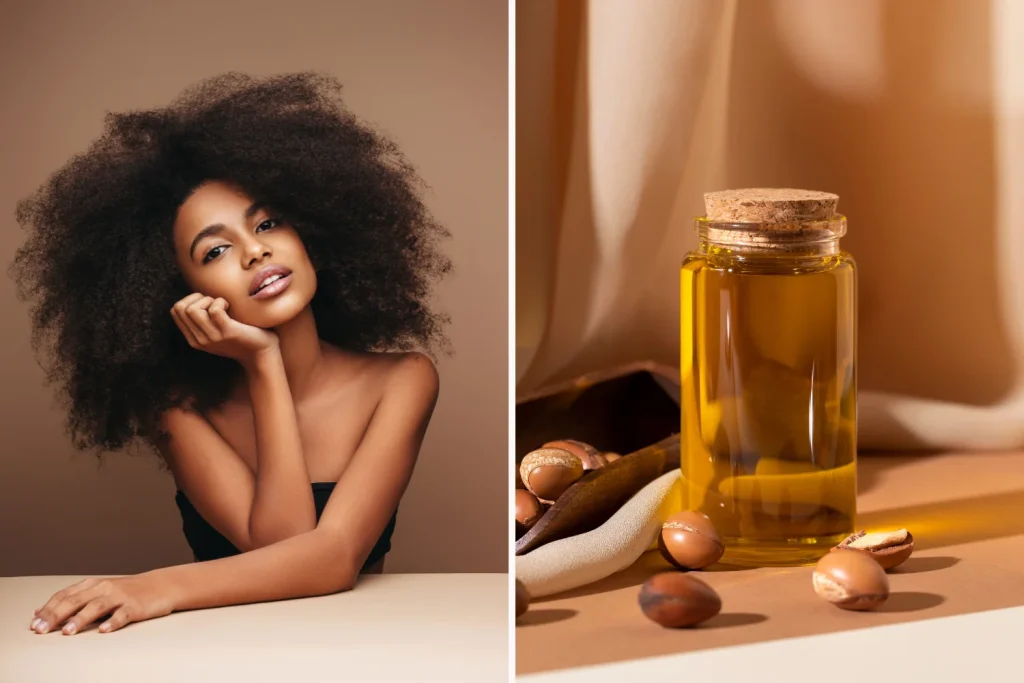
Enter argan oil, the golden elixir that’s been creating quite the buzz in the curly community.

Sourced from the kernels of Morocco’s native argan tree, this liquid gold has been a beauty secret for centuries. But there’s some serious science behind why this oil has become a holy grail product for curly-haired folks everywhere.

Ron Robinson, a cosmetic chemist, tells Allure that argan oil is “rich in fatty acids and works to condition the hair and provide shine,” so it’s no surprise that those with curly hair swear by its smoothing and defining powers.

Whether you’re rocking loose waves, tight coils, or anything in between, argan oil might just be the answer to your curl prayers.

In this guide, we’re diving deep into everything you need to know about argan oil for curly hair. From its rich composition to practical application tips, consider this your comprehensive roadmap to understanding why this natural wonder has earned its spot in countless curly hair care routines.

What Makes Argan Oil So Special?

Before we get into how argan oil works its magic on curls, let’s break down what’s actually in this golden elixir. Argan oil contains a powerful cocktail of nutrients, including:

  • Essential fatty acids (including linoleic acid)
  • Vitamin E
  • Antioxidants
  • Natural phenols
  • Omega-6 and Omega-9 fatty acids

These compounds work together to create a moisturising powerhouse that curly hair absolutely loves!

Why Curly Hair and Argan Oil Are a Perfect Match

Curly hair tends to be naturally drier than straight hair because the spiral shape makes it harder for natural oils to travel down the hair shaft – which is exactly why argan oil’s molecular structure makes it so effective.

Its small molecules can penetrate the hair shaft rather than just sitting on top, helping to repair damage from the inside out and providing deep moisturising properties that curly hair craves!

Argan oil is packed with vitamin E, ferulic acid, and carotenoids – antioxidants that help protect hair from environmental damage and UV rays.

Plus, its high content of oleic and linoleic acids helps seal moisture into the hair shaft, reducing frizz and enhancing curl pattern.

For best results, warm a few drops between your palms before scrunching into damp hair, focusing on mid-lengths to ends.

A little goes a long way – start with less than you think you need!

The Benefits of Argan Oil for Curly Hair

  • Deep Moisture Without the Weight – Unlike some hair oils that can leave curls feeling heavy and greasy, argan oil provides moisture without weighing down your curls. This makes it an ideal styling product for achieving defined, bouncy curls.
  • Split End Prevention and Repair – The fatty acids in argan oil help seal the hair cuticle, reducing the appearance of split ends and preventing future damage. While it can’t technically “heal” split ends (only trimming can do that), it can make them less noticeable and prevent new ones from forming.
  • Promotes Healthy Hair Growth – Argan oil helps stimulate hair growth by nourishing hair follicles, improving scalp health, increasing blood circulation and providing essential nutrients for healthy hair growth.
  • Frizz Fighting Power – The moisturising properties of argan oil help smooth the hair cuticle, reducing frizz and promoting better curl definition. It’s like a natural curl definer!

4 Ways To Use Argan Oil in Your Curly Hair Care Routine

  1. As a Pre-Shampoo Treatment – Apply pure argan oil to your dry hair and scalp 30 minutes before washing. This helps protect your curls during the cleansing process and provides deep nourishment.
  2. As a Styling Product – Add 2-3 drops to your palms, rub them together, and apply to damp curls before your other styling products. This helps lock in moisture and prepare your hair for styling.
  3. For Daily Maintenance – Use a tiny amount on dry hair to refresh curls, tame frizz, and add shine between wash days.
  4. In Your Hair Mask – Mix a few drops of argan oil into your favourite deep conditioning mask for extra moisturising benefits.

Tips for Using Argan Oil

  1. Less is More – Start with a small amount – you can always add more if needed. Too much oil can make even the driest curls look greasy.
  2. Quality Matters – Look for pure, cold-pressed argan oil without added ingredients. Yes, it might be pricier, but a little goes a long way.
  3. Timing is Everything – Apply to damp hair for best absorption and curl definition.

When to Be Cautious

While argan oil is generally safe for all hair types, those with very fine curls might want to use it sparingly or only on their ends. If you have a sensitive scalp, do a patch test before applying it directly to your scalp.

Q. What Are The Disadvantages Of Argan Hair Oil?

A. While this liquid gold is amazing, it comes with a few considerations.

Pure, high-quality argan oil often comes with a luxury price tag that might make your wallet wince. For those of us with finer hair types, too much can leave strands looking more slick than sleek.

And if you have nut sensitivities, you’ll want to patch test first. Not to mention, some varieties have a distinct natural scent that might not be everyone’s cup of tea.

Q. Do You Use Argan Oil On Wet or Dry Hair?

A. Argan oil is it’s versatile enough to work both ways, but timing is everything. Think of damp hair as your ideal canvas: it’s when your strands are most receptive to soaking up all that goodness.

Apply it right after towel-drying for that sweet spot of moisture-locking and curl definition.

For dry hair days? A tiny amount can rescue frizz and add shine in seconds – just remember, a little goes a long way.

Q. Which Oil Is The Best For Curly Hair?

A. While argan oil gets plenty of well-deserved spotlight, your perfect match depends on your curl’s unique personality.

Coconut oil might be your go-to if your hair loves protein, while jojoba oil mimics your hair’s natural oils perfectly.

Castor oil has become a cult favourite for thickness seekers, and sweet almond oil offers a lighter touch.

The Bottom Line

So, is argan oil good for curly hair? Absolutely!

This natural oil contains all the right ingredients to keep your curls healthy, hydrated, and happy. Whether you’re dealing with dry hair, frizz, or damage, argan oil can be a valuable addition to your hair care collection.

Remember that everyone’s curls are different, so what works for one person might not work for another. Start slowly, experiment with different application methods, and pay attention to how your curls respond. With consistent use, argan oil can help transform your curls from dry and frizzy to soft, defined, and gorgeous.

Ready to give argan oil a try? Look for pure, high-quality oil and start incorporating it into your routine. Your curls are about to get a whole lot happier!

Beauty hair
3 Must-try DIY Deep Conditioners For Curly Hair That Actually Work

Ever notice how some days your curls just cooperate perfectly? Those rare moments when every curl is defined, bouncy, and moisturised, and you wish you could recreate that magic every morning!

Well, the good news is that those perfect hair days CAN become much more frequent. The secret lies in DIY deep conditioners for curly hair – treatments that nourish your curls from within and transform your natural hair care routine.

Whether you’re embracing your natural texture or nursing over-processed strands back to health, I’m about to share three simple treatments you can whip up from ingredients you probably already have in your kitchen.

In this guide, we’ll explore these effective treatments and understand why deep conditioning is crucial for curly hair.

Why Your Curly Hair Is Begging for Deep Conditioning

Curly hair is structurally different from straight hair, and not just in the obvious ways.

Those beautiful coils and curves that make your hair unique actually create a bit of an obstacle course for your natural oils. While straight hair lets oils glide down like a water slide, curly hair makes those nurturing oils work for it!

Each twist and turn in your curl pattern creates a barrier that makes it harder for your scalp’s natural moisture to reach the ends of your hair.

Think of it like trying to get water through a twisted garden hose – it’s just not as smooth a journey. This is exactly why your hair needs that extra moisture boost that deep conditioning provides.

Plus, if you colour, heat style, or live in a dry climate, your curls lose moisture at a significantly faster rate.

That’s why deep conditioning shouldn’t be seen as an optional treatment – it’s an essential step that provides your curls with the hydration they desperately need.

Deep Conditioner vs Regular Conditioner: What’s Really The Difference?

Let’s clear up the confusion once and for all! While both products aim to make your curls happier, they work quite differently. Think of regular conditioner as your daily multivitamin, while deep conditioner is like an intensive wellness retreat for your hair.

Regular Conditioner

  • Lightweight formula that works on the surface
  • Detangles and adds immediate slip
  • Typically stays on for 3-5 minutes
  • Designed for daily or co-washing use
  • Focuses on surface-level moisture
  • Washes out easily
  • Good for basic maintenance

Deep Conditioner

  • Thicker, more concentrated formula
  • Penetrates deeply into the hair shaft
  • Needs 20-30 minutes to work its magic
  • Used weekly or bi-weekly
  • Repairs and restructures from within
  • Contains more intensive ingredients
  • Targets specific hair concerns

How Often Should You Deep Condition?

According to Michelle Blaisure, certified trichologist and technical specialist for Bosley Professional Strength, “Conditioners are valuable for all hair types but it is the frequency of conditioning that can vary based on different types/textures.”

While your specific hair type is the ultimate deciding factor, most curly hair thrives with deep conditioning every 1-2 weeks.

If your curls are particularly parched, colour-treated or damaged, you might want to bump it up to weekly sessions or every time you shampoo.

But here’s the key: listen to your hair. Is it feeling soft and manageable? You’re on the right track. Feeling a bit limp or heavy? Maybe dial back the frequency.

Too much of a good thing can definitely be counterproductive!

Signs you need more frequent deep conditioning:

  • Excessive dryness or frizz
  • Split ends
  • Difficulty detangling
  • Loss of curl pattern
  • Dull, lifeless appearance

Signs you might be overdoing it:

  • Limp, heavy curls
  • No volume at root
  • Hair feels too soft or mushy
  • Lack of natural bounce
Beauty hair
How To Protect Curly Hair At Night: The Complete Guide for All Curl Types

Remember that GREAT feeling of perfect curl definition after a fresh wash day? Now imagine maintaining that bounce and vitality even after eight hours of beauty sleep. Sounds like a dream, right?

As someone who’s navigated the ups and downs of curly hair care since going natural in 2017 (and yes, literally woken up looking like I’d been electrocuted), I’m here to share the secrets of how to protect your curly hair at night that actually work – backed by science and real-world experience.

Whether you’re dealing with gentle waves or tight coils, that morning masterpiece starts with your nighttime routine.

Throwing your hair up and hoping for the best just doesn’t cut it!

The Science Behind Nighttime Curl Care: Why Your Evening Routine Matters

Let’s get a bit nerdy for a moment because understanding your curls means knowing how to protect them.

Each curl on your head is like a delicate spring with a unique structure. When you look at curly hair under a microscope, you’ll notice the hair shaft isn’t uniform like straight hair – it has an elaborate pattern that gives your curls their signature bounce.

The Overnight Challenge

During sleep, three main factors affect your curls:

  1. Friction: Every toss and turn creates friction between your head and bedding, which can rough up the hair cuticle and create frizz. This is especially damaging when your scalp’s natural oils haven’t made their way down your hair shaft (a common challenge with curly hair).
  2. Moisture Loss: Your hair loses moisture throughout the night, particularly in dry climates or heated rooms. Less moisture equals more frizz and undefined curls come morning.
  3. Compression: The weight of your head against traditional pillowcases can literally flatten and distort your curl pattern while you sleep.
Beauty hair
These 10 Dreamy Balletcore Outfits Will Add Some Grace to Your Wardrobe
There’s something eternally enchanting about the ballet aesthetic that goes way beyond the barre. The good news is, you don’t need to know your plié from your pirouette to embrace this ultra-feminine trend that’s taking over our social feeds.

Balletcore outfits aren’t just about throwing on a tutu and calling it a day (though we’re not opposed to a bit of tulle!).

It’s about capturing that perfect blend of strength and softness, comfort and elegance – something we could all use a bit more of in our everyday lives, right?

Whether you’re working from home, meeting friends for brunch, or heading to the office, I’ve curated 27 wearable balletcore outfits that won’t make you look like you got lost on your way to dance class.

Think ballet flats (obviously!), romantic layers, and subtle nods to dancewear that feel completely modern and totally achievable!

1.The Ethereal Layered Look

A dreamy all-white ensemble that perfectly captures ballet’s romantic essence. The tiered chiffon skirt paired with a delicate lace bralette and flowing button-down creates gorgeous movement. It’s giving major warm-up vibes, but make it street-style!

Pro tip: Layer similar pieces in cream or ivory to create depth while keeping that ethereal feel.

2.Sweet & Strong Contrast

This look is pure balletcore magic! A pink cable-knit jumper (complete with an adorable heart cutout!) meets a black tulle skirt with lace trim. The leg warmers and bow-detailed flats are gorgeous. Perfect for those who love mixing sweet and edgy elements.

Style hack: Try different coloured leg warmers to switch up the vibe.

3.Garden Ballet Romance

This white and powder-blue tiered dress hits the sweet spot where balletcore meets plazacore – and does it beautifully!

The ruffled layers and delicate lace details channel your inner ballerina, while the puff sleeves and feminine silhouette give major European plaza vibes.

Those chunky Mary Janes with frilly socks are giving both “off-duty dancer” and “strolling through a Parisian garden” energy. Perfect for garden parties, weekend brunches, or twirling through rose gardens pretending you’re in a European courtyard.

The ribbon in the hair adds that extra touch of ballet-meets-plaza charm that ties the whole aesthetic together.

4.Modern Marie Antoinette

A masterclass in balletcore elegance! The white ruffled top with statement sleeves pairs beautifully with that twirl-worthy blush pink skirt. Those chunky Mary Janes add a contemporary edge while staying true to the ballet aesthetic.

5.Dark Romance

A gorgeous twist on traditional balletcore with a brown geometric print bodysuit paired with a black mini skirt. The leg warmers and structured bag add sophistication, while the sleek bun keeps things classic. It’s giving “principal dancer heading to evening rehearsal” energy.

6.Practice Room Pretty

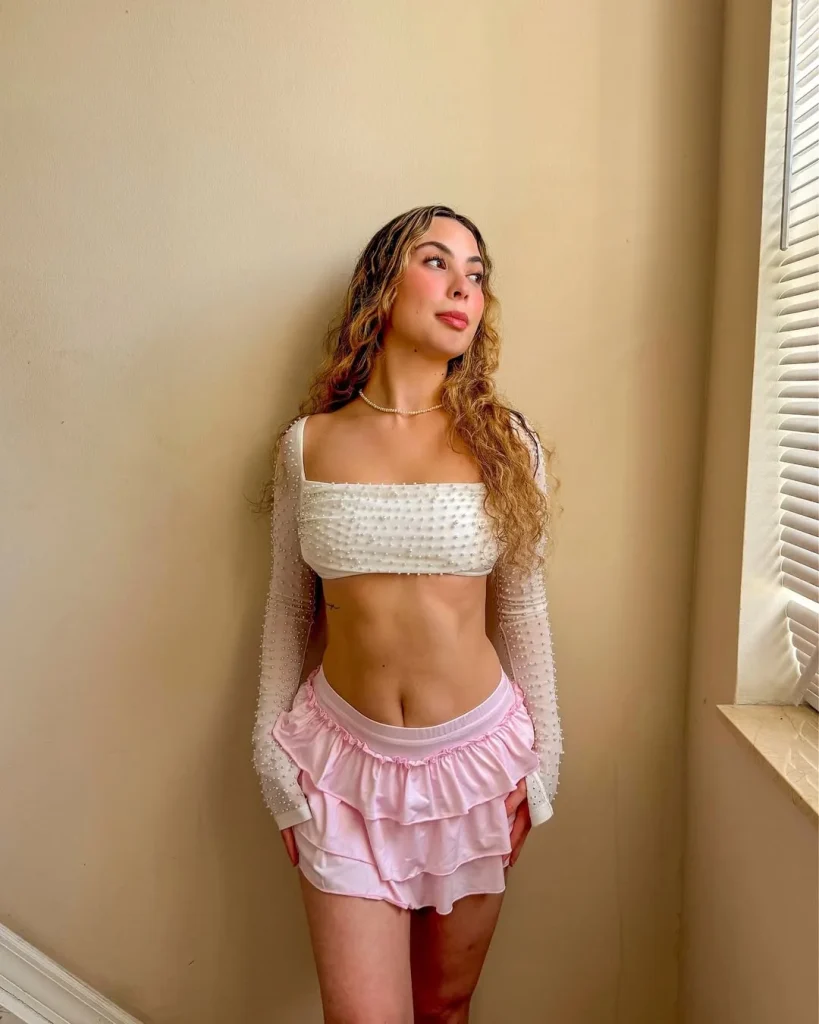
A modern take on dancewear with pink ruffle-tiered shorts and a white pearl-embellished long-sleeve crop top that gives a subtle nod to the Y2K revival.

The pearl choker adds the perfect finishing touch. Perfect for those who want to channel their inner dancer while keeping things contemporary.

7.Pink Satin Afternoon

A classic ballerina-off-duty look featuring a blush pink midi dress with a fitted bodice and flowing skirt. The matching pink ballet flats and woven grey bag add modern sophistication. It’s the perfect blend of dance studio elegance and everyday grace.

8.Black Swan Elegance

A stunning off-shoulder dress that combines a black bodice with a white tulle skirt – pure ballet drama! Those crystal bow heels and YSL bag add the perfect touch of luxury.

9.Winter Swan Vibes

A dreamy ensemble with a white furry-trimmed cardigan, pink pleated tennis skirt, and white knee-high boots. The heart-shaped pink bag is such a sweet touch!

10.Sweet Sophistication

A dreamy combination of pink turtleneck layered under an iridescent dress with leg warmers and ballet flats. The pink beret adds that perfect French-inspired touch! The holographic fabric catches the light just like stage costumes but makes it totally wearable for the day.

Fashion
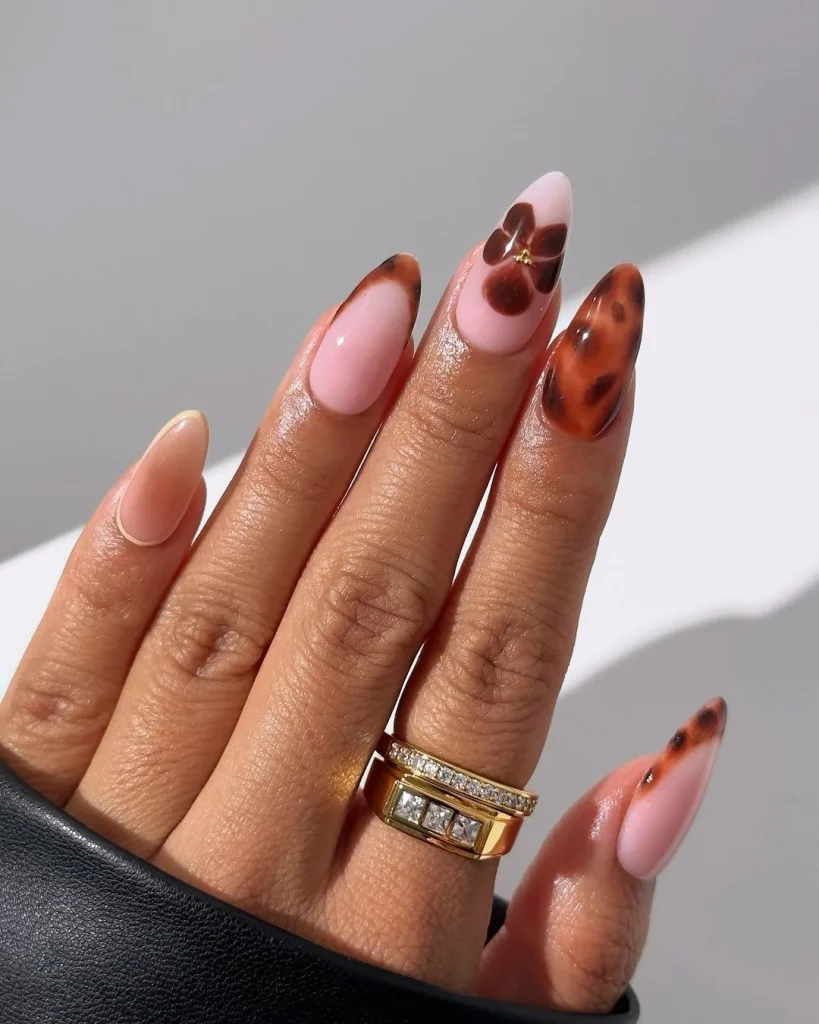
10 Tortoiseshell Nail Ideas That Are Wildly Sophisticated

Let’s talk about the nail trend that’s basically the equivalent of wearing vintage Chanel glasses – tortoiseshell nails.

These 10 tortoiseshell nail ideas showcase why this pattern somehow manages to be both bold and understated, trendy and timeless, all while giving off that old-money energy we can’t get enough of.

Think warm amber tones, delicate overlapping patterns, and a finish that looks like it could’ve been plucked straight from Jackie O’s sunglasses collection.

Whether you’re team classic browns and ambers or ready to experiment with unexpected colour combinations like blue tortoise, you’ll be impressed by these tortoiseshell nail ideas that prove that sometimes the most elegant statements come from nature’s own pattern book.

  1. Botanical Tortoise

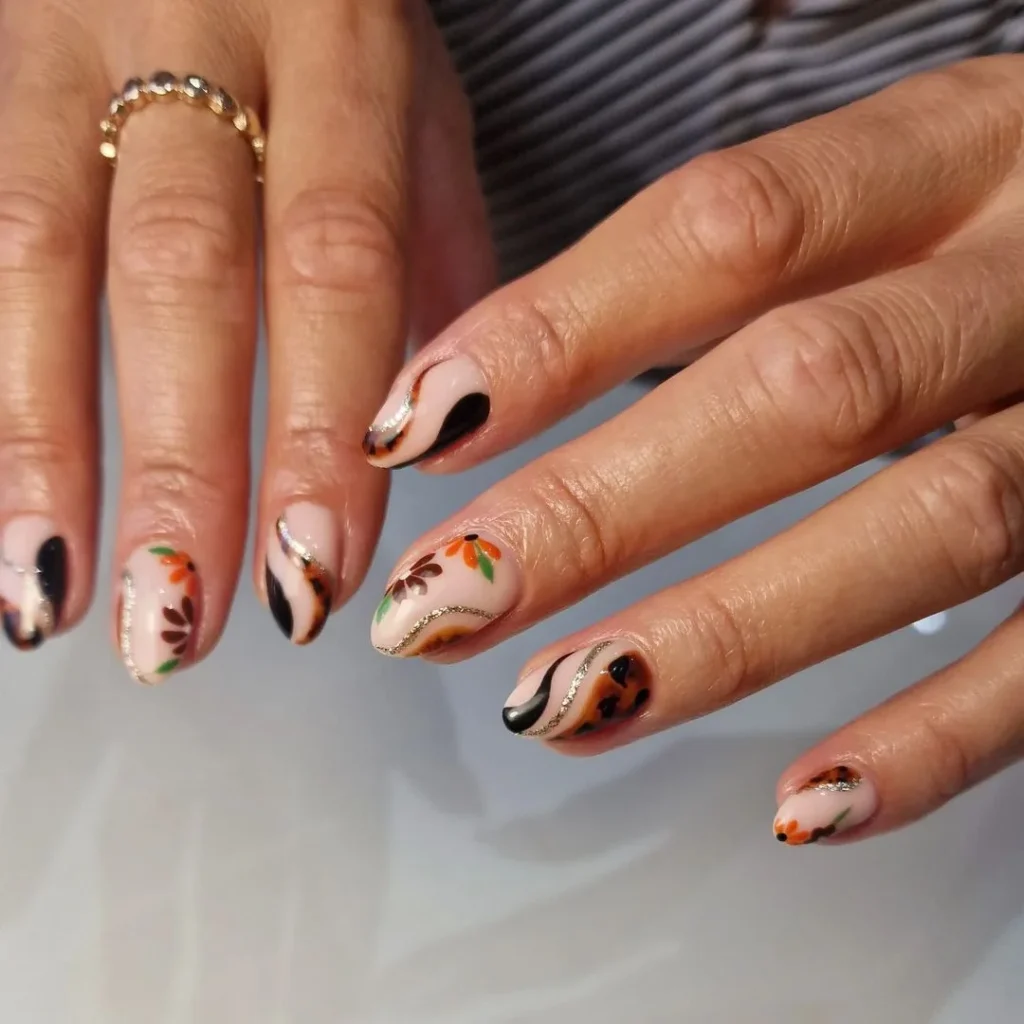
Nature meets elegance in this design, where traditional tortoise patterns are softened with delicate floral accents and golden curves. The nude base keeps things grounded while subtle leaves add a fresh touch.

  1. Classic Redefined

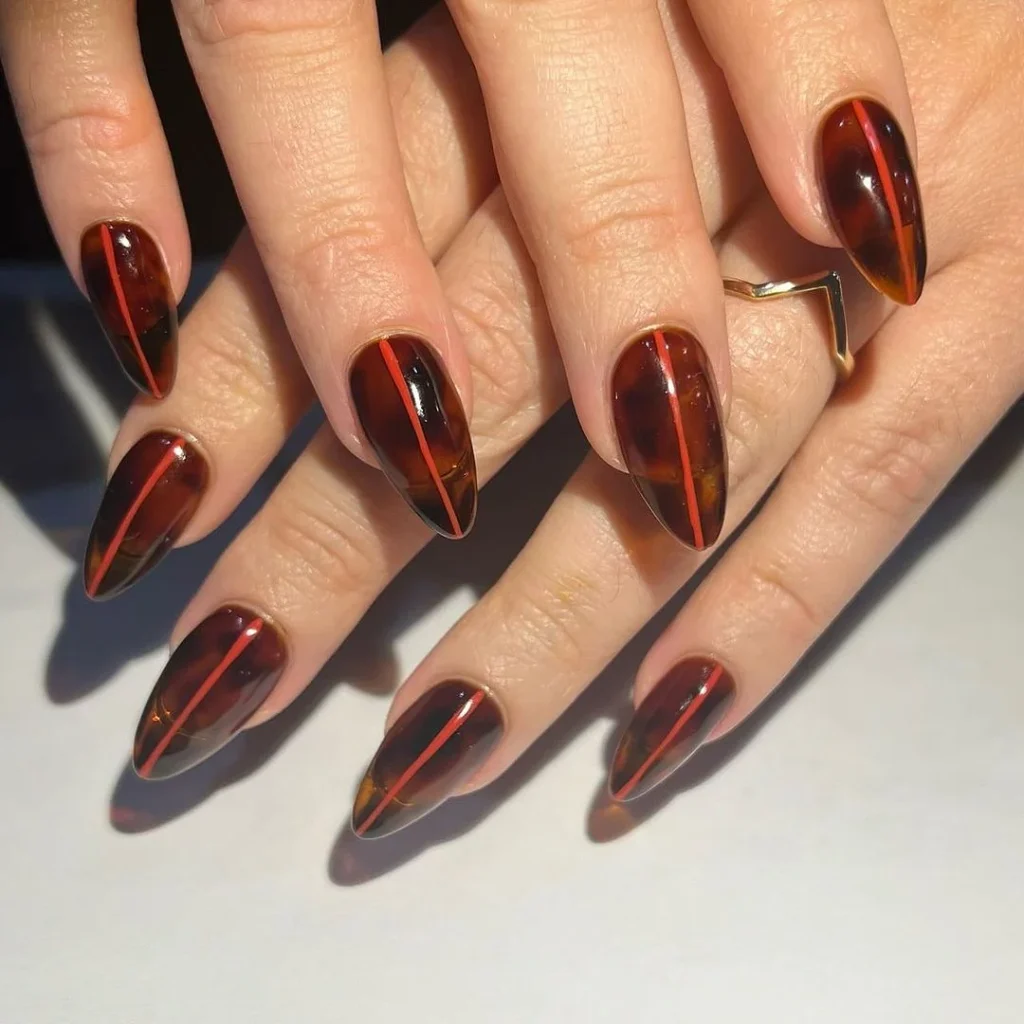
Deep amber tones with a sleek coral accent line create a refined look that means business. The rich tortoise pattern feels both timeless and current – like your favourite vintage accessory reimagined.

  1. The Pink Statement

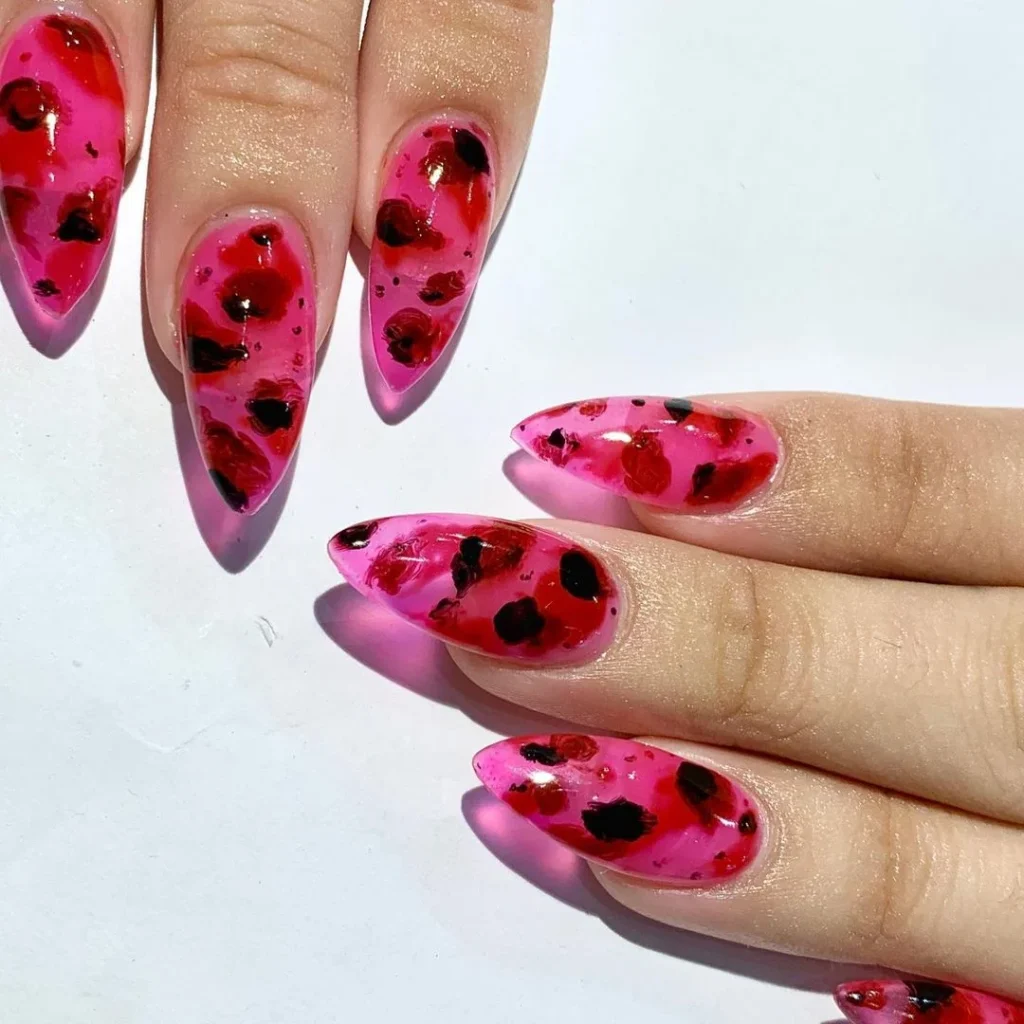
Breaking away from tradition, this hot pink interpretation is basically joy in nail form. The deep burgundy tortoise pattern floating on that vibrant pink base is giving main character energy.

  1. Pattern Play

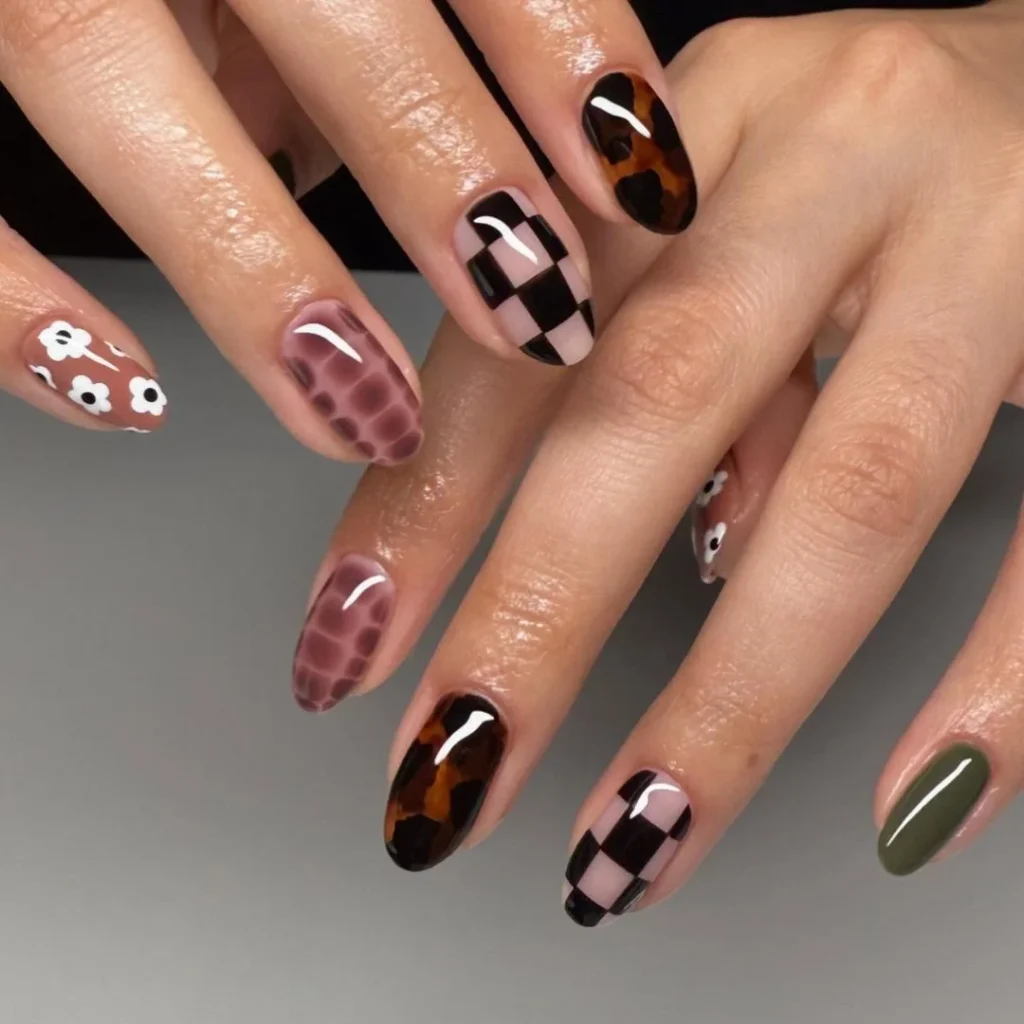
This set cleverly combines tortoise print with checkerboard patterns and dainty florals. The mauve tortoise effect adds a soft, feminine twist to the classic pattern, while that olive accent nail grounds the whole look.

  1. The Simple French Tortoise

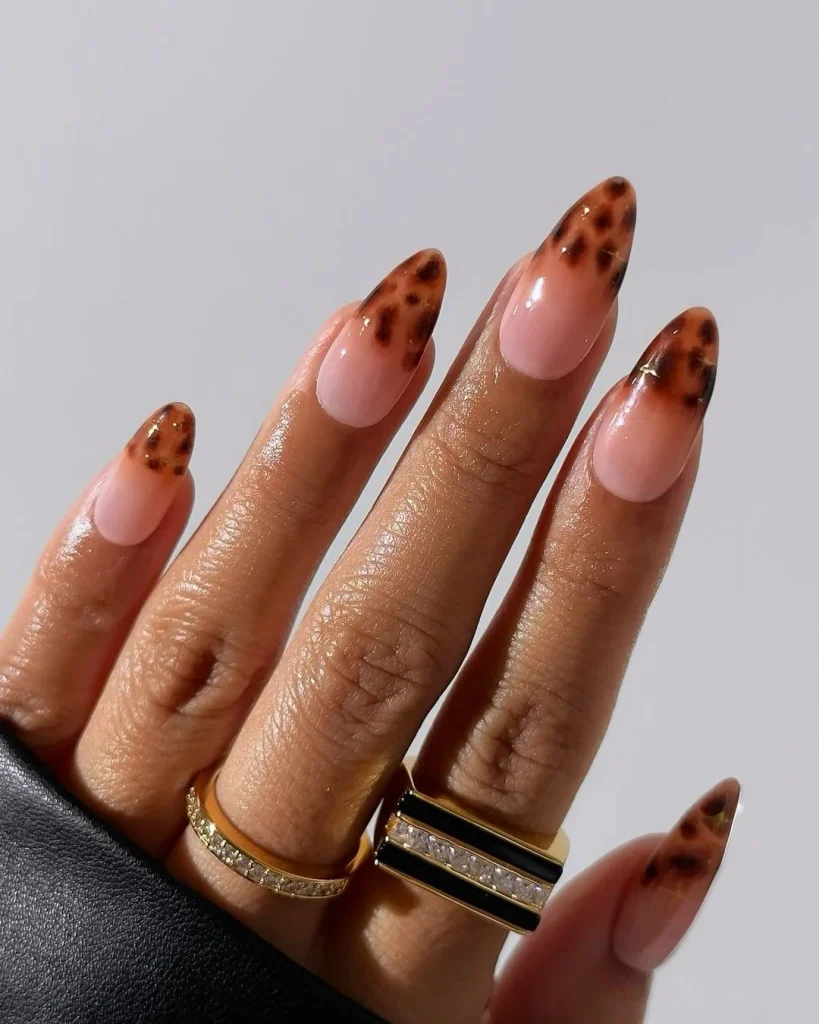
This nude-to-tortoise gradient puts a modern spin on the classic French tip. It’s understated elegance that works everywhere from the office to dinner out.

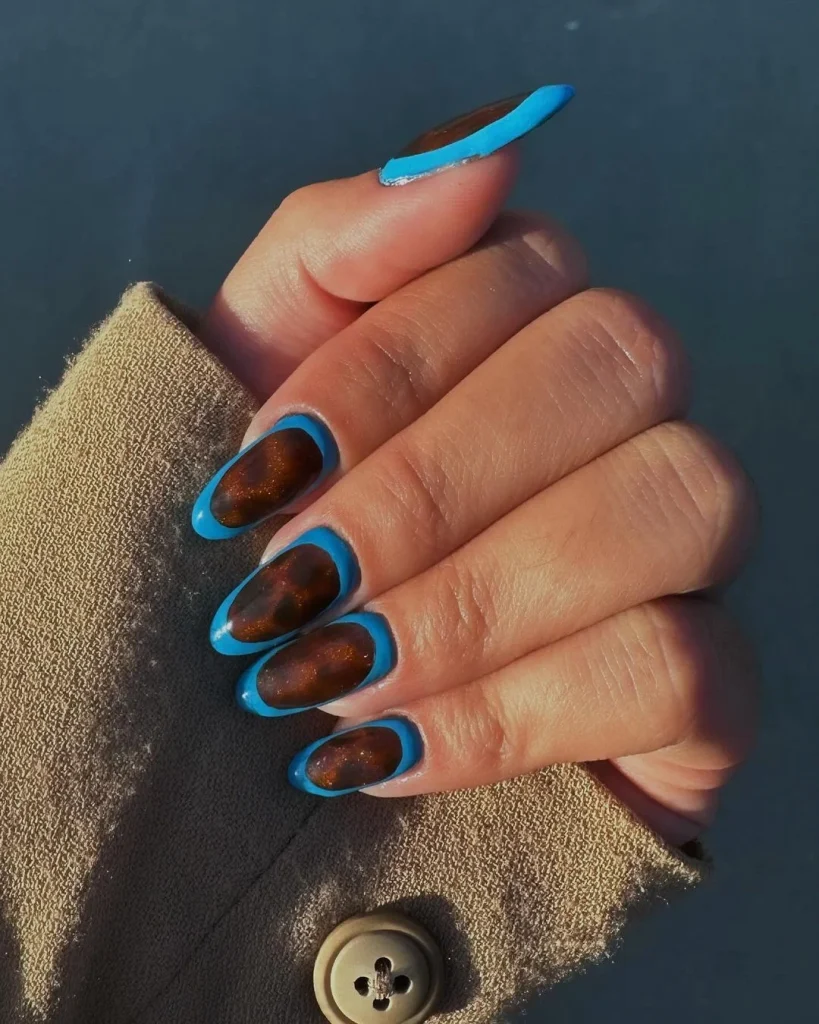
  1. Blue Frame Design

Rich tortoiseshell centres framed by electric blue borders – a fresh take that feels both modern and wearable. The contrast creates an eye-catching effect that works for both day and evening.

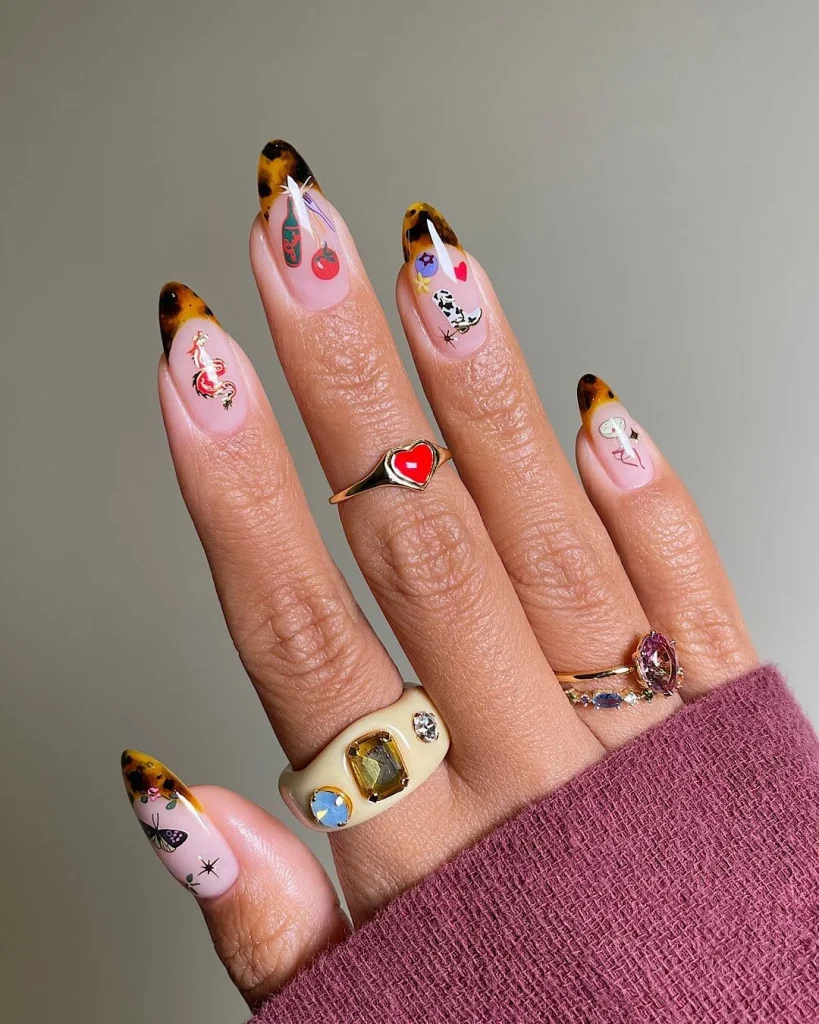
  1. Whimsical Tips

Nude base meets tortoiseshell tips, decorated with playful mini illustrations. It’s a perfect balance of professional and personality-driven style that tells a pretty cool story through nail art.

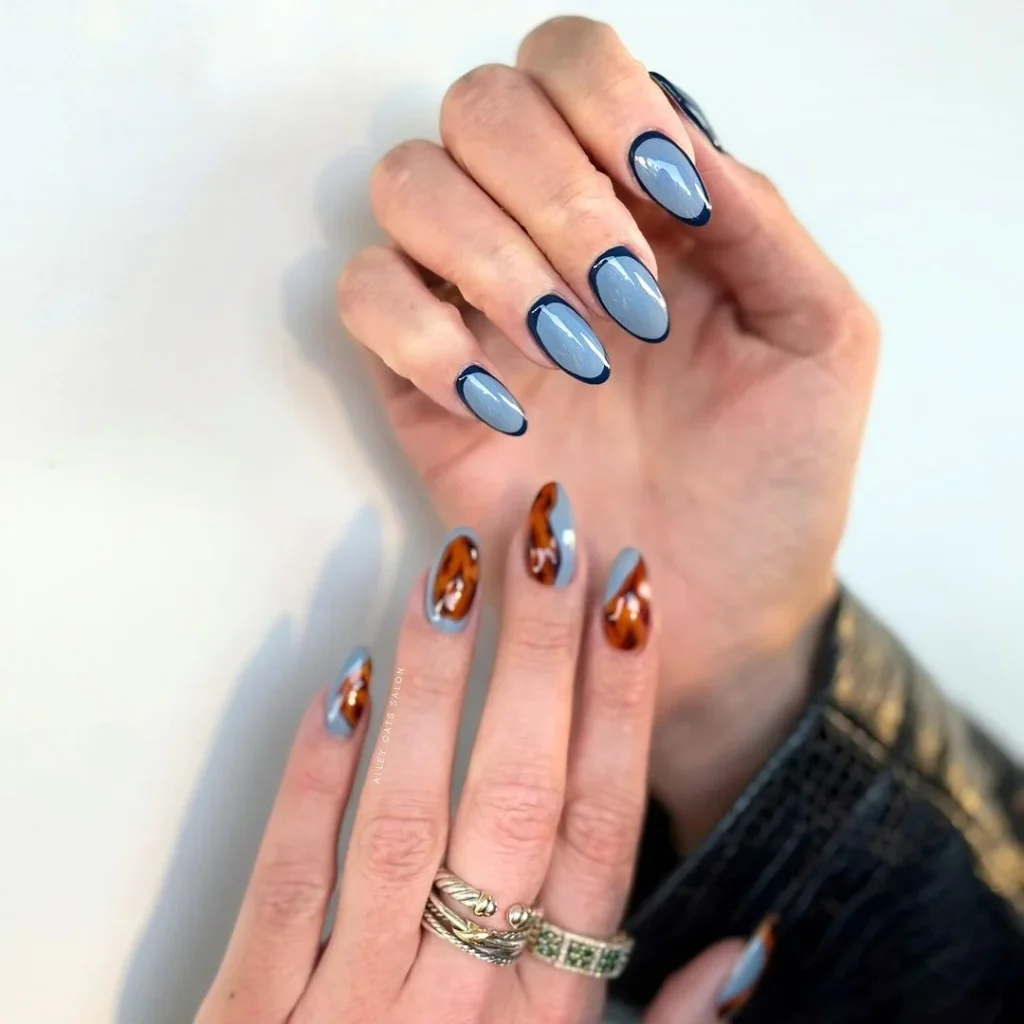
  1. Powder Blue Mix

A creative blend of cool powder blue and warm tortoise accents. The split design offers a unique perspective on the classic pattern while maintaining its sophisticated appeal.

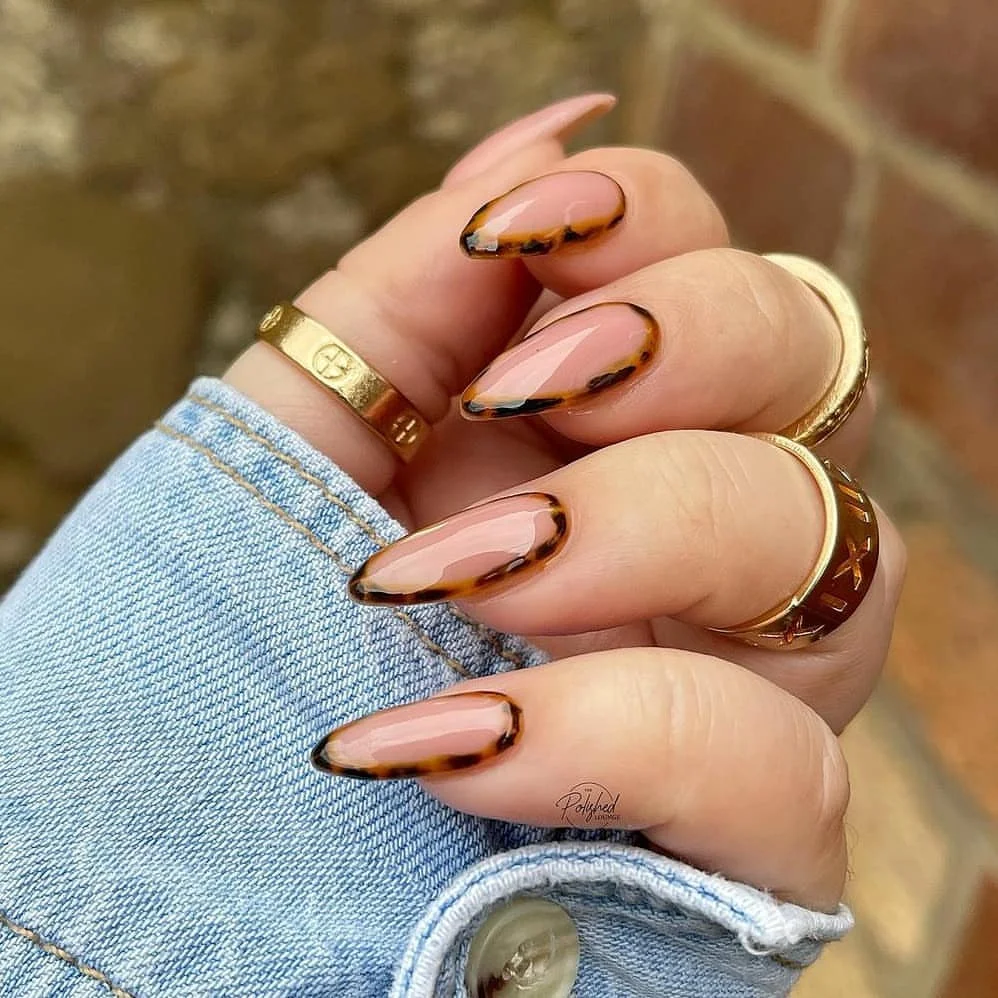
  1. Minimalist French

A modern interpretation of French tips using tortoiseshell detail. The warm amber tones complement the natural nail base, creating an effortlessly chic look.

  1. Classic Tortoise Flower

A delicate blend of nude base and rich mahogany tortoise accents, featuring a subtle floral detail. Perfect for those who love their classics with a gentle twist.

Beauty Nails
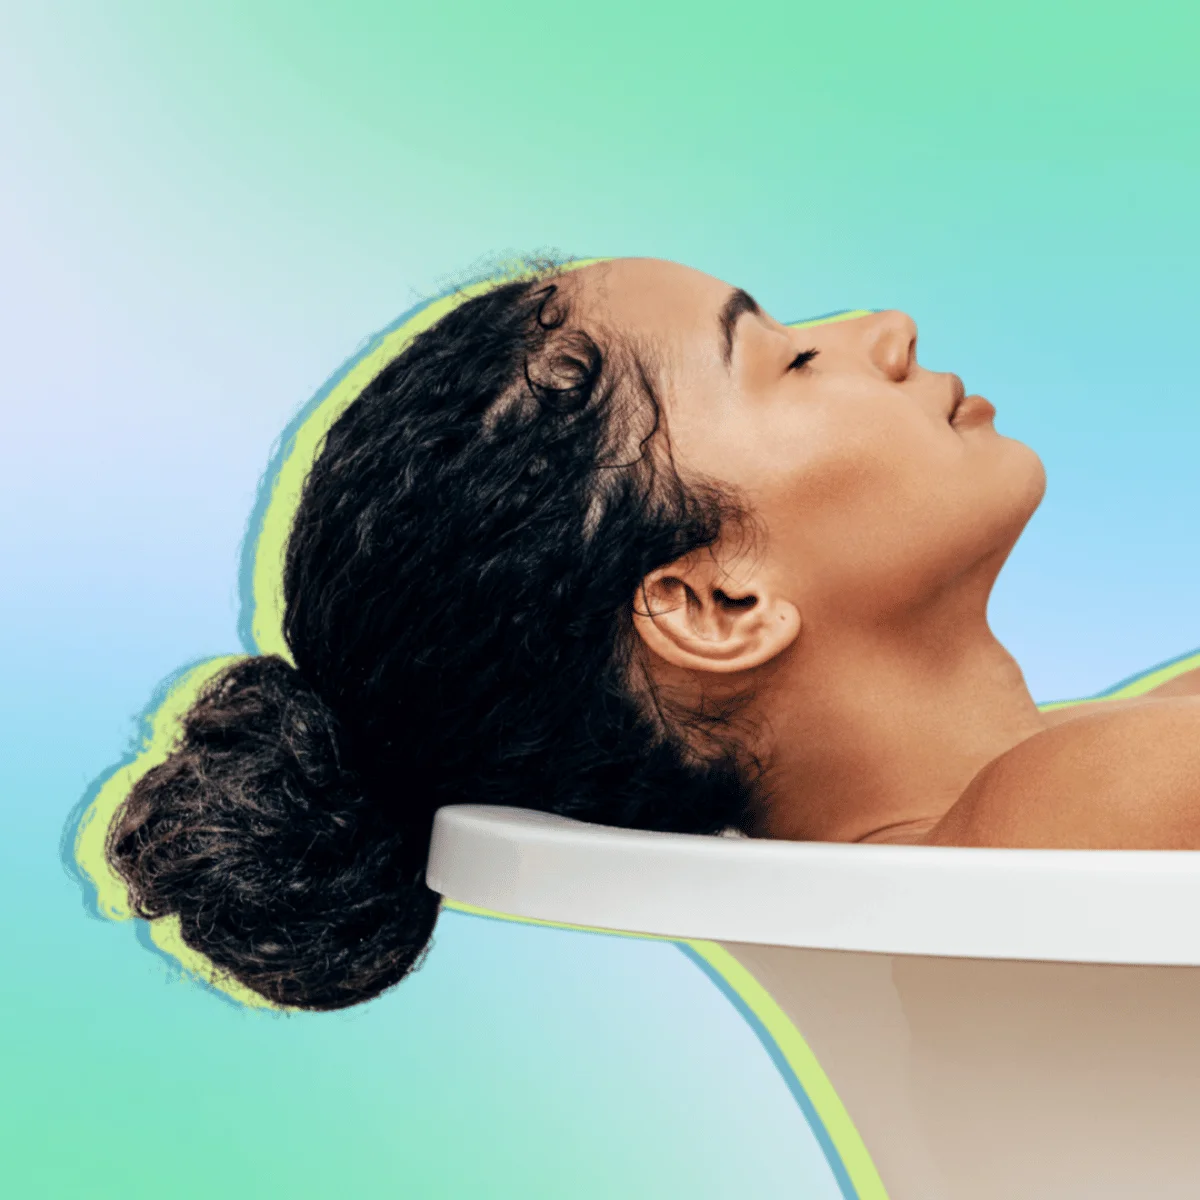
3 Ways To Upgrade Your Bath Routine (Relaxation Guaranteed!)

While many of us rely on quick showers to start our day, there’s something undeniably therapeutic about ending it with a well-prepared bath.

Beyond mere relaxation, finding ways to upgrade your bath routine can offer numerous benefits for both body and mind. Research suggests that a thoughtfully prepared bath can help reduce muscle tension, improve sleep quality, and even lower cortisol levels – our body’s primary stress hormone.

The practice of therapeutic bathing isn’t new. From the ancient Roman baths to traditional Japanese onsen, cultures worldwide have long recognised the healing properties of a good soak.

Today, we can recreate these beneficial experiences in our own homes, transforming a standard bathroom into a personal wellness retreat.

The best is…you don’t need expensive spa products or complicated setups!

With just a few simple additions – many of which you probably already have in your kitchen or bathroom cabinet – you can easily upgrade your bath routine from basic cleansing to a rejuvenating self-care ritual.

  1. Essential Oils: A Guide to Aromatherapy
    Essential oils can transform a regular bath into a therapeutic experience. Here are some particularly effective options:

Recommended Oils and Their Benefits:

Lavender Oil:

  • Promotes relaxation
  • Helps balance mood
  • Creates a calming atmosphere

Peppermint Oil:

  • Improves circulation
  • Soothes irritated skin
  • Helps combat fatigue

Chamomile Oil:

  • Relieves muscle tension
  • Helps reduce anxiety
  • Supports better sleep

Important Note: Essential oils don’t mix directly with water, so you’ll need to combine them with a carrier oil first. This step is crucial for both safety and effectiveness.

Recommended Carrier Oils:

  • Jojoba oil
  • Sweet almond oil
  • Black seed oil
  • Argan oil
  • Rosehip oil
  • Olive oil

Combine 2-3 drops of essential oil with a tablespoon of carrier oil before adding to your bath water.

  1. The Benefits of Milk Baths

Milk baths have been used for centuries to soften and nourish skin. The lactic acid in milk acts as a gentle exfoliant while proteins help moisturise.

Best Milk Options:

  • Full-fat cow’s milk
  • Coconut milk
  • Buttermilk

To enhance your milk bath, consider adding:

  • A small amount of honey
  • Essential oils (properly diluted)
  • Bath salts
  1. Colloidal Oatmeal: A Natural Skin Soother

Colloidal oatmeal is finely ground oatmeal specifically prepared for skin care. It’s particularly effective for sensitive or irritated skin.

How to Prepare an Oatmeal Bath:

  1. Fill your tub with lukewarm water
  2. Add 1 cup of colloidal oatmeal while the water runs
  3. Mix well to ensure even distribution
  4. Soak for 15-20 minutes
  5. Pat skin dry gently

Tip: Follow with a moisturiser to lock in the benefits. An oatmeal-based moisturizer like Aveeno works particularly well.

Tips for Creating Your Perfect Bath

Remember to keep the water temperature comfortable rather than hot, and take time to ensure any additions are properly mixed in.

These simple modifications can make your bath time both more enjoyable and beneficial for your skin.

Consider these elements as building blocks – you can use them individually or combine them based on your needs.

Whether you’re looking to relax, soothe tired muscles, or care for your skin, these additions can help enhance your bath routine.

Beauty makeup-skincare
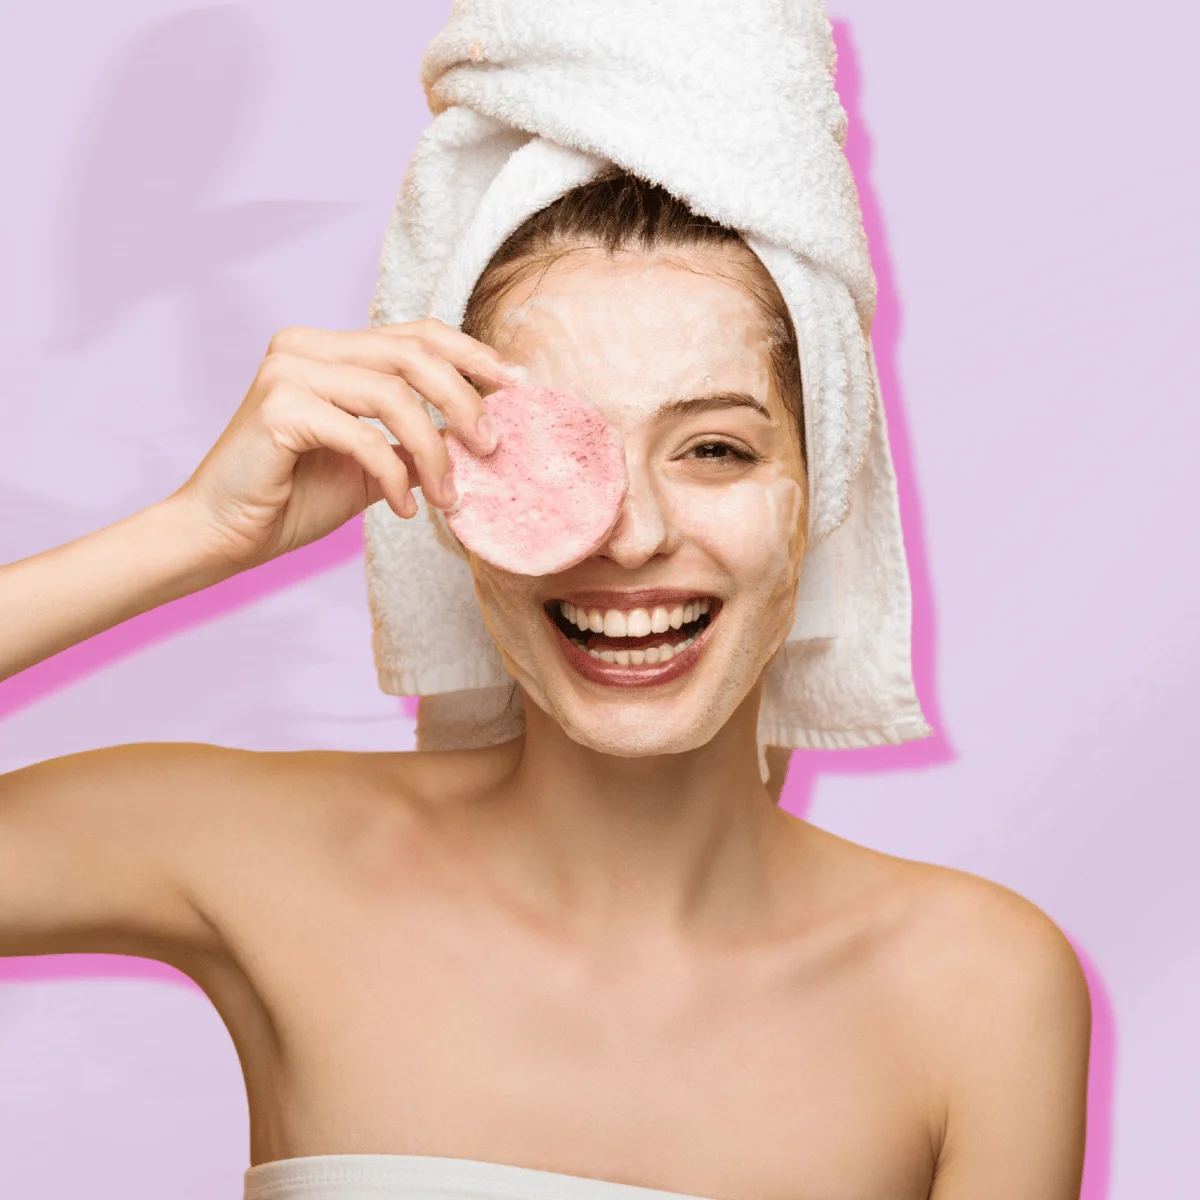
7 Ways To Pamper Yourself With These Easy DIY Home Spa Treatments

Feeling a bit stressed, it’s cold and windy outside, or you just need to relax?

These DIY home spa treatments are a great way to relieve some of that tension and give yourself some well-deserved pampering at home.

From peppermint foot soaks to coconut oil face masks, these treatments are super easy and will leave you feeling refreshed and rejuvenated.

If you want to set the ambience for your DIY home spa treatment fill your room with scented candles, then throw on some relaxing music. This can help enhance relaxation and improve moods.

I recommend using lavender-scented candles because studies have shown that lavender has calming effects on people and helps reduce anxiety levels when used in aromatherapy treatments, and it’s just a heavenly smell! My fav is Feuille de Lavande Lavender Leaf candle from Diptyque Paris.

Read on to explore some of the easiest DIY home spa treatments to try out right now!

  1. Take a Bath With Essential Oils

This is a great way to relax after a long day at work or school. A hot bath can be relaxing, but a few drops of your favourite essential oils will take it to the next level. The oils help relax tense muscles and reduce stress.

Here are two essential oil recipes to try:

  • Lavender — Lavender is one of the most popular essential oils for relaxation. It’s also great for easing headaches, soothing sore muscles and even helping with insomnia. To use lavender oil in your bath, simply add 5 drops of the oil into your running bathwater and soak for 20 minutes.
  • Eucalyptus — Eucalyptus is another great essential oil for relaxation because it helps clear sinuses and smells amazing! To use eucalyptus oil in your bath, add 10 drops of the oil into your running bathwater and soak for 20 minutes before washing off with warm water
  1. Give Yourself a Hand Massage

Make this simple massage oil if you’re looking for a simple way to relax, and hydrate if you have dry hands or cuticles. It can also help to slow down signs of ageing on your hands!

INGREDIENTS:

  • 1/2 cup almond oil
  • 1/2 cup coconut oil
  • 5 drops of lavender essential oil
  • 1 tbsp of sugar

WHAT TO DO:

  1. Pour the almond oil and coconut oil into a small bowl (about 1/2 cup each) and add 2-3 drops of lavender essential oil (or whatever scent you like) and 1 tbsp of sugar.
  2. Mix everything together with a fork until the texture is creamy and smooth. You can add more or less oil depending on your preference. If it’s too oily for your liking, just add more sugar and mix again until it gets to the right consistency for you!
  3. Apply the mixture onto your hands and massage them gently from top to bottom and vice versa for 2-3 minutes on each hand (or until they feel soft). Apply a super hydrating moisturiser afterwards like Eucerin Dry Skin Intensive Hand Cream.
  1. Rejuvenate Your Feet with Peppermint Oil (or another favourite scent)

Did you know that peppermint oil is a natural remedy for tired, aching feet? It’s also great at helping you relax, so it’s the perfect addition to any DIY spa kit. Not only is it great for improving circulation, but it helps to improve aches and pains in other areas of the body too.

WHAT TO DO:

  1. Pour peppermint oil into a small bowl. The amount depends on how many drops you want in your foot soak. You can find peppermint oil at most health food stores or online.
  2. Fill a large mixing bowl with warm water and add the peppermint oil to it. This will create your foot bath.
  3. Soak your feet for about 15 minutes in the bowl of water and then pat dry with a towel.
  4. Apply moisturiser to your feet afterwards, try Elemis Treat Your Feet Foot Cream.
  1. Make A Sugar Lip Scrub
    This lip scrub is perfect for anyone who loves soft, kissable lips. It easily removes dead skin cells to reveal pinker, plumper and silky-smooth lips. You can use it before applying your favourite lip gloss, balm or lipstick to get rid of any dryness or chapped areas on your lips.

INGREDIENTS:

  • 1 tbsp coconut oil (or olive oil)
  • 1 tbsp brown sugar (or granulated sugar)
  • 1 tsp honey

WHAT TO DO:

  1. Combine 1 tablespoon of coconut oil or olive oil and 1 tablespoon of sugar in a small bowl. Dampen your lips with warm water to soften up the dead skin cells.
  2. Apply the mixture to your lips, massaging in small and gentle circular motions.
  3. With lukewarm water, wipe the scrub off with a clean cloth.
  4. Apply a lip gloss, lipstick or even better – a buttery lip balm packed with vitamins such as Drunk Elephant Lippe Balm or a lip mask like the Laneige Lip Sleeping Mask.

You can always exfoliate your lips twice weekly to keep them hydrated and smooth. But sure to never over-exfoliate as this can dry out your lips.

  1. Have An Aromatherapy Steam Facial
    Aromatherapy steam facials, or facial saunas, are a great way to hydrate, exfoliate and deep cleanse your skin leaving it feeling fresh and rejuvenated.

INGREDIENTS:

  • 1 cup distilled water
  • 1 tablespoon ground oatmeal (or 1/2 teaspoon oatmeal powder)
  • 3 drops of essential oils of your choice (lavender, chamomile, rosemary, eucalyptus or tea tree oil)
  • 1 small towel

WHAT TO DO:

  1. Fill a large bowl with hot water and add a few drops of lavender essential oil or tea tree essential oil.
  2. Place your head over the bowl so that your face is above the steam. Keep your eyes closed while you are doing this treatment.
  3. Move your head around slowly for about 5 minutes so that the steam covers every part of your face.
  4. Remove excess water from your face using a towel and pat dry gently with another towel.
  1. Make A Coconut & Honey Face Mask
    This simple two-ingredient recipe will leave your skin feeling hydrated and moisturised.

INGREDIENTS

  • 1 tbsp coconut oil
  • 1 tbsp raw honey

WHAT TO DO:

  1. Add the shea butter and coconut oil to a double boiler and melt until it liquefies.
  2. Remove from the flame and add the raw honey
  3. Mix well and apply to your entire neck
  4. Keep it on for 15-20 minutes, and then
  5. Wash it off with lukewarm water and a soft cloth, then pat dry
  6. Store leftovers in a lidded glass jar
  1. Whip Up A Body Butter
    A body butter is a rich and creamy moisturiser that deeply nourishes the skin. It is made with natural ingredients like shea butter, cocoa butter, avocado oil, and coconut oil, which help to lock in moisture and leave the skin feeling soft, supple, and smooth.

Body butters also help to soothe dry and irritated skin and improve the skin’s elasticity.

Here’s an easy recipe for you to try.

INGREDIENTS & EQUIPMENT:

  • Organic, extra virgin olive oil – 500g
  • Organic, unrefined shea butter – 500g
  • 300ml Sweet almond oil
  • Essential oil – Use your favourite one!
  • High-quality stand mixer or electric whisk
  • Rubber spatula
  • Mason jar

WHAT TO DO:

  1. Combine your shea butter and coconut oil in a bowl and gently melt them together. Place a metal bowl over boiling water if you’re using one. The microwave can also be used if you have a plastic bowl.
  2. Once the butter and oil are infused and melted together, add your sweet almond oil and 20 drops of your essential oil of choice.
  3. Allow to cool a little, and place in your fridge until it’s solid (about two hours).
  4. Once solid, your mixture is now ready for whipping! Use an electric whisk or stand mixer and whip it up until it has a whipped cream consistency.
  5. Then, place the body butter in a glass jar and keep it cool and dry.
Beauty makeup-skincare
If You Have One Of These 8 Signs, You Might Be Drinking Too Much Water!

We’ve all heard about the importance of staying hydrated, but did you know there’s such a thing as drinking too much water? It might sound counterintuitive, but overhydration is a real thing, and it’s worth paying attention to!

In this post, we’re exploring the less-talked-about side of hydration: the signs of too much water consumption. While it’s rare to overhydrate, it can happen, especially if you’re really dedicated to meeting those daily water goals.

We’re about to explore 8 unexpected signals that might indicate you’re taking in more water than your body needs. From subtle changes in your bathroom habits to how you’re feeling throughout the day, these signs are your body’s way of saying, “Hey, maybe ease up on the H2O a bit.”

Let’s explore these hydration insights together. It’s time to find that sweet spot between perfectly hydrated and, well, water-logged!

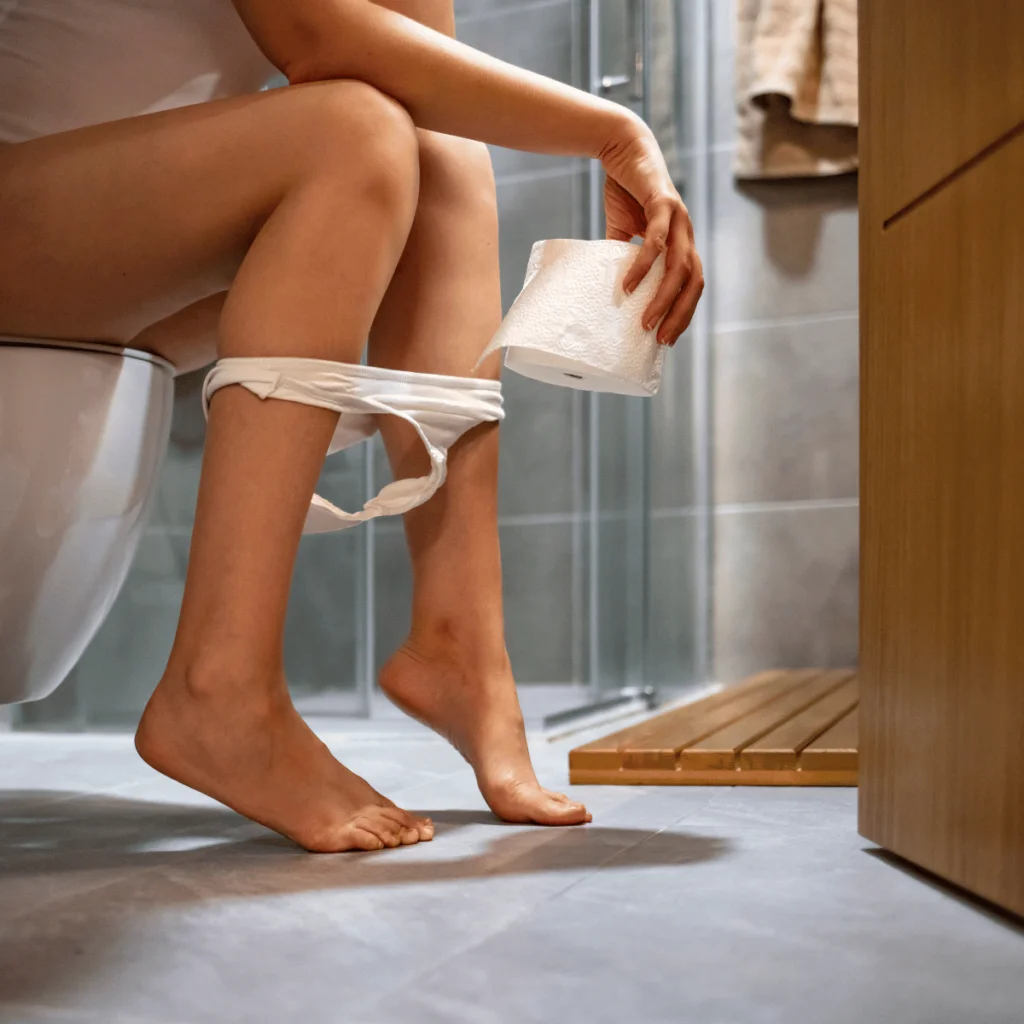
  1. Constant Urination

Frequent urination, known as polyuria, can be a sign of excessive water intake.

While it’s normal to urinate several times a day, excessive urination without a corresponding increase in fluid intake may indicate overhydration.

According to Healthline, “urine volume is considered excessive if it equals more than 2.5 liters per day.”

They also note that excessive urine output could “signal health problems” such as bladder infection, urinary continence, diabetes, kidney failure, sickle cell anaemia, and certain kinds of cancer.

Symptoms may include:

  • Fever
  • Back pain
  • Leg weakness
  • Sudden onset of polyuria, particularly in young children
  • Mental disorders
  • Night sweats
  • Weight loss

Seek medical attention if you notice any of these symptoms.

  1. Clear Urine

While clear urine is often considered a sign of adequate hydration, urine that is too clear may indicate overhydration.

“It’s completely normal for the colour of your urine to vary a little day by day,” says Dr. Peter Bajic at Cleveland Clinic, “but it should stay within a certain range of yellow.”

Clear urine means that the kidneys are excreting water in excess of what the body needs, potentially flushing out essential electrolytes like sodium and potassium.

  1. Bloating

Contrary to popular belief, drinking too much water can lead to bloating.

Excess water intake can dilute the electrolyte concentration in the body and cause cells to swell up, leading to bloating and discomfort.

According to a 2013 study, the kidneys have a limit on how much water they can eliminate per day. It ranges between “20–28 liters of water a day, but they can remove no more than 0.8 to 1.0 liters every hour.”

Reducing water intake allows the kidneys to catch up.

  1. Headaches

Similar to insufficient water intake, excessive water consumption can also lead to headaches.

“Drinking too much water can result in a condition called hyponatremia, which is a dangerous drop in blood sodium levels,” says Kristin Koskinen, RDN, a registered dietitian nutritionist who runs her own blog.

Low sodium levels can pose several dangers to your health. According to Mayo Clinic, “symptoms of hyponatremia can include nausea and vomiting, loss of energy and confusion. Serious hyponatremia can cause seizures, coma and even death.”

  1. Nausea and Vomiting

Consuming too much water can overwhelm the kidneys’ ability to excrete it, leading to nausea and vomiting.

In such cases, seeking medical attention promptly is crucial, as severe cases of water intoxication can be life-threatening.

Medical professionals may administer intravenous fluids with electrolytes to restore balance or take other measures depending on the severity of the condition.

  1. Fatigue

While proper hydration is essential for energy levels, overhydration can have the opposite effect, leading to fatigue and lethargy.

Hyponatremia-induced fatigue is a common symptom of overhydration.

According to WebMD, it does this by creating “a hormone reaction that makes you feel stressed and tired. If you can’t get out of bed after drinking too much water, it’s because your kidneys are overworking.”

  1. Muscle Cramps

Muscle function depends on the proper balance of electrolytes, including sodium, potassium, calcium, and magnesium.

Hyponatremia can disrupt the ability of muscles to contract and relax effectively, leading to muscle cramps.

This electrolyte imbalance interferes with the transmission of nerve signals to the muscles, causing them to contract involuntarily and resulting in cramping.

Therefore, while proper hydration is important for muscle function and overall health, it’s essential to maintain a balance and not overhydrate, as excessive water intake can disrupt electrolyte levels and potentially lead to muscle cramps and other adverse effects.

  1. Changes in Mood or Mental State

Excessive water intake can disrupt the electrolyte balance in the brain, leading to changes in mood or mental state.

A case study by Annals of Indian Psychiatry, reports two cases where hyponatremia was misdiagnosed as depression.

In both cases, each patient presented the following symptoms:

  • Sadness of mood
  • Lack of interest in previous pleasurable activities
  • Inability to do work
  • Decreased sleep
Lifestyle Nutrition-wellness-fitness