How To Easily Get Pink Lips Naturally

Do you wish to have smooth and pink lips? You don’t have to look any further!

In this post, you’ll discover natural and effective tips to achieve pink lips without chemicals or expensive treatments to enhance their appearance and boost your confidence.

Whether due to genetics, lifestyle habits, or exposure to the sun, lips can lose their natural rosy hue.

But don’t worry, there are simple and affordable remedies that can help restore their beauty.

Common Causes Of Dark Or Discoloured Lips

Dark or discoloured lips can be caused by various factors, such as excessive smoking, dehydration, sun exposure, hormonal imbalances, or even certain medications.

It’s important to identify the underlying cause to effectively treat and prevent further discolouration.

Here are some common causes of dark or discoloured lips:

  • Smoking: Smoking not only affects your overall health but also leaves a negative impact on your lips. The nicotine and chemicals in cigarettes can darken the lips and cause them to appear dull and lifeless.
  • Dehydration: Lack of hydration can lead to dry and dark lips. It’s essential to drink an adequate amount of water throughout the day to keep your lips and body hydrated.
  • Sun Exposure: Prolonged exposure to the sun’s harmful UV rays can cause your lips to darken. Just like your skin, your lips need protection from the sun. Make sure to apply a lip balm with SPF before stepping out in the sun.

5 Tips For Protecting Your Lips From Damage

There are a few lifestyle changes you can make to protect your lips from damage to maintain their natural pink colour.

Here are some tips to protect your lips:

  1. Avoid Licking Your Lips: Licking your lips may provide temporary relief, but it actually dries out your lips, making them more prone to damage and discolouration.
  2. Stay Hydrated: Drink plenty of water throughout the day to keep your body and lips hydrated. Dehydration can make your lips appear dry and dark.
  3. Apply Vitamin E Oil: The antioxidants and humectant properties present in Vitamin E oil help shield your lips from damaging free radicals and environmental pollutants preventing further dehydration.
  4. Quit Smoking: As mentioned earlier, smoking can darken your lips. Quitting smoking not only improves your overall health but also prevents further discolouration.
  5. Use A Lip Balm: Apply a nourishing lip balm throughout the day to keep your lips moisturised and protected. Look for lip balms that contain natural ingredients like shea butter, coconut oil, or beeswax.
  6. Apply Sunscreen: Apply a lip balm that’s at least SPF15 before going out in the sun. This helps protect your lips from the sun’s harmful UV rays, preventing further darkening.
  7. Moisturise Before Lipstick: When your lips are dry and dehydrated, lipstick can cling to any dry patches or flakiness, resulting in an uneven and unattractive finish. Additionally, dry lips can make lipstick look dull and lacklustre. By moisturising beforehand, you can ensure that your lips are soft, supple, and ready to showcase your chosen lip colour.

Natural Remedies For Getting Pink Lips

Now that we know the common causes of dark or discoloured lips and have some tips to protect your lips from damage, let’s explore some natural remedies!

These remedies are safe, affordable, and can be easily incorporated into your daily skincare routine.

DIY Lip Scrubs For Exfoliation

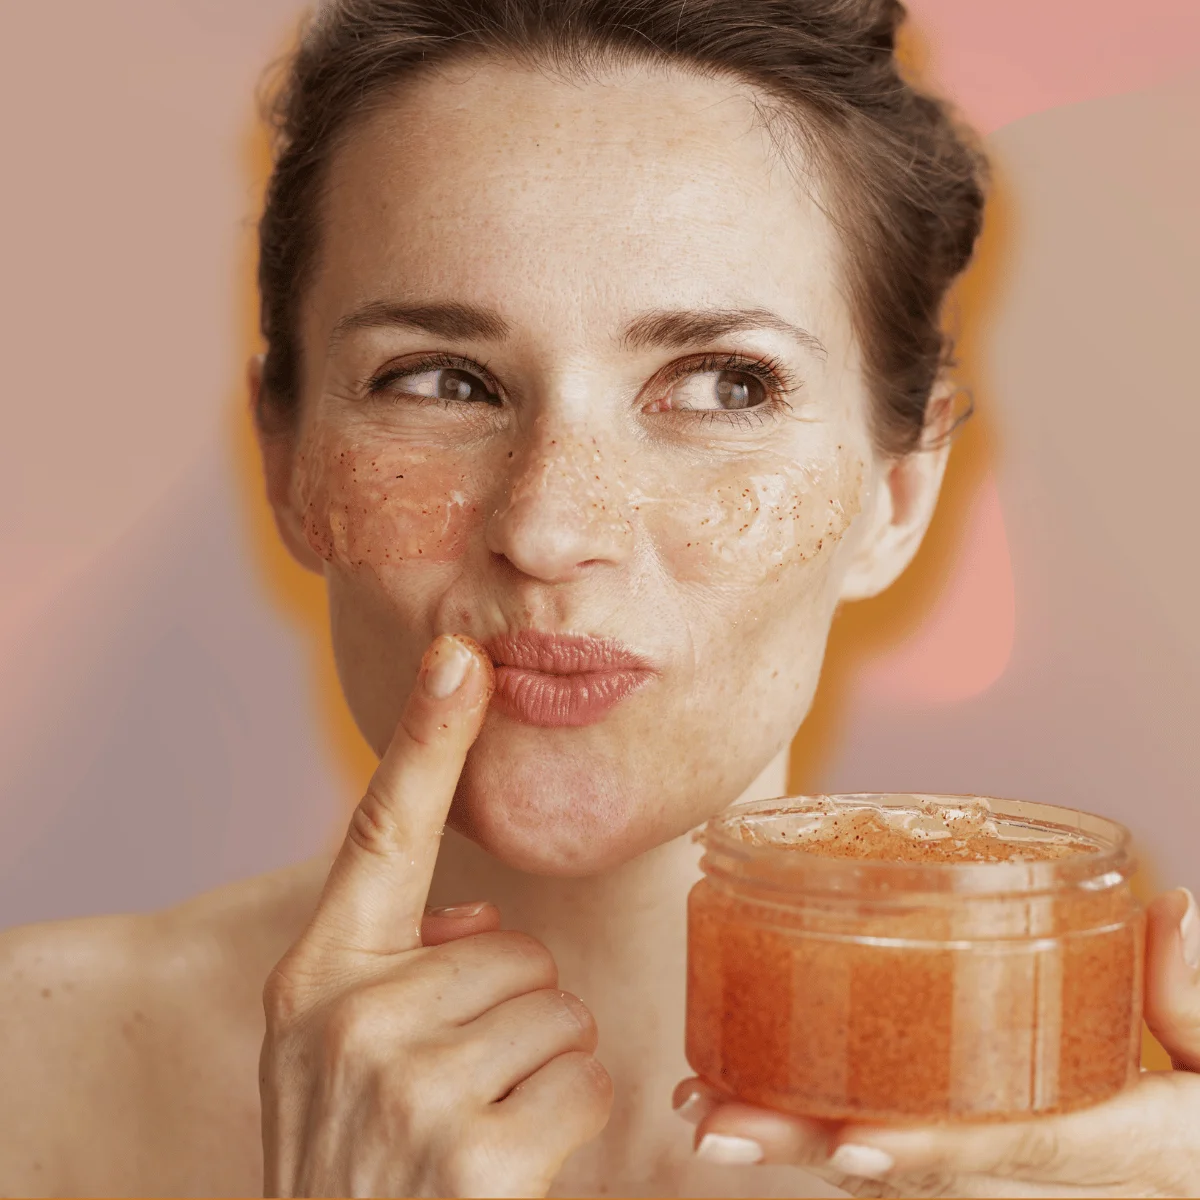
Exfoliating your lips regularly helps remove dead skin cells and promotes the growth of new, healthy skin. This process enhances blood circulation, making your lips look plumper and rosier.

Here are a few simple DIY lip scrubs you can try:

  1. Sugar and Honey Scrub: Mix equal parts of sugar and honey to create a gentle lip scrub. Apply it to your lips and gently massage in circular motions for a few minutes. Rinse off with warm water and pat dry. This scrub will leave your lips soft, smooth, and naturally pink.
  2. Coffee Grounds and Olive Oil Scrub: Mix coffee grounds with a teaspoon of olive oil to create an exfoliating scrub. Gently massage the mixture onto your lips for a minute or two. Rinse off with lukewarm water and apply a lip balm to moisturise. The coffee grounds help remove dead skin cells, while the olive oil nourishes and hydrates your lips.

Homemade Lip Masks For Hydration & Nourishment

Apart from exfoliation, it’s equally important to provide your lips with deep hydration and nourishment.

Here are a few homemade lip masks that can help restore the natural pink colour of your lips:

  1. Beetroot and Rose Petal Mask: Grind a small piece of beetroot with a few rose petals to create a paste. Apply this mixture to your lips and leave it on for about 15 minutes. Rinse off with cold water and apply a lip balm. Beetroot is rich in antioxidants and helps lighten the lips, while rose petals provide hydration and a natural pink tint.
  2. Milk and Turmeric Mask: Mix a tablespoon of milk with a pinch of turmeric powder to form a paste. Apply the mixture to your lips and leave it on for 10-15 minutes. Rinse off with lukewarm water and apply a lip balm. Turmeric has anti-inflammatory properties, and milk helps moisturise and lighten the lips.

Essential Oils For Lip Lightening & Healing

Essential oils are known for their healing and skin-lightening properties. They can help lighten dark lips and restore their natural pink colour.

Here are a few essential oils that are beneficial for achieving pink lips:

  1. Lemon Essential Oil: Mix a few drops of lemon essential oil with a carrier oil like coconut oil or almond oil. Apply this mixture to your lips before going to bed and leave it on overnight. Lemon essential oil acts as a natural bleaching agent and helps lighten dark lips.
  2. Rose Essential Oil: Dilute a few drops of rose essential oil with a carrier oil and apply it to your lips. Rose essential oil not only provides hydration but also helps to maintain the natural pink colour of your lips.

Lip Care Products For Achieving Pink Lips

If you prefer ready-made products, there are several lip care products you can try instead:

  1. Lip Balms: Choose lip balms that are specifically formulated to nourish and lighten the lips. Look for ingredients like pomegranate, strawberry, or raspberry extracts like the Lipabalm Bioactive Lip Balm from Facetheory which is made with shea butter and raspberry seed oil, providing intense hydration and a natural pink tint.
  2. Lip Serums: Lip serums are concentrated formulas that penetrate deep into the lips more than lip balms, providing intense hydration and promoting natural lip colour. Look for serums that contain natural oils like jojoba oil, castor oil, or avocado oil like the Extra Plump Lip Serum from Bobby Brown which has all three!
  3. Lip Masks: Lip masks like StriVectin Hyaluronic Omega Moisture Lip Mask typically include hyaluronic acid, which is an effective humectant that pulls in and retains moisture. This ingredient acts as a sponge, absorbing moisture from the environment and making your lips fuller.
Beauty makeup-skincare
The Best Pearl-Inspired Accessories For The Home

When it comes to home decor, elegance and sophistication are key factors in creating a space that exudes luxury and refinement.

One way to achieve this is by incorporating pearl-inspired accessories into your home.

Pearls have long been associated with timeless beauty and have a unique ability to elevate any space with their delicate allure.

Pearl-inspired home decor allows you to bring the elegance of these precious gems into your living space.

The subtle shimmer of pearls reflects light in a way that creates a soft and inviting atmosphere, making your home feel warm and welcoming.

The Versatility of Pearl-Inspired Accessories

Pearl-inspired accessories can be incorporated into any room of your home, from the living room to the bedroom, and even the bathroom.

They effortlessly blend beauty with functionality, adding a touch of luxury to everyday items.

Imagine waking up to a pearl-adorned vanity mirror or stepping out of the shower onto a soft, pearl-inspired bath mat.

These small details can make a big impact and elevate your daily routine.

5 Pearl-Inspired Accessories For The Home

  1. Annadel Round Wall Mirror
  1. Embellished Pearl Arch Photo Frame
  1. Lepelclub Pearl Spoons

4.Hudson Valley Royalton 8-light Polished Nickel Pendant

  1. White Pearl Stoneware Pasta Bowl
Home-decor Lifestyle
3 DIY Face Masks To Deeply Moisturise The Skin

Dry skin can be a real challenge to manage, but with the right care, you can restore its natural radiance and hydration.

One of the best ways to nourish and pamper your skin is using DIY face masks specifically designed for dry skin.

These three masks are both affordable and free of harsh chemicals, making them a safe and natural choice for your skincare regimen.

Benefits Of Using DIY Hydrating Masks

The magic of DIY face masks lies in their ability to transform dry, tired skin into a radiant complexion – all with ingredients from your kitchen. These natural remedies work on multiple levels to restore your skin’s vitality.

Think of these masks as an intensive moisture treatment. When you smooth on ingredients like honey, ripe avocado, or pure aloe vera, you’re creating a natural moisture barrier that deeply hydrates parched skin.

The result?

Skin that feels plump, soft, and naturally dewy.

But hydration is just the beginning. If your dry skin feels tight or looks red, nature’s anti-inflammatory heroes come to the rescue. A gentle blend of colloidal oatmeal, fresh cucumber, or calming chamomile can soothe irritation and reduce redness, bringing comfort to sensitive skin.

Perhaps most impressive is how these masks help preserve your skin’s youthful bounce. Dry skin can emphasize fine lines, but regular use of nutrient-rich masks helps boost collagen production and improve elasticity.

By nourishing your skin with these natural ingredients, you’re not just treating dryness – you’re investing in your skin’s long-term health and radiance.

Tips For Applying & Removing Face Masks Effectively

Applying and removing face masks correctly is crucial to maximise their benefits and avoid any potential skin irritation.

Here are some tips to ensure an effective and safe application:

  • Cleanse your face: Before applying a face mask, cleanse your face thoroughly to remove any dirt, oil, or makeup. This allows the mask to penetrate deeply into your skin and work its magic.
  • Use a brush or clean fingers: To apply the mask evenly, use a brush or your clean fingers. Start from the center of your face and work your way outwards, avoiding the delicate eye and lip areas.
  • Relax and unwind: While the mask is on, take some time to relax and unwind. Put on some soothing music, light a scented candle, or read a book to enhance your self-care experience.
  • Follow the recommended time: Each mask has a recommended time for how long it should be left on the skin. Follow the instructions provided and avoid leaving the mask on for longer than recommended, as it can lead to skin irritation.
  • Gently remove the mask: When it’s time to remove the mask, use lukewarm water and a soft washcloth or your hands. Avoid scrubbing vigorously, as it can cause redness and irritation.
  1. Honey & Avocado Mask

This mask is packed with moisturising properties from both avocado and honey. Avocado is rich in healthy fats and vitamins that nourish and hydrate the skin. Honey is a natural humectant, meaning it attracts and retains moisture, keeping your skin moisturised and soft.

Ingredients:

  • 1 ripe banana
  • 2 tablespoons of honey

Instructions:

  1. Mash the avocado in a bowl until it forms a smooth paste.
  2. Add the honey and mix well.
  3. Apply the mask to your face and leave it on for 15-20 minutes.
  4. Rinse off with lukewarm water and pat dry.
  1. Aloe Vera & Cucumber Mask

Aloe Vera has soothing and hydrating properties that can alleviate dryness and irritation. Cucumber is known for its cooling effect and high water content, making it an excellent ingredient for hydrating and refreshing the skin.

Ingredients:

  • 2 tablespoons of fresh aloe vera gel
  • 1/4 cucumber, peeled and grated

Instructions:

  1. Mix the aloe vera gel and grated cucumber in a bowl.
  2. Apply the mixture to your face, focusing on dry areas.
  3. Leave it on for 15-20 minutes.
  4. Rinse off with cool water and gently pat dry.
  1. Oatmeal & Milk

Oatmeal is a gentle exfoliant that helps remove dead skin cells and soothe dryness. Milk contains lactic acid, which helps to hydrate and brighten the skin. This mask is perfect for restoring moisture and promoting a healthy complexion.

Ingredients:

  • 1/4 cup of oatmeal
  • 2 tablespoons of milk

Instructions:

  1. Grind the oatmeal into a fine powder using a blender or coffee grinder.
  2. Mix the oatmeal powder with milk to form a thick paste.
  3. Apply the mask to your face and let it sit for 15-20 minutes.
  4. Rinse off with warm water and pat dry.

Other Tips For Managing Dry Skin

In addition to using DIY face masks, there are other skincare tips you can incorporate into your routine to effectively manage dry skin:

  • Hydrate from within: Drink plenty of water throughout the day to keep your body and skin hydrated. Water helps to flush out toxins and maintain the moisture balance of your skin.
  • Moisturise daily: Use a rich, hydrating moisturiser specifically formulated for dry skin. Apply it twice a day, in the morning and evening, to lock in moisture and protect your skin from external aggressors.
  • Avoid hot showers: Hot water can strip your skin of its natural oils, exacerbating dryness. Opt for lukewarm showers and limit your bathing time to prevent moisture loss.
  • Protect your skin: Shield your skin from harsh weather conditions by wearing a scarf, hat, or gloves. Extreme temperatures and wind can further dehydrate your skin, leading to dryness and irritation.
  • Eat a balanced diet: Incorporate foods rich in omega-3 fatty acids, vitamins, and antioxidants into your diet. These nutrients help nourish your skin from the inside out and promote a healthy complexion.

By following these tips and incorporating DIY face masks into your skincare routine, you can effectively manage dry skin and achieve a healthy, radiant glow.

Remember, self-care is essential, and taking the time to pamper your skin with nourishing face masks is a perfect way to indulge in some much-needed TLC.

So go ahead, treat yourself to these DIY face masks and embrace the benefits of natural ingredients for your dry skin.

Beauty makeup-skincare
6 DIY Skin Lightening Scrubs That Actually Work

Everywhere we look, expensive skin-lightening products promise miracle results. But here’s the truth: many of these products not only fail to deliver but are often packed with harsh chemicals that have no business being anywhere near our precious skin

Luckily, you may not have to go far to achieve a lighter and brighter complexion. DIY skin lightening scrubs and natural treatments can be crafted using simple ingredients found right in your kitchen pantry.

Homemade scrubs and masks made from natural ingredients can be just as effective, if not more so, than store-bought products.

They also offer various skin benefits at a more affordable price. By making your own products, you have complete control over the ingredients used, allowing you to tailor the recipe to your exact needs. You can experiment with different combinations of ingredients to find what works best for you.

These natural remedies not only offer a lighter complexion, but also help reduce acne, exfoliate dead skin cells, and promote a healthy glow.

For example, ingredients like lemon, turmeric, papaya, and tomato are known for their skin-lightening properties, as well as their antibacterial, anti-inflammatory, and antioxidant properties that improve overall skin health.

Here are some recipes to try out.

  1. Lemon & Sugar Scrub

If you’re looking for a simple and effective homemade scrub to lighten your skin tone and brighten your complexion, look no further than the lemon and sugar scrub.

Lemon is a natural bleaching agent that can help fade dark spots and even out skin tone, while sugar acts as a gentle exfoliant to remove dead skin cells and reveal a fresher layer of skin.

Ingredients:

  • 1 tablespoon of freshly squeezed lemon juice
  • 1 tablespoon of granulated sugar

Directions:

Start by mixing the lemon juice and sugar in a small bowl until they form a paste-like consistency. Gently massage the scrub onto your face in circular motions, focusing on areas with dark spots or uneven skin tone. Leave the scrub on for about 5 minutes to allow the lemon juice to work its magic, then rinse off with lukewarm water.

Remember to always do a patch test on a small area of your skin before using any new homemade scrub or mask to ensure that you do not have any adverse reactions. It’s also important to note that lemon juice can make your skin more sensitive to sunlight, so be sure to apply sunscreen if you plan on going outside after using this scrub.

  1. Turmeric & Yoghurt Mask

Turmeric has been used for centuries in Ayurvedic medicine for its numerous health benefits, including its ability to lighten the skin tone.

When combined with yoghurt, which is rich in lactic acid and probiotics, turmeric can help even out skin tone, reduce pigmentation, and give you a brighter complexion.

Ingredients:

  • 1 teaspoon of turmeric powder
  • 2 tablespoons of plain yoghurt

Directions:

In a small bowl, mix the turmeric powder and yoghurt until they form a smooth paste. Apply the mask evenly to your face, avoiding the eye area, and leave it on for 15-20 minutes. As the mask dries, you may feel a slight tightening sensation, which is normal. Rinse off the mask with lukewarm water, gently massaging your skin in circular motions to exfoliate any dead skin cells.

It’s important to note that turmeric can leave a yellow stain on the skin, so be careful not to use too much or leave the mask on for too long. If you do notice any yellow staining, simply wash your face with a mild cleanser to remove it.

  1. Papaya & Honey Scrub

Dark spots caused by sun damage, acne scars, or hyperpigmentation can be a source of frustration for many people. However, with the help of a homemade papaya and honey scrub, you can effectively reduce the appearance of these dark spots and achieve a more even skin tone.

Papaya contains natural enzymes that exfoliate the skin and promote cell turnover, while honey has moisturising and antibacterial properties.

Ingredients:

  • 1/2 cup of ripe papaya, mashed
  • 1 tablespoon of honey

Directions:

In a bowl, mix the mashed papaya and honey until they are well combined. Apply the scrub to your face, gently massaging it in circular motions for about 2-3 minutes. Allow the scrub to sit on your skin for an additional 10 minutes to let the enzymes work their magic. Rinse off the scrub with lukewarm water and pat your skin dry.

For best results, use this scrub twice a week. Over time, you should start to notice a reduction in the appearance of dark spots and a more even skin tone. However, it’s important to be patient, as it may take several weeks or even months to see significant results.

  1. Tomato & Cucumber Mask

If you’re looking for a refreshing and rejuvenating mask that can also lighten your skin tone, try the homemade tomato and cucumber mask.

Tomatoes are rich in antioxidants and vitamin C, which can help brighten the skin and reduce the appearance of dark spots. Cucumber, on the other hand, has a cooling and soothing effect on the skin, making it perfect for calming any redness or irritation.

Ingredients:

  • 1 small tomato, blended or mashed
  • 1/4 cucumber, blended or mashed

Directions:

Combine the blended or mashed tomato and cucumber in a bowl until they form a smooth paste. Apply the mask to your face, avoiding the eye area, and leave it on for 15-20 minutes. During this time, you can relax and let the mask work its magic. After the allotted time, rinse off the mask with lukewarm water and pat your skin dry.

This mask can be used once or twice a week to refresh and lighten your skin tone. With regular use, you should notice a brighter and more radiant complexion.

However, it’s important to keep in mind that homemade remedies may not provide instant results, and consistency is key.

  1. Sugar & Olive Oil Scrub

The granulated sugar exfoliates away dead skin cells, while the olive oil which is a natural emollient will deeply hydrate the skin, leaving it soft and supple. Olive oil also contains antioxidants that can help protect the skin from damage caused by free radicals.

For an extra touch of relaxation, add a few drops of your favourite essential oil. Treat yourself to a pampering session and enjoy the benefits of this nourishing scrub!

Ingredients:

  • 1 cup of granulated sugar
  • 1/2 cup of olive oil
  • Optional: a few drops of essential oil (such as lavender or peppermint) for a pleasant fragrance

Directions:

In a mixing bowl, combine the granulated sugar and olive oil. Mix well until the sugar is evenly coated with the oil. If desired, add a few drops of your chosen essential oil to the mixture. This will give your scrub a soothing scent. Stir the ingredients together until everything is well combined. You should have a slightly grainy paste-like consistency.

Begin by wetting your skin with warm water to open up your pores and soften your skin. Take a small amount of the scrub and gently massage it onto your face or body in circular motions, focusing on rough or dry areas. Remember to be gentle, as the sugar granules can be abrasive.

Rinse off the scrub with warm water and pat your skin dry. Finally, apply your preferred moisturiser to lock in the hydration.

  1. Coffee & Coconut Oil Scrub

Coffee is rich in antioxidants, which can help reduce inflammation and brighten the skin. Coffee grounds make for an excellent exfoliator that helps to remove dead skin cells and promote cell turnover, leading to smoother and brighter skin.

Coconut oil is deeply moisturising and can help nourish and hydrate the skin, leaving it soft and supple.

Ingredients:

  • 1/2 cup ground coffee
  • 1/2 cup coconut oil

Directions:

In a mixing bowl, combine the ground coffee and coconut oil. Stir the ingredients together until they are well combined and form a thick paste-like consistency. Transfer the scrub into an airtight container for storage.

Before using the scrub, wet your skin with warm water to help open up your pores. Take a small amount of the scrub and gently massage it onto your skin in circular motions. Pay extra attention to areas that need exfoliation, such as elbows, knees, or areas with dry skin.

Leave the scrub on your skin for a few minutes to allow the ingredients to work their magic. Rinse off the scrub with warm water and pat your skin dry. Moisturise your skin afterwards to lock in hydration. Repeat twice a week for best results.

Beauty makeup-skincare
How To Make Almond Oil At Home: A Step-By-Step Guide

Ever noticed how almond oil seems to be in every beauty product these days?

There’s a good reason – this versatile oil is amazing for skin, hair, and overall wellness. But quality almond oil can get pretty expensive, and it’s not always easy to know what’s actually in those store-bought bottles.

Good news!

Making your own is totally doable and might save you some money in the process!

Why Make Your Own Almond Oil?

  • Control over ingredients
  • Cost-effective in the long run
  • Makes a lovely handmade gift
  • Perfect for natural beauty enthusiasts

What You’ll Need

  • Food processor or blender
  • Cheesecloth or fine strainer
  • Glass jar or bottle for storage
  • Raw almonds
  • Carrier oil (olive oil, coconut oil, or jojoba oil work great)
  • Optional: essential oils for fragrance

The Step-by-Step Process

  1. Gather Your Ingredients

Quality matters here! Look for fresh, raw almonds and choose a carrier oil that works for your needs. If you’re using this mainly for face care, jojoba oil makes a great carrier. For hair care, coconut oil might be your best bet.

  1. Prep & Grind

Transform those almonds into the finest powder you can manage. The finer the grind, the better your oil extraction will be. You’ll notice the natural oils starting to release when you’ve got the right consistency.

  1. Mix With Your Carrier Oil

Combine your almond powder with your chosen carrier oil using the 1:2 ratio (one part almond powder to two parts carrier oil). Mix well until everything is evenly combined.

  1. The Infusion Period

Let your mixture sit for at least 48 hours in a cool, dark spot. Set a reminder to stir every 12 hours – this helps with the infusion process and ensures everything blends well.

  1. Strain & Store

Carefully strain your oil through a cheesecloth or fine strainer. Take your time with this step to get all the good stuff out!

Storage Tips

  • Use a dark glass bottle if possible
  • Keep away from direct sunlight
  • Use within 6 months
  • Store in a cool, dry place

Ways To Use Your Almond Oil

  • Daily moisturiser
  • Hair conditioning treatment
  • Cuticle care
  • Gentle makeup remover
  • Base for DIY beauty recipes
Beauty makeup-skincare
Natural Ways To Lighten Dark Inner Thighs & What Causes It

Although dark inner thighs (or hyperpigmentation) are not uncommon, they can still be a source of self-consciousness for many people, affecting their confidence, especially during the summer months when you’re trying to rock your denim cutoffs or teeny tiny bikini on the beach!

This post will explore several contributing factors that cause dark inner thighs and provide you with effective treatment options including natural remedies and medical treatments to help you regain your confidence and achieve smoother, even-toned skin.

Causes Of Dark Inner Thighs

Dark inner thighs can be caused by a variety of factors, including:

  • Friction from wearing tight clothing
  • Hormonal imbalances such as pregnancy, menstruation or conditions such as polycystic ovarian syndrome (PCOS)
  • Skin conditions such as eczema or psoriasis
  • Using harsh soaps or detergents
  • Exposure to the sun
  • Dry skin

To prevent and treat dark inner thighs, it is important to understand the underlying causes and contributing factors.

If you are overweight, losing weight can help to reduce friction and improve circulation in the affected area.

Avoid wearing tight clothing and use gentle, fragrance-free soaps and detergents.

If you have a skin condition such as eczema or psoriasis, consult a dermatologist for appropriate treatment.

Natural Ingredients & Easy Remedies To Lighten Dark Inner Thighs

LEMON JUICE

Lemons are good for brightening and lightening the skin due to their high vitamin C content and natural acidity.

Vitamin C is a potent antioxidant that helps to neutralise free radicals, which can damage the skin and lead to dullness and uneven tone.

Additionally, the citric acid in lemons acts as a natural exfoliant, helping to remove dead skin cells and reveal fresh, brighter skin underneath.

This exfoliating action can also help to reduce the appearance of dark spots and hyperpigmentation over time.

However, it’s essential to use lemon juice cautiously and in moderation, as its acidity can be harsh on the skin and may cause irritation or sensitivity, especially in those with sensitive or dry skin.

You Will Need:

  • ½lemon
  • Cotton pads

What To Do:

  1. Squeeze out the juice from half a lemon
  2. Use a cotton pad to apply the juice. In case of sensitive skin, dilute the lemon juice with water in equal proportion
  3. Leave it on for 20-30 minutes and rinse it off with warm water
  4. Repeat daily until you see a noticeable improvement

ALOE VERA

Aloe vera gel contains compounds that can reduce inflammation and promote healing but it also contains aloin which causes “melanin aggregation leading to skin lightening”.

Apply aloe vera gel to your inner thighs and leave it on for 20-30 minutes before rinsing with warm water. Repeat daily for best results.

You Will Need:

  • Aloe vera gel (as required)

What To Do:

  1. Take an aloe vera leaf and scrape out its gel
  2. Blend the gel using a fork
  3. Apply the aloe gel to the affected areas
  4. Leave it on for 20-30 minutes and rinse it off with warm water
  5. Freeze the remaining gel

Turmeric is a popular spice that has been used for centuries in traditional medicine and skincare routines.

It is known for its numerous health benefits and is often touted as a natural remedy for various skin issues, including lightening the skin.

One of the main reasons turmeric is believed to help lighten the skin is its active compound called curcumin.

Curcumin has been shown to have anti-inflammatory and antioxidant properties, which can help reduce the appearance of dark spots and pigmentation on the skin.

You Will Need:

  • Turmeric
  • Milk of your choice (optional)

What To Do:

  • Mix turmeric powder with milk or water to make a paste
  • Apply it to your inner thighs
  • Leave it on for 20-30 minutes before rinsing with warm water
  • Repeat twice a week for the best results

BAKING SODA

Baking soda, or sodium bicarbonate, is a mild abrasive and can help exfoliate the skin by removing dead skin cells.

This exfoliation process can give the appearance of brighter skin and may help to even out skin tone.

Just be aware that baking soda may be too harsh for some and may cause adverse reactions so do a patch test first!

You Will Need:

  • Baking soda

What To Do:

  • Mix a tablespoon of baking soda with enough water to make a paste
  • Apply it to your inner thighs.
  • Leave it on for 15-20 minutes before rinsing with warm water.
  • Repeat twice a week for best results.

Cosmetic Treatments For Dark Inner Thighs

If you find that natural remedies are as effective or as quick as you’d like, there are medical treatments that can help lighten the inner thighs fast.

Here are the most effective ones:

Laser Therapy – Uses high-intensity light to break down melanin, the pigment that gives skin its colour. This can help reduce the appearance of dark skin and promote the growth of new, lighter skin.

Chemical Peels – Is an effective medical treatment for lightening the inner thighs. Chemical peels use a chemical solution to remove the top layers of skin, revealing lighter, brighter skin underneath. This can help reduce the appearance of dark skin and promote the growth of new, lighter skin.

It’s important to remember that everyone’s skin is unique, and what works for one person may not work for another.

If you are seeking to lighten your skin, it is advisable to consult with a dermatologist or skincare professional who can provide personalised advice based on your specific needs and skin type.

Beauty makeup-skincare
What Is The Jellyfish Haircut?

The jellyfish haircut is a trendy and avant-garde hairstyle that draws inspiration from the graceful and flowing movements of jellyfish.

This haircut typically features long, layered, and textured strands that cascade down the shoulders, resembling the tentacles of a jellyfish.

The key elements of the jellyfish cut include soft, wispy layers, and a carefree, effortless appearance that captures the ethereal beauty of jellyfish in motion.

The jellyfish haircut is characterised by its versatility, making it suitable for various hair types and lengths.

It can be customised to complement different face shapes and personal styles, offering a playful and whimsical aesthetic for those looking to make a bold statement with their hair.

Styling products such as texturising sprays and sea salt mists are often used to enhance the natural movement and texture of the hair, adding to the organic and fluid look reminiscent of jellyfish.

For example, a jellyfish haircut can be achieved with long, wavy hair that is expertly layered to create a sense of weightlessness and movement.

This style can be further accentuated by incorporating subtle highlights or balayage to evoke the iridescent and translucent quality of jellyfish.

Additionally, the jellyfish haircut can be adapted to shorter hair lengths by focusing on creating layers that frame the face and add dimension to the overall hairstyle.

How Is The Jellyfish Haircut Different From A Hime Cut and an Octopus Haircut?

The Hime cut, originating from Japan, is a traditional hairstyle characterised by blunt, straight-across bangs and long, straight hair.

This style often encompasses a mid-length or longer bob with thick, evenly cut bangs.

The Octopus haircut is a contemporary and edgy style that features numerous short, choppy layers resembling the tentacles of an octopus.

This bold and dynamic haircut is often achieved using razor-cutting techniques to create texture and movement.

What Face Shape Is Best For Jellyfish Cut?

The jellyfish cut is versatile and can complement various face shapes, but it particularly suits those with round or square face shapes.

For those with a round face shape, the jellyfish cut can help create the illusion of length and balance out the overall proportions of the face.

The longer length on top adds height, which elongates the face, while the tapered sides and back provide a more structured and angular appearance.

Similarly, people with a square face shape can benefit from the jellyfish cut as it softens the angles and adds a touch of texture and movement.

The longer top section can help to create a more oval-like appearance, which is often considered the ideal face shape for many hairstyles.

How To Ask For The Jellyfish Cut At The Hairdressers?

When asking your hair stylist for the jellyfish, be as clear and specific as you can. Although the cut can vary in interpretation, all jellyfish cuts feature short and rounded layers on top, while retaining your length.

If you need to, take a reference picture so your stylist understands your desired look, visuals usually work best!

Beauty hair
The Best Way To Shave Down There Without Getting Ingrown Hairs

Let’s talk about something we all deal with but nobody discusses at brunch…

Finding the best way to shave down there!

Whether you’re prepping for beach season or just prefer to keep things tidy, achieving the perfect bikini line can often feel like a delicate balance between wanting to feel confident and sexy while also dealing with the uncomfortable and sometimes painful aftermath of shaving.

I know the struggle is real! The annoying ingrown hairs, the awkward regrowth stage, and that moment of panic when you realise you’ve got a pool party tomorrow!

But after years of trial, error, and way too many questionable tutorials, I’ve cracked the code on how to get silky-smooth results without the post-shave drama.

Understanding Ingrown Hairs and Why They Happen

Before we dive into the tips and tricks for preventing ingrown hairs, it’s important to understand what they are and why they happen. Ingrown hairs occur when hair grows back into the skin instead of up and out of the follicle.

This can happen for a variety of reasons, including shaving too closely or with a dull razor, wearing tight clothing, and not exfoliating regularly.

If a hair becomes ingrown, it can cause redness, irritation, and even infection. It’s important to take preventative measures to avoid ingrown hairs altogether.

The Do’s and Don’ts Before Shaving

Before you even think about picking up a razor, there are a few important do’s and don’ts to keep in mind to prepare your skin for a smooth shave.

  • DO exfoliate – Use a gentle exfoliating scrub or brush to remove any dead skin cells and ensure a smooth surface for shaving.
  • DON’T shave dry – Always use shaving cream or gel to lubricate the skin and prevent irritation.
  • DO trim longer hairs – If your pubic hair is longer than a quarter inch, trim it down with scissors or clippers before shaving.
  • DON’T use a dull razor – A dull razor can cause more irritation and increase the likelihood of ingrown hairs. Replace your razor regularly.

The Perfect Tools for a Smooth Shave

Now that you’ve prepped your skin, it’s time to talk about the tools you’ll need for a smooth shave.

  • Razor – Invest in a high-quality razor specifically designed for sensitive skin. Look for a razor with multiple blades and a pivoting head to ensure a close, smooth shave like the Gillette Venus Deluxe Smooth Sensitive Women’s Razor which has Vogue’s approval as the number one razor for sensitive skin.
  • Shaving cream or gel – Choose a shaving cream or gel that is specifically formulated for sensitive skin and contains moisturising ingredients like aloe vera or vitamin E like Fur’s Shaving Cream.

The Perfect Technique for a Smooth Shave

The key to a smooth shave is all in the technique. Here’s how to do it:

  1. Start by applying shaving cream or gel to the area you want to shave.
  2. Use short, gentle strokes to shave in the direction of hair growth.
  3. Rinse the razor frequently to prevent clogging.
  4. Once you’ve finished shaving, rinse the area with warm water and pat dry with a clean towel.

What to Do After Shaving to Prevent Ingrown Hairs

After you’ve finished shaving, it’s important to take a few extra steps to prevent ingrown hairs.

  • Apply a moisturiser – Use a gentle, fragrance-free moisturiser like the DeoDoc Intimate After Shave Balm to soothe and hydrate the skin.
  • Avoid tight clothing – Tight clothing can cause irritation and increase the likelihood of ingrown hairs. Wear loose, breathable clothing after shaving.

How to Treat Ingrown Hairs When They Happen

Despite your best efforts, you may still experience ingrown hairs from time to time. Here’s how to treat them:

  • Apply a warm compress – Use a warm, damp washcloth to apply gentle pressure to the affected area. This can help reduce inflammation and encourage the hair to grow out of the follicle.
  • Exfoliate – Use a gentle exfoliating scrub or brush to remove dead skin cells and help the hair grow out of the skin. This will also open up the pores, allowing for deeper penetration of a moisturiser.

Home Remedies for Ingrown Hairs and Bumps

If you prefer to use natural remedies, there are a few options for treating ingrown hairs at home.

  • Tea tree oil – Tea tree oil has anti-inflammatory properties and can help reduce redness and inflammation. Dilute a few drops of tea tree oil with a carrier oil such as coconut oil or sweet almond oil and apply to the affected area.
  • Aloe vera – Aloe vera has soothing properties and can help reduce irritation and redness. Apply aloe vera gel directly to the affected area.
Beauty makeup-skincare
How To Make Your Garden Look More Expensive Just In Time For Spring

If you want to add a touch of opulence to your garden this spring, there’s no need to break the bank.

With a few strategic tweaks, you can easily create an expensive-looking oasis right in your own backyard.

Here are some tips to get you started.

Pick The Right Flowers & Plants: Evergreens, Roses, Peonies

To make your garden look more expensive, you need to pick plants with personality! Some great plants to choose from are evergreens, roses, and peonies.

  • Evergreens are a great choice because they stay green all year round.
  • You can never go wrong with roses as they are a timeless classic.
  • Peonies are a beautiful and romantic option.

When choosing plants, make sure to consider the size, shape, and colour of the plant. You want to choose plants that complement each other and create a cohesive look.

Create a Focal Point: Water Feature, Seating Area, Sculpture

A water feature, seating area, or sculpture are all great options that will add a touch of luxury to your space.

If you opt for a water feature, be sure to choose one that fits the size and style of your garden. A small fountain or birdbath can be just as effective as a large pond. Incorporate plants and stones around the feature to create a harmonious feel.

If you have the space for it, a seating area is another great way to not only add a focal point to your garden but create a designated space for outdoor entertainment.

Whether you choose a whimsical or elegant design, a sculpture accentuates the relationship between a garden and architecture. It can simply create an area of interest, draw attention to plants or use them as a feeding spot to attract wildlife.

Incorporate Different Textures: Wicker, Stone, Glass

One way to add texture to your garden is by using weather-resistant materials. Wicker and stone are two great options that will stand up to the elements. You can also layer different textures to create interest and depth. For example, try pairing glass with stone or concrete.

Another way to incorporate different textures into your garden is by using colour. Choose colours that complement each other to tie the whole look together.

You can also use different shades of one colour to add dimension. For example, if you’re using a blue colour scheme, try using light blue and dark blue accents.

Add Some Bling: Mirror Balls, Solar Lights, Gilded Accessories

Adding some bling to your garden can take it from drab to fab in an instant. Mirror balls and solar lights are great ways to add some bling without breaking the bank.

When it comes to adding bling to your garden, the sky’s the limit. But if you want to keep it classy, consider choosing items that will catch the light. Mirror balls are a great way to add some sparkle, and they can be hung from trees or placed on the ground.

Solar lights are another option that will boost the ambience while also providing practical lighting for your garden.

Also, consider the overall aesthetic of the space. If you have a modern garden, then opt for sleek and chic accessories. If your garden has a more vintage feel, then go for items with an antique finish. And if you want to create a vibrant and playful look, then choose fun and colourful pieces.

No matter what style you choose, adding some bling to your garden is a surefire way to make it look more expensive. So get creative and have fun with it!

Finish With a Pop of Colour: Cushions & Rugs

Much like the cushions you have in your living room or bedroom, outdoor cushions add comfort, implement colour and textures and can also be used to layer up your garden sofa.

Outdoor cushions come in a variety of colours, patterns, and materials but remember to choose cushions that complement the furniture and overall aesthetic of your space.

Incorporate an outdoor rug to define a space, adding a decorative touch with colour and texture. They can easily uplift the aesthetic but also protect the flooring underneath it. Scatter potted plants around the perimeter of the area for added visual interest.

Home-decor Lifestyle
6 Hair Straighteners That Won’t Damage Your Hair

It’s true that hair straighteners can send your hair strands into the afterlife and yet so many of us whip out those mega-hot iron plates and press our precious hair locks in between them every morning to achieve that sleek finish.

But hair straighteners are also one of the most versatile hair styling tools out there. Whether you are going for large voluminous “va-va-voom” waves, loose curls or pencil-straight hair – a “good” hair straightener can do it all!

Hair straighteners will always have the potential to cause some degree of damage (especially if used every day), and while it’s very important to use great quality products to prime and protect your hair beforehand, a great set of hair straighteners can make all the difference!

There are a few ways in which you can prepare the hair to reduce the amount of damage:

  • WASH IT — Wash your hair thoroughly beforehand with a smoothing shampoo and deep conditioner.
  • MAKE IT DRY — Your hair should be completely dry from the water before straightening (hair is most fragile when it’s wet) otherwise your hair will fry!
  • USE HEAT PROTECTANT — Spritz your hair with a heat protectant like L’Oréal Paris Advanced Hairstyle SLEEK IT Iron Straight Heatspray. Heat protectants form a protective layer on the hair shaft, shielding it from extreme heat. But for afro-textured hair, you may need a little extra protection by using a leave-in serum like the Mizani Thermasmooth Smooth Guard Serum or the Olaplex No.7 Bonding Oil which can be applied before or after. This serum helps to control frizz and flyaways as well as repair bonds on a molecular level.
  • SECTION THE HAIR — Straightening your hair in small sections means that part of your hair will straighten faster, reducing the need to go over it again – causing more damage.

Remember that your hair straighteners don’t need to be on full blast!

Not all hair types can handle hair straighteners the same way or are as effective.

  • Afro Hair (3C-4C Curl Types) — Ceramic-coated plates heat up quickly, the heat is distributed evenly and they produce negative ions which give the hair more shine and less frizz. But if you can get your hands on a steam hair straightener like the award-winning L’Oréal Professionnel Steampod 3.0 Steam Hair Straightener & Styling Tool, you can enjoy up to 91% less heat damage and bone-straight hair in half the time.
  • Thick Hair — Titanium plates are great for straightening stubborn hair – they heat up quickly, and can reach very high temperatures meaning fewer passes are needed. Choose ones that are wide-plated to save you time.
  • Frizzy Hair — Straighteners with Ionic technology like the GHD Gold Hair Straighteners are a must to protect your hair against humidity.
  • Fine Hair — Ceramic plates used in a low heat setting are best for fine hair due to their even heat distribution and because they’re more gentle.

You might know about tourmaline hair straighteners too. Tourmaline is a crystalline mineral that is produced organically and can be used to coat the plates.

They have up to six times more negative ions than ceramic and leave the hair straighter and shinier for longer. These straighteners can be used on thin to coarse hair types.

We all need a good straightener in our arsenal of hair tools, so as long you prepare and protect your hair you should see little to no damage.

So with that in mind, I’ve narrowed it down to 6 of the best hair straighteners on the market right now that are very popular with top reviews.

  1. L’OREAL PROFESSIONAL 3.0 STEAM POD STRAIGHTENER

Why It’s Hot |

  • Cosmopolitan Summer Beauty Award 2021 Winner
  • Integrated water tank
  • 360° rotative cord
  • Long-lasting results
  • Less damage to hair

Why It’s Not |

  • Slow to heat up (due to the water tank)
  • Steam is released only from one side of the plates

Overview | The 3rd generation of L’Oréal’s series of professional hair stylers, the professional steam pod straightener claims to reduce hair damage by up to 91% due to its built water tank which produces steam when in use.

The steam helps repair and nourish leave-in products penetrate the hair better. It has been the first on the market to try it.

  1. DYSON CORRALE STRAIGHTENER

Why It’s Hot |

  • Elle International Beauty Award 2021 Winner
  • Cord-free
  • Flexing manganese copper alloy plates shape around your hair.
  • Can reach temperatures up to 210C

Why It’s Not |

  • Hefty price tag
  • Quite heavy (561g)

Overview | Dyson has never really been known as a purse-friendly brand! So as you’d expect, the Dyson Corrale will put holes in your bank account.

However, Dyson does have a high reputation for delivering quality and robust products that enlist advanced technology for maximum and effective results and it doesn’t seem to falter with their hair straighteners either.

The highlight of the Dyson Corrale is that it is the only straightener with flexing copper plates that shape to gather hair, meaning less heat and half the time.

  1. GHD UNPLUGGED STRAIGHTENER

Why It’s Hot |

  • Cosmopolitan 2021 Beauty Award Winner
  • Cord-free
  • High-shine finish

Why It’s Not |

  • Two hour charging time for 20-minute use
  • Cannot be used plugged in
  • Hefty price tag

Overview | ‘Unplugged’ is the first cordless straightener from GHD’s and was designed with being on the move in mind, simply put this compact yet powerful in your handbag to quickly change up your style.

In just 45 minutes the ceramic-coated plates are heated up and ready to glide through your hair snag-free delivering salon-sleek results with 65% more shine.

  1. CLOUD NINE THE ORIGINAL IRON

Why It’s Hot |

  • Easy to see temperature control
  • Heats up in 20 seconds
  • Swivel cord for 360° movement
  • Comes with a protective heat guard
  • Signature Mineral-infused ceramic plates

Why It’s Not |

  • A little expensive

Overview | The Original Iron is one of Cloud Nine’s best-selling hair straighteners and for good reason! One of their signature features is the Sericite and Tourmaline-infused ceramic plates which minimise damage and maximise shine.

This high-quality hair straightener is delivered with some freebies too! It comes with a protective heat guard that can be put on immediately after styling to allow the Iron to cool down without damaging surfaces and a travel-sized magical quick dry potion that tames frizz and flyaways as well as gently conditions the hair and provides heat protection.

  1. REMINGTON PROLUXE HAIR STRAIGHTENER

Why It’s Hot |

  • Pretty design – soft pearlescent pink with rose gold accents
  • Reasonably priced
  • Intelligent OPTIheat technology
  • Variable settings up to 230°C
  • Three-metre power cord
  • 24 hour locked in styles

Why It’s Not |

  • The hair straightener doesn’t lock the heat setting button during styling, so you can accidentally change the temperature.

Overview | Using intelligent OPTIheat technology, the Remington PROluxe straightener targets heat where your hair needs it the most.

The plates are made with ultimate glide ceramic for 5x smoother and snag-free results. You can also enjoy 50% straighter hair in one pass compared to the standard Remington straightener.

  1. REVAMP PROGLOSS TOUCH DIGITAL CERAMIC HAIR STRAIGHTENER

Why It’s Hot |

  • Colour Touch Screen Digital Display
  • Manual temperature adjustment between 80oC – 235oC
  • 3 Pre-Set Temperatures for Hair Types: Fine, Medium, Thick
  • Fully Ceramic Floating Heat Plates – Progloss Essential Oil Infused with Keratin, Argan & Coconut
  • Safety shut off after 60 minutes
  • Three-metre power cord with 360o swivel.

Why It’s Not |

  • Inconvenient placement of temperature control buttons

Overview | The Revamp Progloss Digital straightener promises to deliver super-smooth and snag-free results through its infusion of keratin, argan and coconut oil on the floating ceramic plates.

The pre-set hair mode settings means that no hair type will be left out, whether your locks are fine, medium or thick. Plus, the ultra-fast PRO PTC heater for one-stroke styling ensures you’ll be done in no time.

Beauty hair