12 Autumn Staples You Must Have In Your Wardrobe

Fall isn’t just about leaves changing—it’s the ultimate opportunity to refresh your look and give your wardrobe a makeover.
Picture cosying up with a steaming pumpkin spice latte as you stroll through a kaleidoscope of autumn hues, all while dressed in your perfect fall outfit.

If you’re on the hunt for essential pieces to elevate your autumn style, consider this guide your go-to resource for curating the ultimate autumn capsule wardrobe.

From chunky jumpers (or sweaters for our US readers) to timeless denim, this comprehensive list covers all the essentials you need to step up your fashion game this season.

1.The Versatile Jumper
Autumn wardrobe staples wouldn’t be complete without a selection of warm and comfortable jumpers a selection of warm and comfortable jumpers.

From chunky knits to lightweight fabrics, jumpers are the perfect layering piece for those chilly autumn days and even blistering winter evenings.

Choose neutral tones such as beige, grey, or camel to lay down a flexible foundation for your attire.

Pair them with skinny jeans and ankle boots for a chilled yet stylish vibe, or elevate the look by swapping in a skirt and heels for a more refined ensemble.

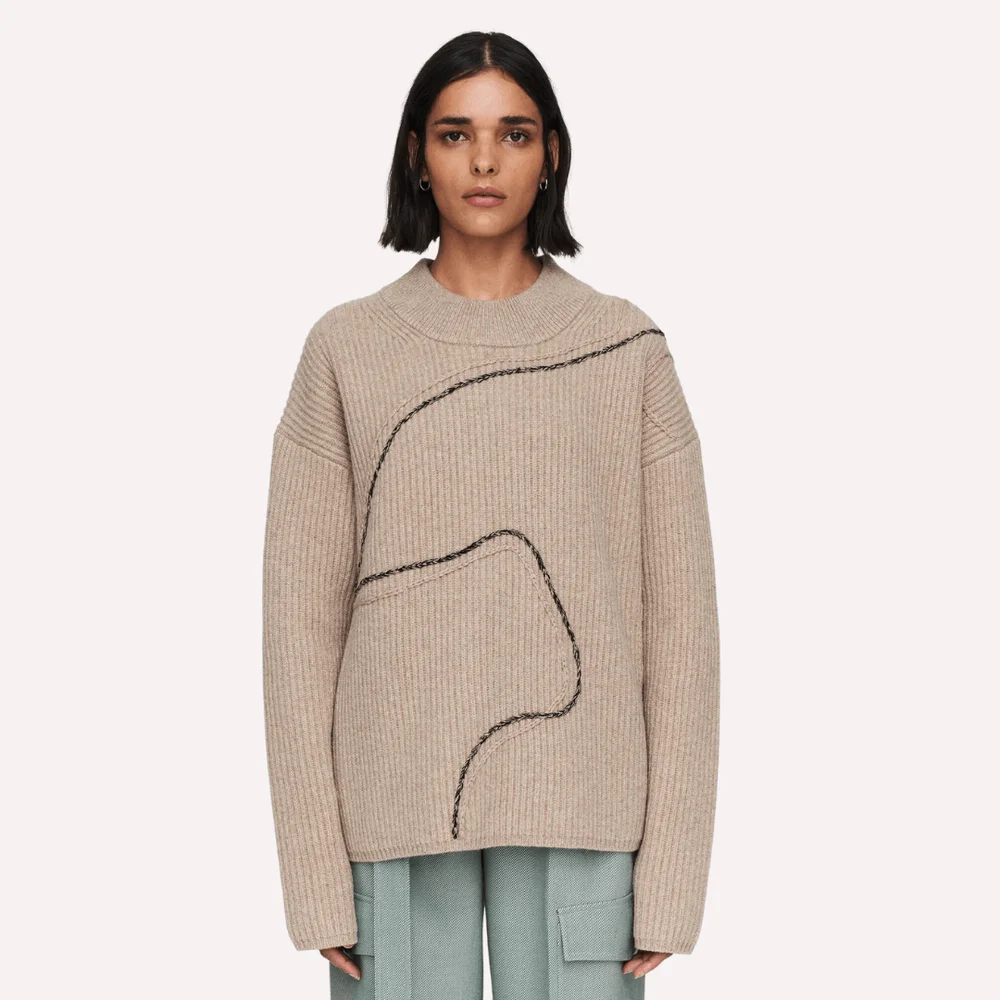
One must-have jumper we’ve been feasting our eyes on is this high-neck wool jumper by Joseph. Crafted from 100% Merino wool, it brings together warmth and fashion like a pro.

Its distinctive embroidered design and ribbed accents will introduce a hint of sophistication to any outfit.

2.Timeless Trench Coats
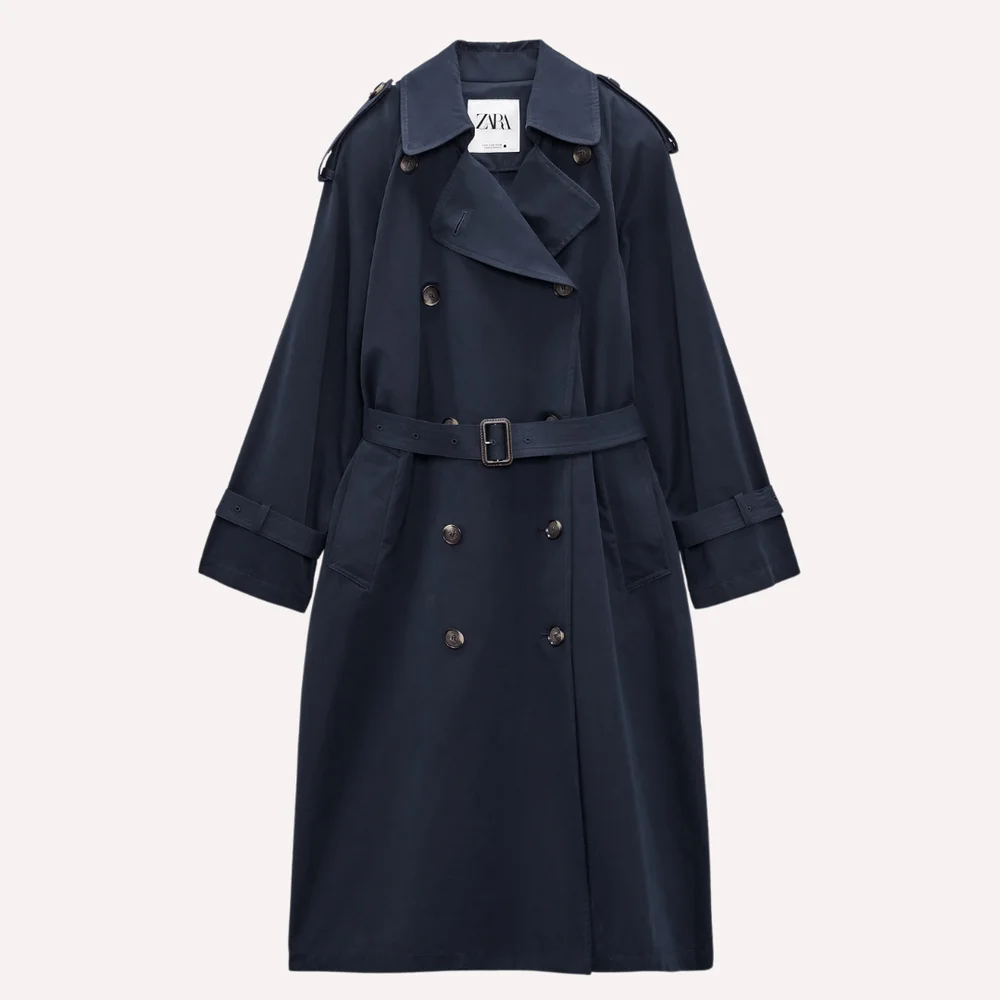
A classic trench coat is a must-have item in any closet, and it never goes out of style.

It’s ideal for those in-between days of autumn when you’re not sure whether it’ll rain or shine.

Opt for a versatile colour such as beige or navy; it goes well with just about anything. The oversized water-resistant trench coat from Zara is a fantastic choice, thanks to its flattering fit and lovely design touches.

3.The Relaxed Trousers
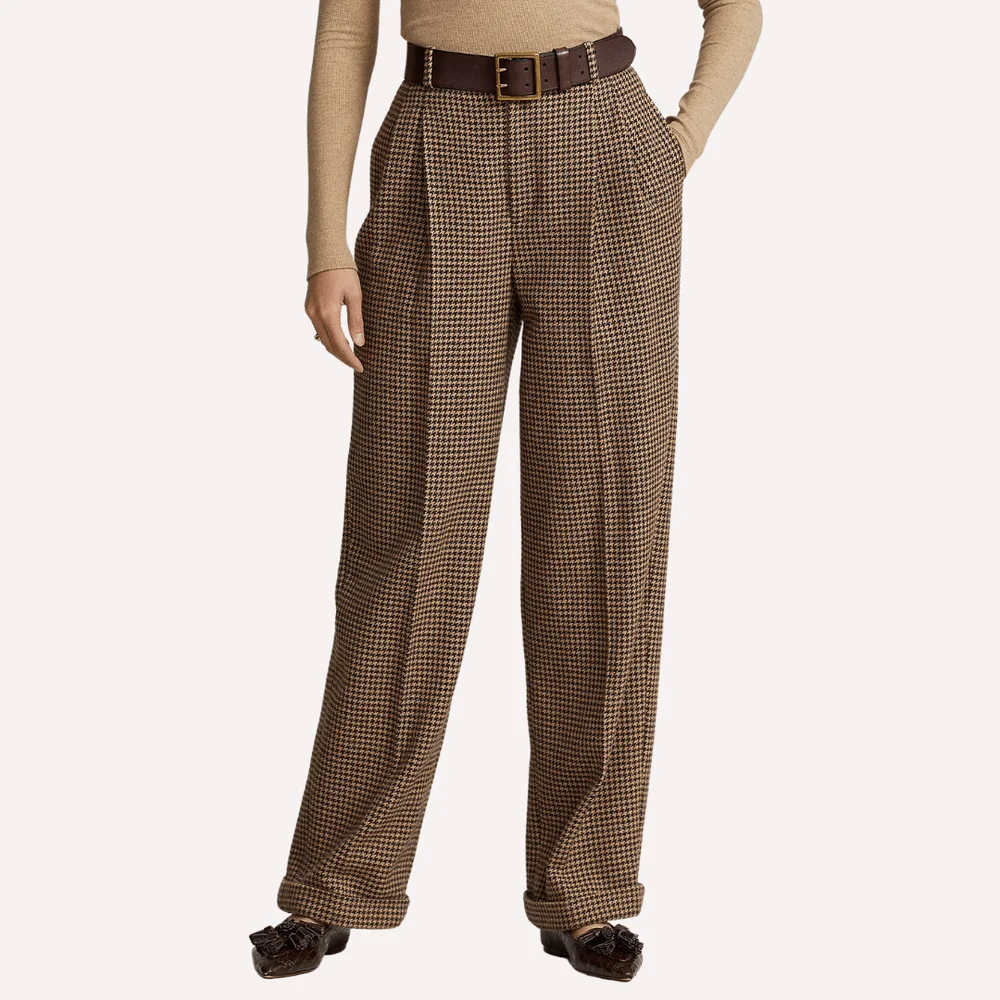
When it comes to fall fashion, feeling cosy is essential. That’s why having a pair of relaxed trousers is a wardrobe essential.

These Ralph Lauren houndstooth tweed trousers perfectly blend comfort and style.

You can effortlessly create a polished office look by pairing them with a fitted blazer and loafers.

Alternatively, throw on a long knitted jumper and some comfy trainers for a casual yet put-together vibe while running errands.

4.The Stylish Half-Zip Jumper
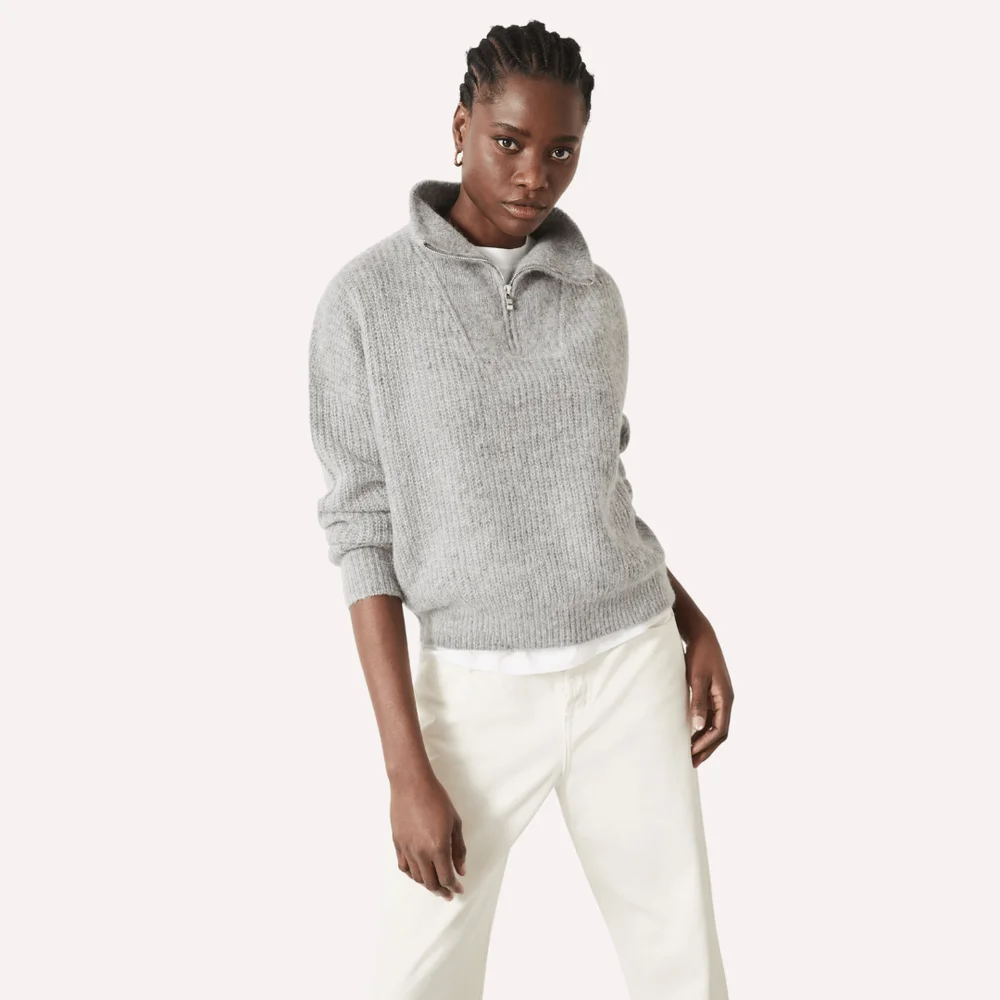
A half-zip sweater is such a versatile and chic addition to your wardrobe! It’s the perfect middle ground between casual and classy.

We love the Dalia half-zip sweater from Hush. It’s super cosy with its fluffy yarn, and the grey marl colour adds a subtle elegance to any outfit.

Pair it with your favourite pair of jeans and some cute ankle boots – perfect for those crisp autumn days!

5.The Must-Have Uggs
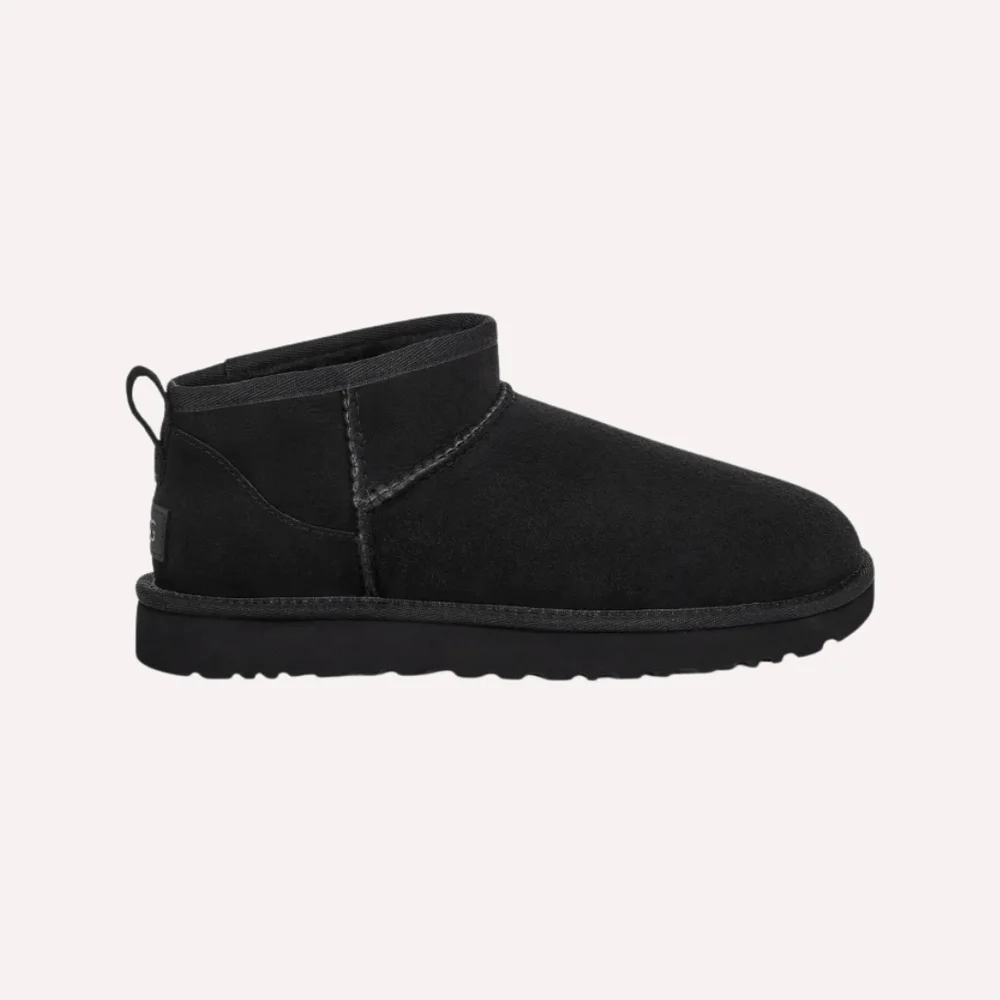
Uggs have really bounced back into the spotlight lately, haven’t they?

While they’re not exactly my go-to choice for boots, I can’t deny their appeal, especially when it comes to keeping your feet toasty during the fall season.

They’re like slipping your feet into a cosy cloud! Plus, they have this free and easy style that just adds a little extra oomph to any outfit. Those classic ultra mini boots from Ugg are total crowd-pleasers – celebs and fashionistas alike can’t seem to get enough of them.

And let’s talk versatility, those sleek black ones go with everything! Jeans, leggings, dresses – you name it.

6.A Slinky Slip Skirt
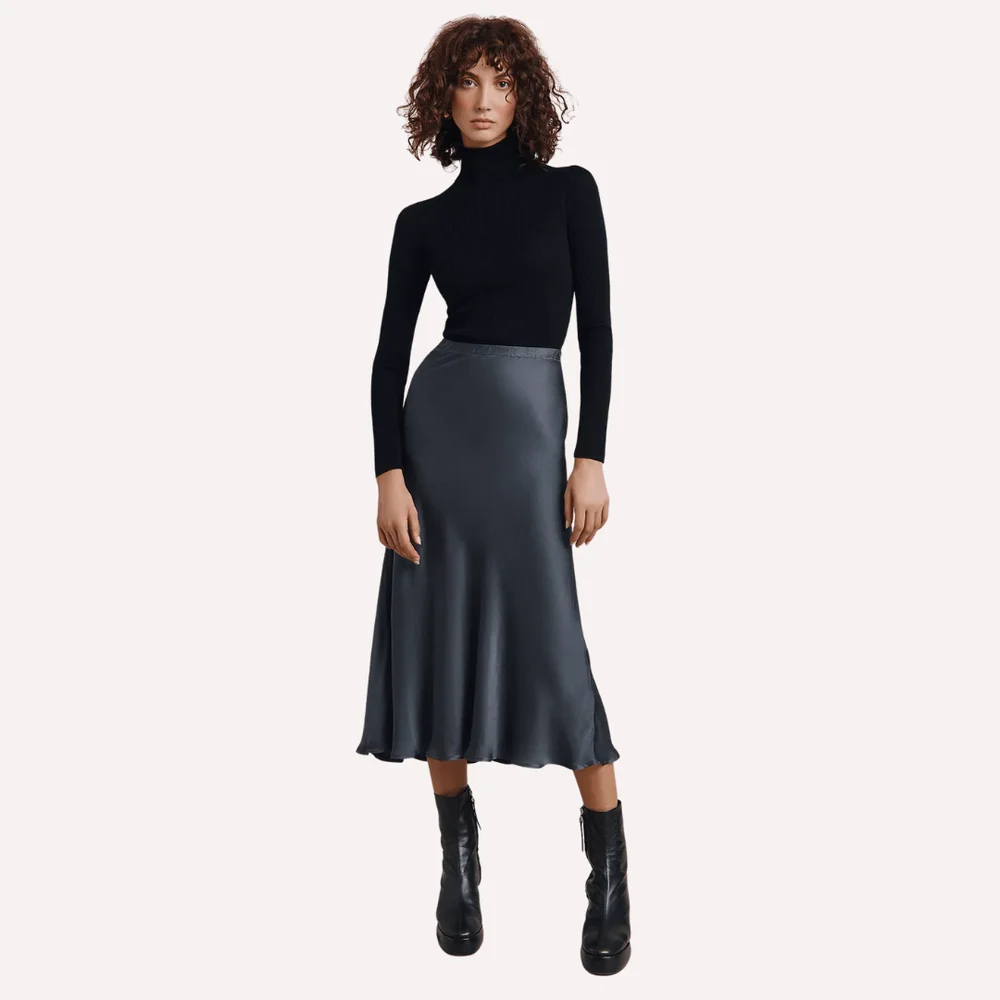
Slip skirts blend seamlessly from casual hangouts to upscale gatherings.

Pair them with a cosy jumper or a snug polo-neck with some boots for a laid-back vibe. Or, if you’re feeling fancy, team them up with a classy blouse and heels for that touch of sass and elegance.

Slip skirts are usually made from soft, lightweight materials like silk or satin, so they’ll feel ultra smooth against your skin.

And the best part? They’re roomy enough to let you move freely, perfect for those breezy autumn days.

Additionally, you can layer them over tights or leggings when the chill sets in without sacrificing style!

7.The Perfect Pair of Jeans
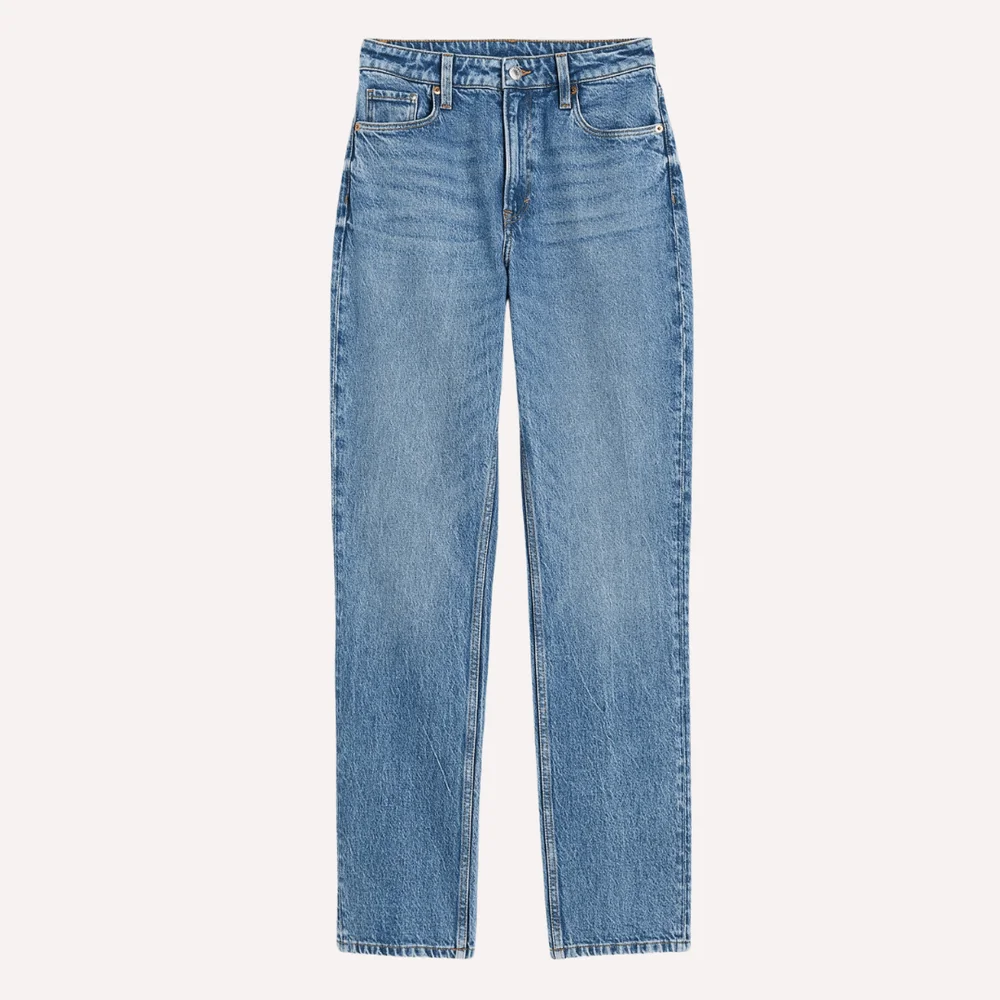
Finding the perfect pair of jeans for the fall season can sometimes feel like searching for a needle in a haystack. But fear not, because H&M has got your back with their fabulous slim high jeans!

Crafted with a blend of recycled polyester and cotton, these jeans not only look great but also carry an eco-friendly vibe.

The slim fit with a straight-leg design offers a comfy yet stylish silhouette that can take you from day to night.

Whether you’re heading out for a casual day with friends or sprucing up for a night on the town, these jeans will have you covered in both fashion and sustainability.

8.The Essential Crossbody Bag
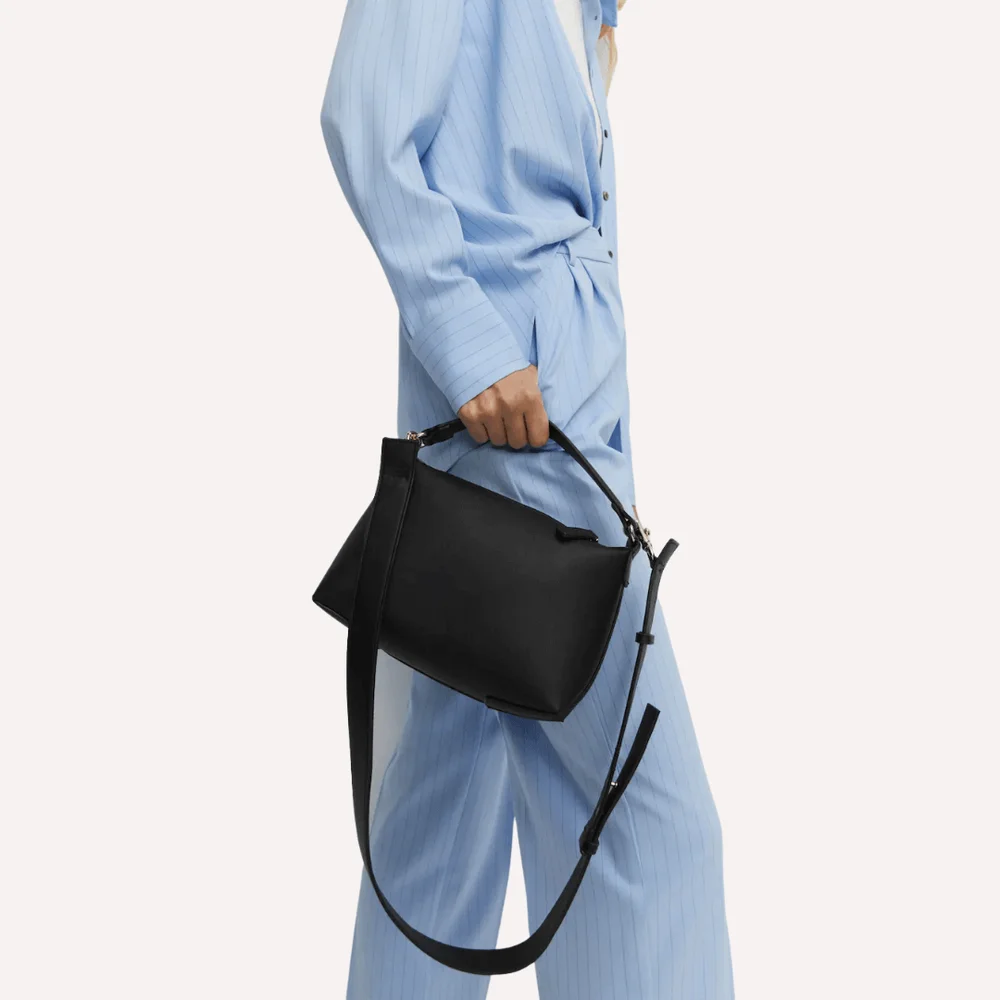
When it comes to accessories that are both practical and trendy, crossbody bags take the crown!

A crossbody bag slung casually over your shoulder keeps your hands free for all those autumnal activities – pumpkin picking, apple cider sipping, you name it.

Plus, they’re just the right size to carry all your essentials: wallet, keys, lip balm for those chilly winds.

9.The Statement Scarf
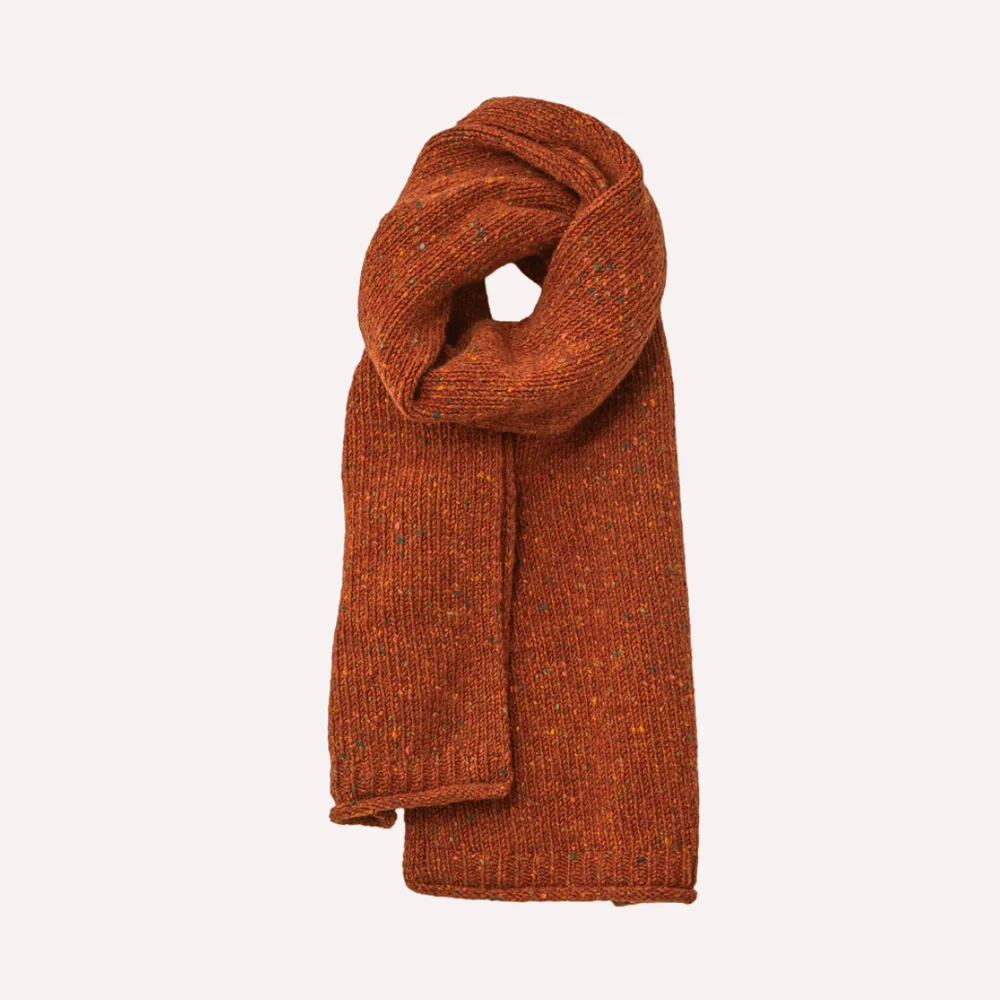
Statement scarves come in all sorts of colours, patterns, and textures, allowing you to express your unique style while staying warm and snug.

Plus, they’re incredibly versatile. You can drape them over your shoulders for a chic Parisian vibe, knot them around your neck for a cosy feel, or even wear them as a makeshift shawl when the temperature dips.

10. The Classic Leather Jacket
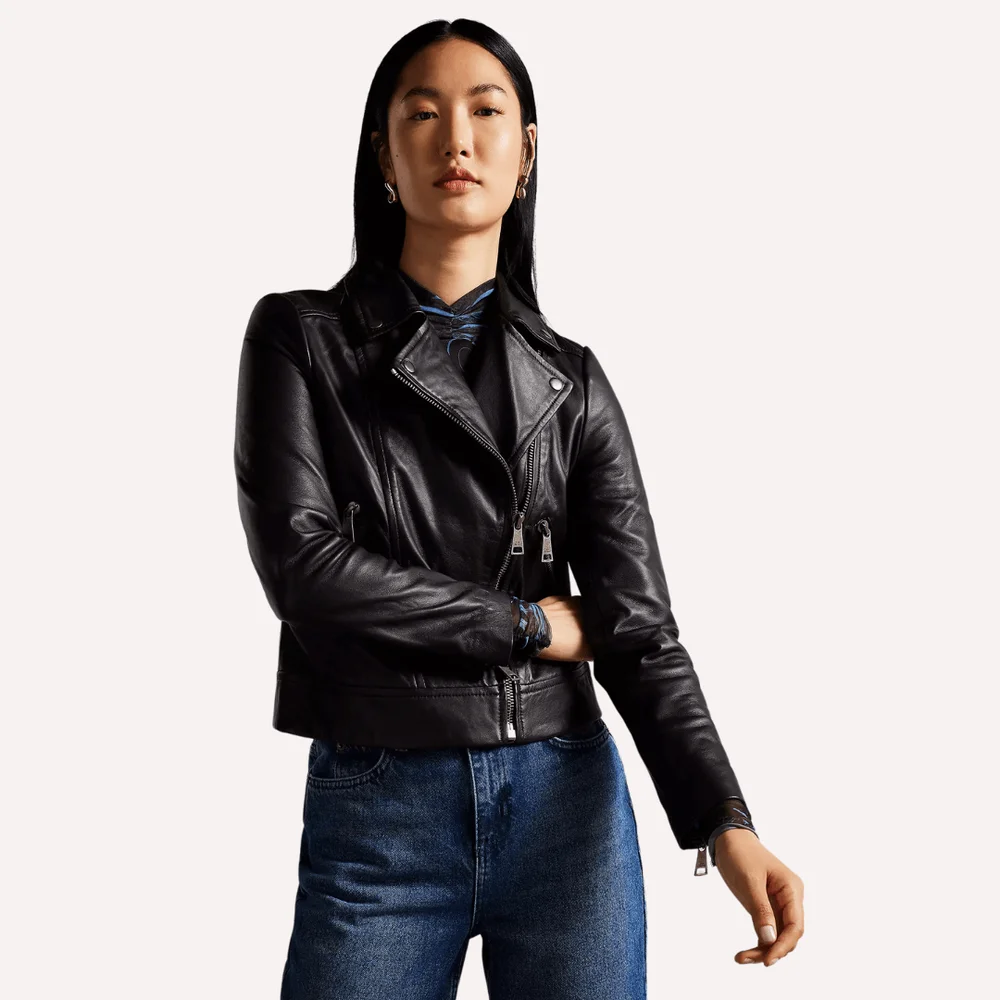
A timeless classic like a leather jacket can really bring a whole new level of cool to your look, especially during those nippy days when you need a little something extra to keep you warm and stylish.

When you’re on the hunt for the perfect leather jacket, versatility is key. Think classic shades like black or brown that effortlessly complement whatever you’re wearing.

And speaking of quality, it’s worth splurging on a well-made piece like Ted Baker’s Ellaar leather jacket.

It’s the kind of investment that’ll pay off big time, lasting you for years and becoming a trusty go-to in your wardrobe.

11.The Cosy Beanie
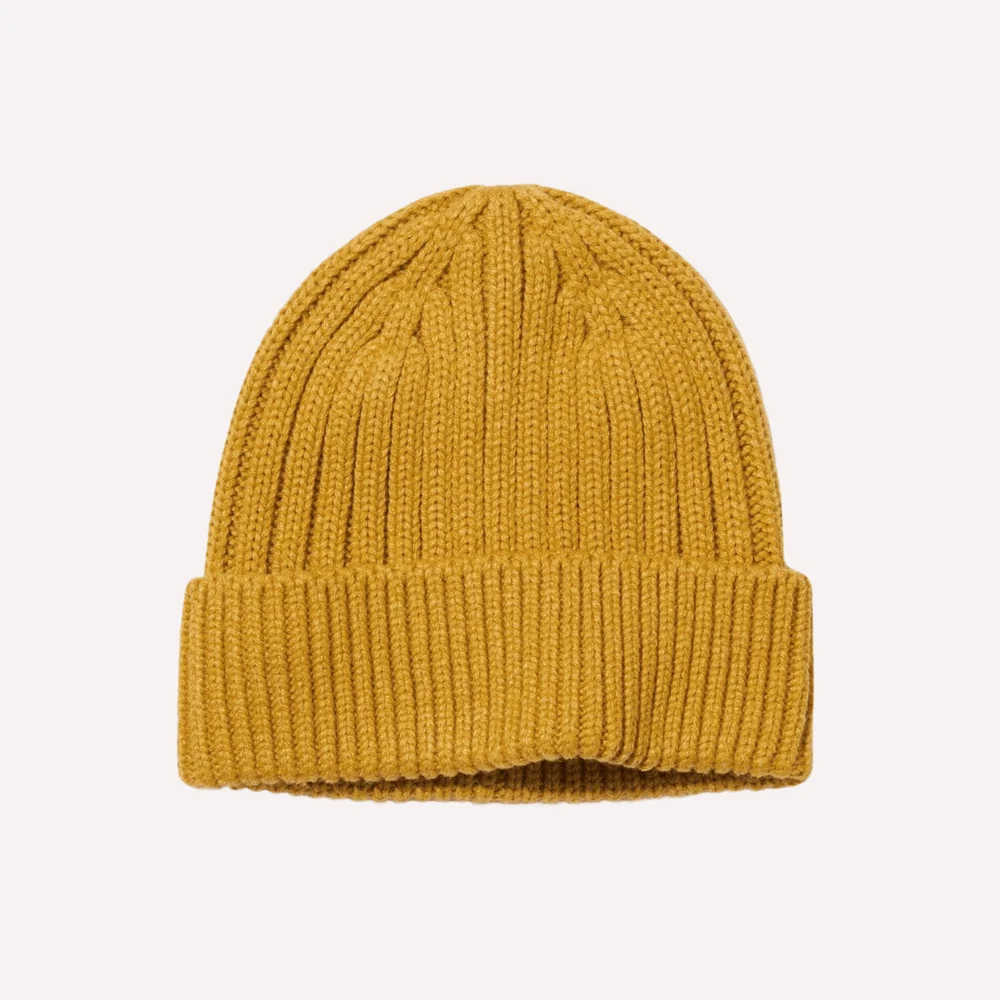
You’ve got to have a snug beanie to add both warmth and pizazz to your look whilst ensuring your hair stays in place, even on windy days!

When shopping for beanies, aim for ones crafted from cosy materials such as wool or cashmere.

You can stick to classic, neutral tones like black, grey, or beige or go full autumn with some burgundy or mustard yellow hues, either way, they’ll complement almost any fall-themed outfit ideas you may have.

12.The Stylish Ankle Boots
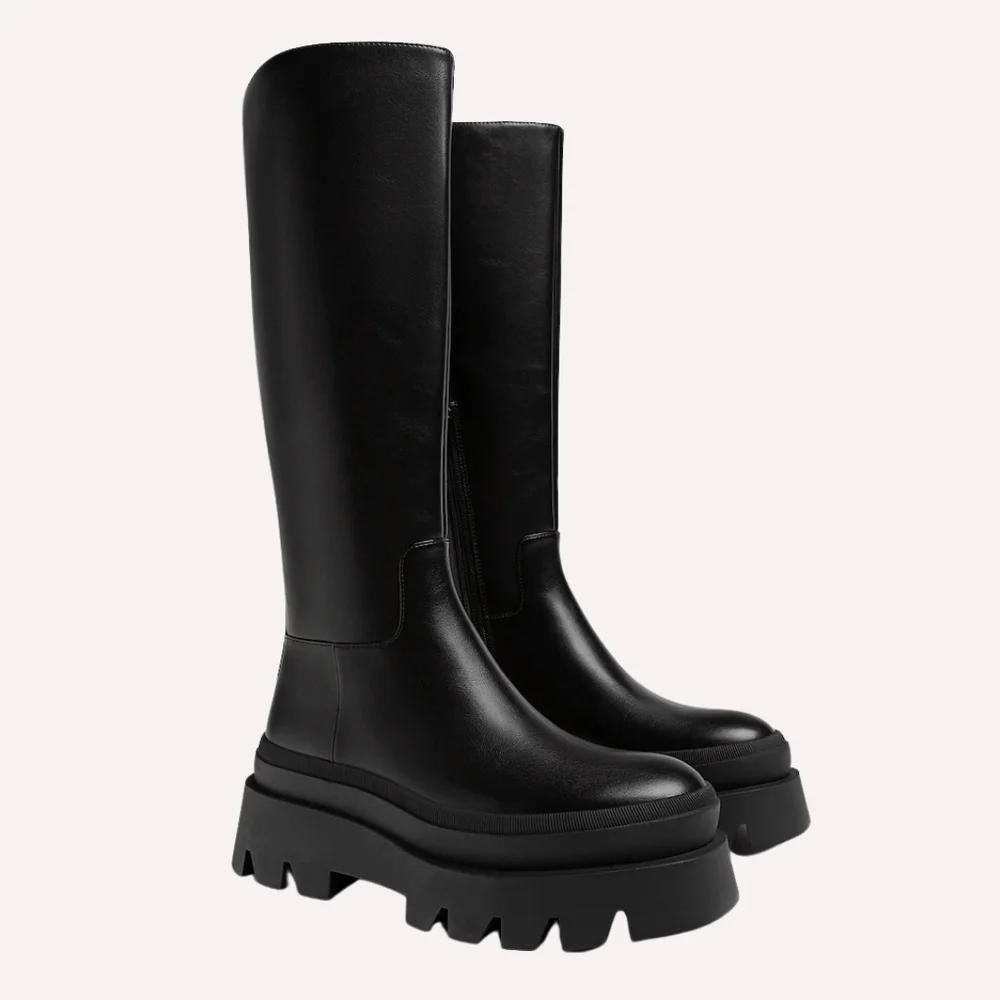
And finally, let’s talk about boots! You’ll want to find yourself some super comfy ones in a colour that goes with everything, like classic black or versatile brown. These are the kind of boots that’ll be your go-to, whether you’re rocking jeans, dresses, or skirts.

When it comes to the heel, go for something that won’t have you wincing with every step. Comfort is key here, so choose a height that lets you strut your stuff without feeling like you’re teetering on stilts.

From the timeless elegance of Chelsea boots to the trendy vibe of Western-inspired styles, ankle boots will add that extra dash of sophistication to your look.

Fashion
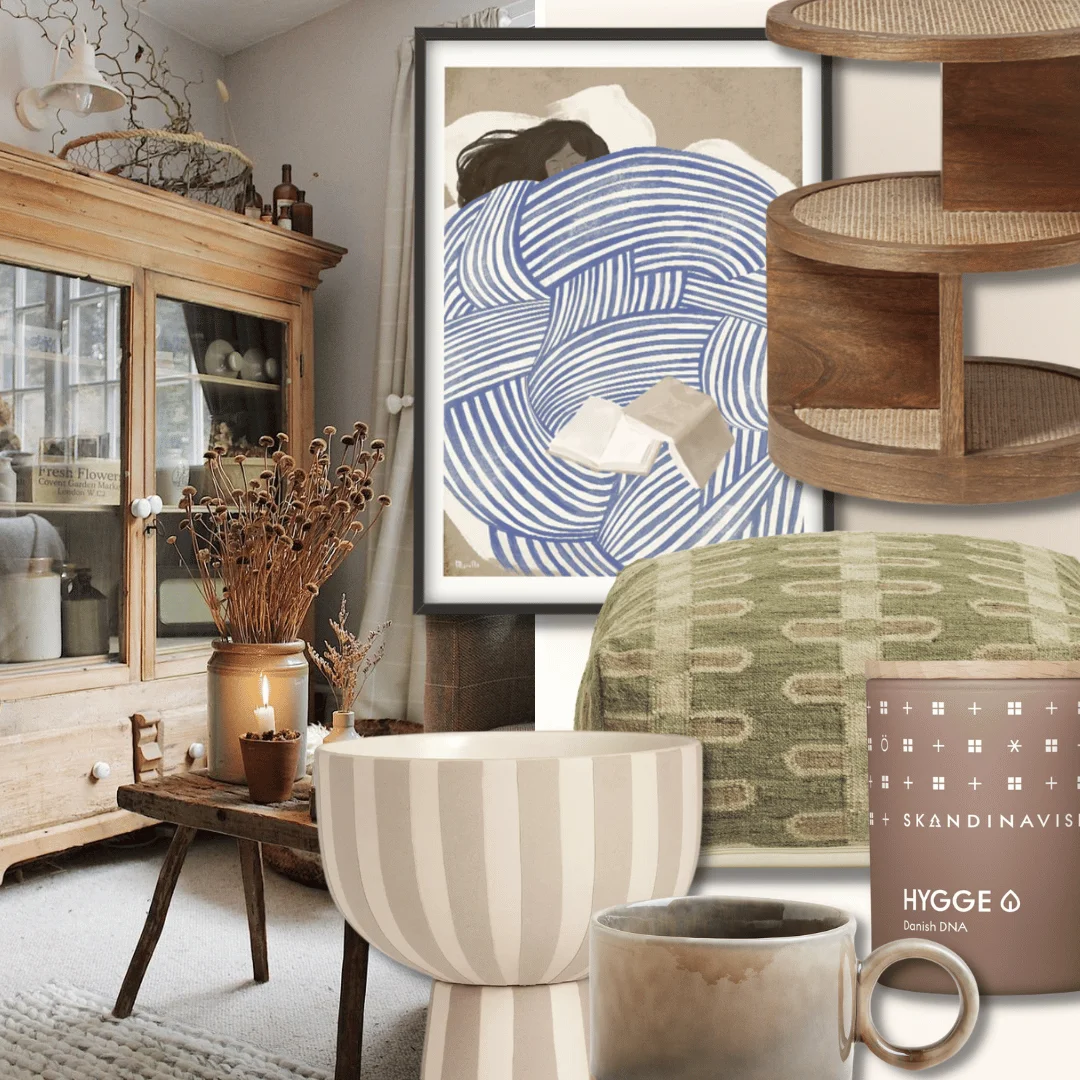
Hygge Decor: What Is This Danish Interior Design Trend?

This Danish decorating style is basically the home equivalent of wrapping yourself in a chunky knit blanket while holding a warm cup of coffee – pure cosy vibes.

Think of it as the design world’s answer to those days when all you want to do is create your own little sanctuary of calm. You know those super-soft throws that make you never want to leave your couch? That’s hygge.

Those natural wood accents that make your space feel like a peaceful forest retreat? Also hygge.

It’s all about turning your home into the most comfortable, soul-soothing space imaginable.

The Concept of Hygge

Hygge is more than just a decorating style; it’s a way of life.

This hygge lifestyle, represented by the Danish word “hygge” loosely translates to “cosiness” or “comfort,” but it isn’t just about making your space look Pinterest-perfect, it encompasses so much more!

It’s about creating a feeling of well-being, contentment, and connection with others.

In Denmark, where long, cold winters are the norm, hygge, as a part of Danish decor, is a way to combat the darkness and find joy in simple pleasures.

Want to bring those hygge vibes home?

Start by creating what I like to call your “cosy command centre.” Think soft, glowy lighting (maybe even twinkly lights and your growing candle collection), and spaces that practically beg people to plop down and stay awhile.

It’s about making your home the kind of place where friends “just drop by” and somehow end up staying for hours, sharing stories over hot chocolate.

Pro tip: If your living room setup has people automatically reaching for their phones instead of making conversation, it might be time for a hygge makeover.

Think comfy seating arrangements that actually let people look at each other (revolutionary, I know), and maybe that dining table you’ve been eyeing that’s perfect for long, lazy brunches with your favourite people.

Elements of Hygge Decor

Here’s your ultimate guide to hygge-fying your space (without breaking the bank or losing your mind):

Textures: Layer those chunky knit blankets like they’re going out of style (spoiler: they’re not). Throw in some faux fur pillows, a ridiculously soft rug that makes you want to cancel plans just to lie on it, and maybe that velvet accent chair you’ve been stalking online!

Lighting is Everything: Forget those harsh overhead lights that make you feel like you’re being interrogated. We’re talking warm, gentle lighting that makes everyone look like they’ve got a permanent Instagram filter. String lights, salt lamps, and enough candles to make your space look like a romantic comedy scene – that’s the move.

Bring Nature In: Think wooden accessories, some low-maintenance plants (because we’re going for calm vibes, not plant parent anxiety), and maybe that dried eucalyptus bundle you’ve been eyeing up.

Colour: Keep it cool but make it warm (yes, that makes sense in hygge-speak). Think neutral colours that feel like a warm hug – soft whites, gentle greys, and those cosy earth tones that make you want to curl up with a good book.

Furniture That Makes You Want to Stay Home: You’ll need furniture that will make you want to cancel your plans. We’re talking about that criminally comfortable oversized sofa (you know, the one that’s basically a cloud disguised as furniture), paired with a reading chair so perfect it deserves its own name. Throw in some chic ottoman pouffes because your feet deserve a throne too, and a warm wooden coffee table that looks like it could tell stories from a cosy cabin somewhere in Copenhagen.

Snug Essentials: Create little corners of joy throughout your space. Maybe it’s a reading nook that’s basically a blanket fort for grown-ups, or a coffee station that makes your morning brew feel like a spa day. It’s all about those little moments of “ahhhh” in your day.

Hygge Decor Tips for Different Rooms in the House

Hygge decor can be incorporated into every room of your house, creating a sense of warmth and tranquillity throughout.

Here are some tips for bringing hygge at home into different hygge rooms of your home:

Living Room: Create a cosy seating area with a plush sofa, load up on oversized cushions, and soft throws. Add a coffee table with a stack of books and a tray of tea or hot chocolate to encourage relaxation and comfort.

Bedroom: This is your snooze sanctuary! Opt for soft, natural bedding in neutral tones. Layer your bed with blankets and cushions for added cosiness. Consider adding a reading nook or an armchair for moments of relaxation.

Kitchen: Make this the kind of space where people actually want to hang out (even when there’s no food). Think warm wooden touches, gorgeous stone counters, and those Instagram-worthy open shelves showing off your mug collection.

Bathroom: Transform your bathroom into a spa-like sanctuary with soft towels, scented candles, and natural bath products. Incorporate plants or natural elements to create a sense of tranquillity.

Home-decor Lifestyle
5 DIY Hair Masks For High Porosity Hair

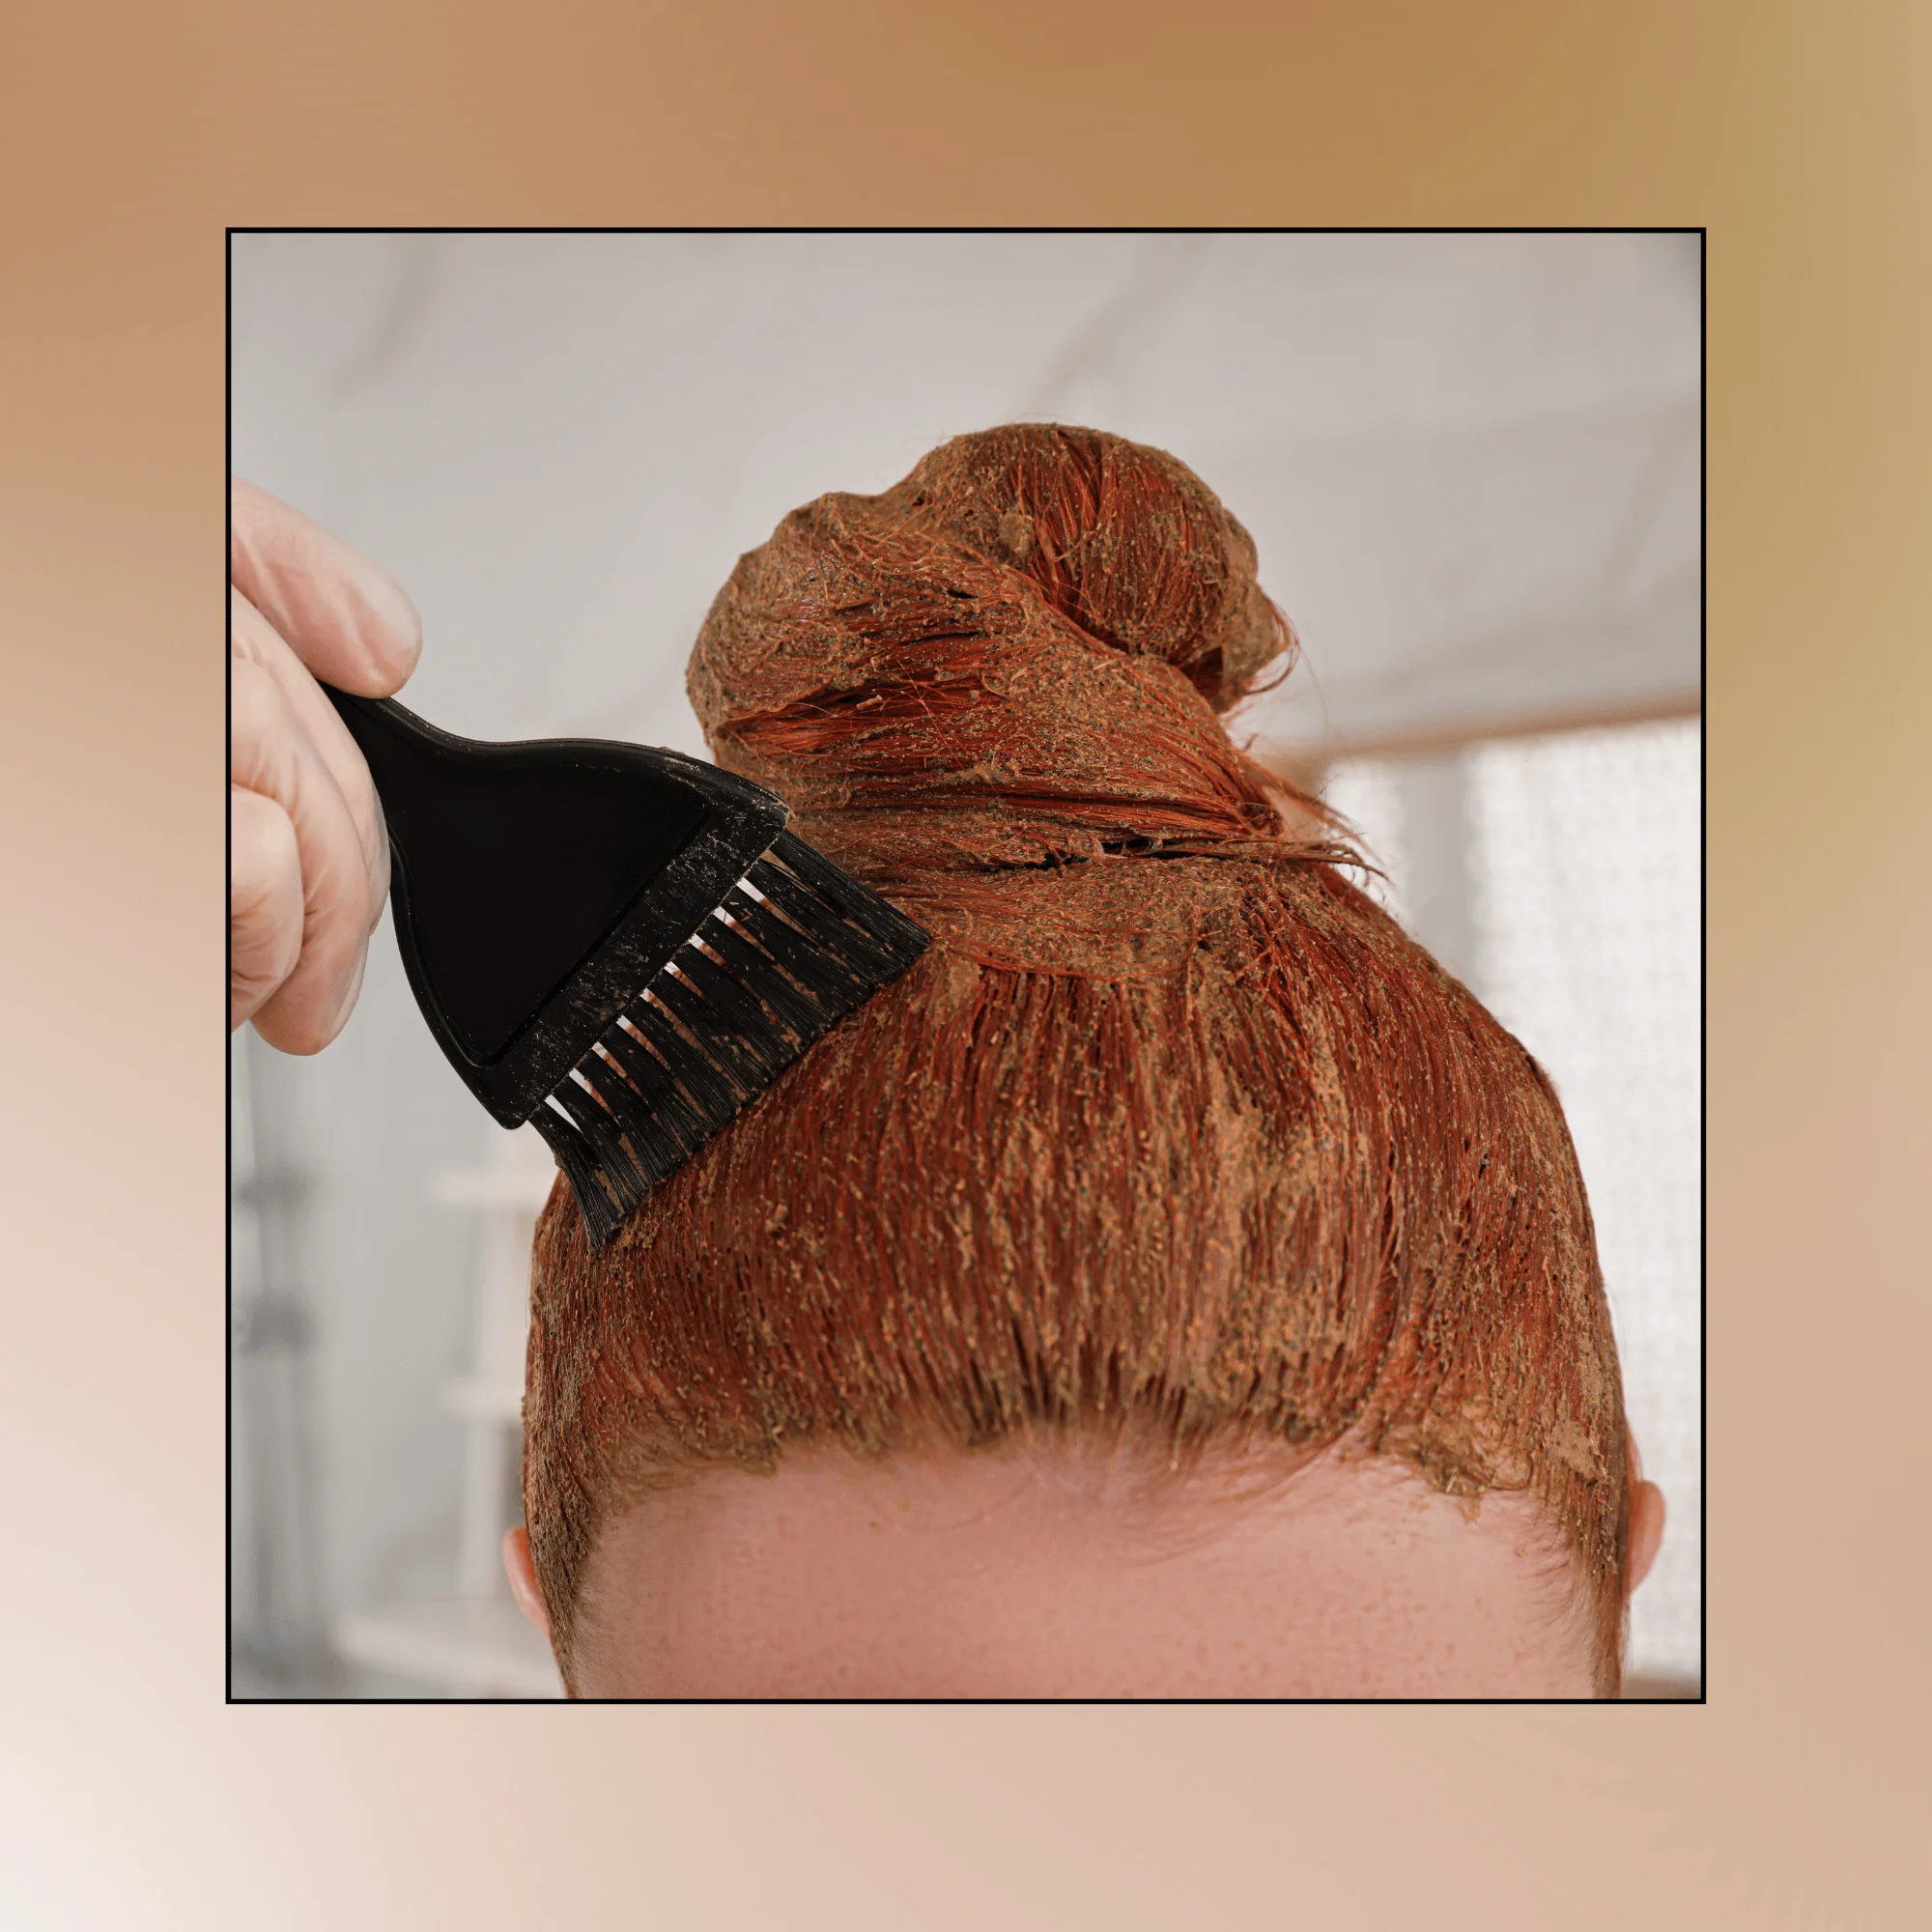
Imagine that you’ve just stepped out of the shower, hair freshly washed and conditioned. But wait—within minutes, your strands are parched, frizzy, and crying out for moisture.

Sound familiar? Welcome to the world of high porosity hair!

We’ve been focusing on high porosity hair lately and for good reason. It’s an often overlooked aspect of hair care that doesn’t always get the attention it deserves. Yet, understanding your hair’s porosity is a crucial factor in figuring out exactly what your hair needs and what might be going wrong with your current routine.

And let’s face it, our locks have been through it all. From the resurgence of Y2K-inspired crimped styles to the pandemic-induced DIY dye jobs, our hair has weathered MANY storms.

Add to that the rising awareness about hair health and texture diversity, and suddenly everyone’s wondering if their hair is low, medium, or high porosity.

But once you know what you’re dealing with, you can tailor your hair care routine to give your tresses exactly what they need.

And that’s where our fab five DIY hair masks for high porosity hair come in – they’re like a tall glass of water for your thirsty strands, with ingredients so nourishing you might be tempted to eat them!

Understanding High Porosity Hair: The Science Behind Your Strands

Before we dive into our mask masterpieces, let’s break down what’s really going on with your high porosity hair.

High porosity hair occurs when these cuticles (the protective outer layer of your hair) are lifted or damaged. This can happen due to various factors:

  1. Genetic lottery: Some of us are simply born with it. Thanks, Mum and Dad!
  2. Chemical treatments: Those gorgeous highlights might be costing you more than just pounds.
  3. Heat styling: Your flat iron might be giving you sleek looks, but it’s also opening those cuticle doors wide.
  4. Environmental factors: Sun, pollution, and hard water are not friends of your hair.

When your cuticles are raised, moisture gets in quickly, but it also escapes just as fast. This leaves you with hair that’s:

  • Prone to frizz
  • Quick to tangle
  • Easily damaged and prone to split ends
  • Difficulty holding onto colour

But here’s the silver lining!

High porosity hair is also quick to absorb nutrients. This means that when you treat it right, it soaks up all that goodness like a sponge. And that’s exactly what we’re going to do with our fabulous five DIY masks.

5 DIY Hair Masks for Your High Porosity Hair

  1. The Protein Boost Mask

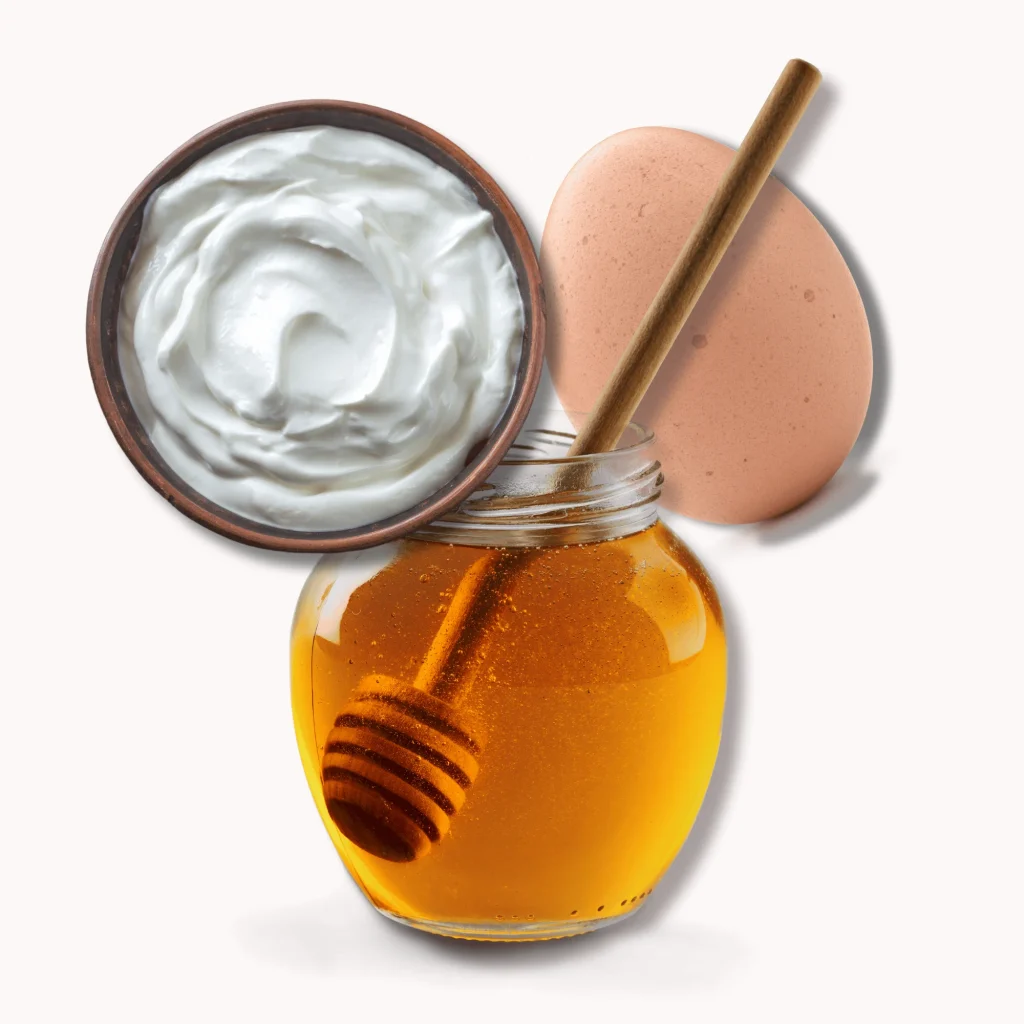
This mask provides a protein treatment that can help strengthen the hair shaft. The amino acids in the egg and yoghurt work to repair damaged hair, while honey helps retain moisture.

WHAT YOU NEED:

  • 1 egg
  • 2 tablespoons Greek yoghurt
  • 1 tablespoon honey

WHAT TO DO:

  1. In a small bowl, whisk the egg until well beaten.
  2. Add Greek yoghurt and honey, mixing until you have a smooth consistency.
  3. Apply the mask to damp hair, focusing on the lengths and ends.
  4. Massage gently into your scalp and hair.
  5. Cover with a shower cap and leave on for 30 minutes.
  6. Rinse thoroughly with cool water, then shampoo and condition as usual.
  1. The Moisture Lock Mask

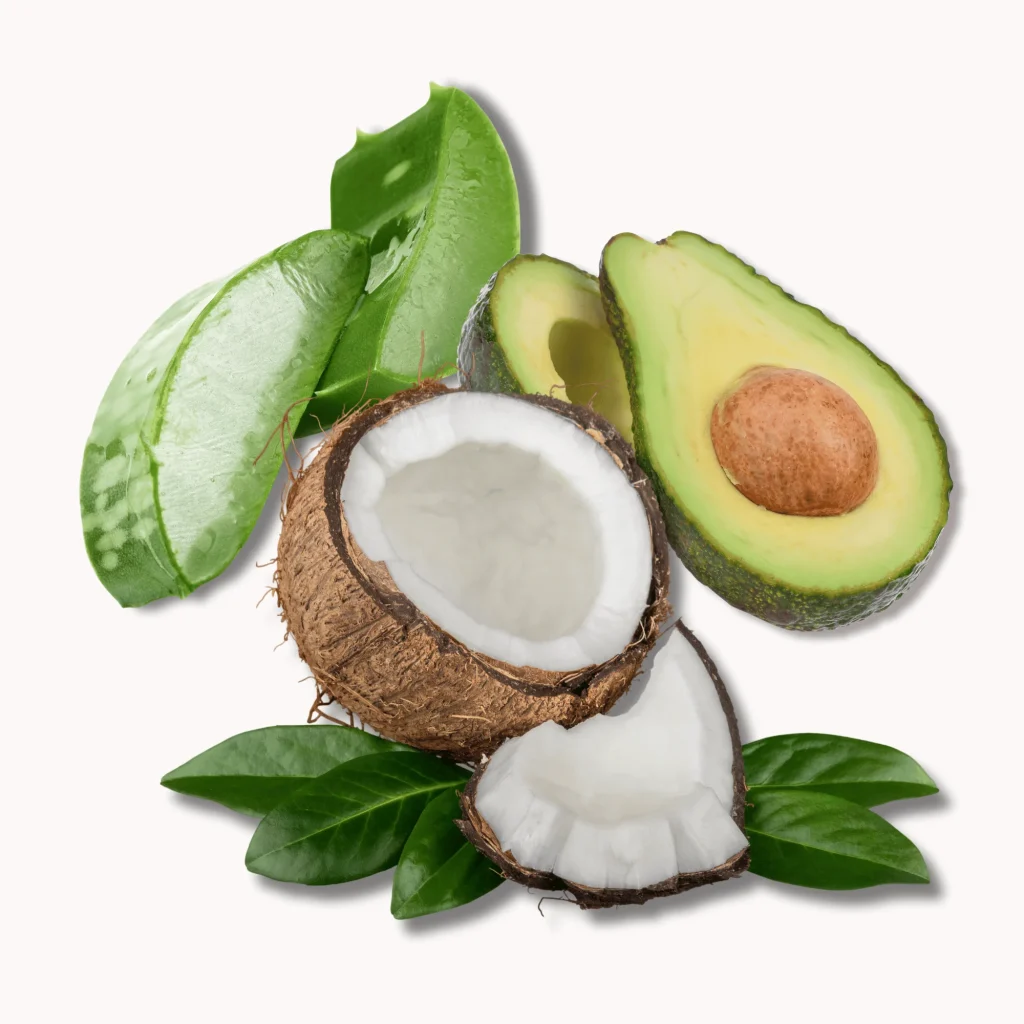
Perfect for deep conditioning, this mask helps your hair retain moisture. The healthy fats in avocado and coconut oil nourish dry hair, while aloe vera soothes the scalp.

WHAT YOU NEED:

  • 1 ripe avocado
  • 2 tablespoons coconut oil
  • 1 tablespoon aloe vera gel

WHAT TO DO:

  1. Mash the ripe avocado in a bowl until smooth.
  2. Melt the coconut oil (if solid) and add to the avocado along with the aloe vera gel.
  3. Mix well until you have a creamy consistency.
  4. Apply to damp hair from roots to tips, ensuring even coverage.
  5. Put on a shower cap and leave for 45 minutes.
  6. Rinse out thoroughly with lukewarm water, then shampoo and condition as normal.
  1. The Frizz Fighter Mask

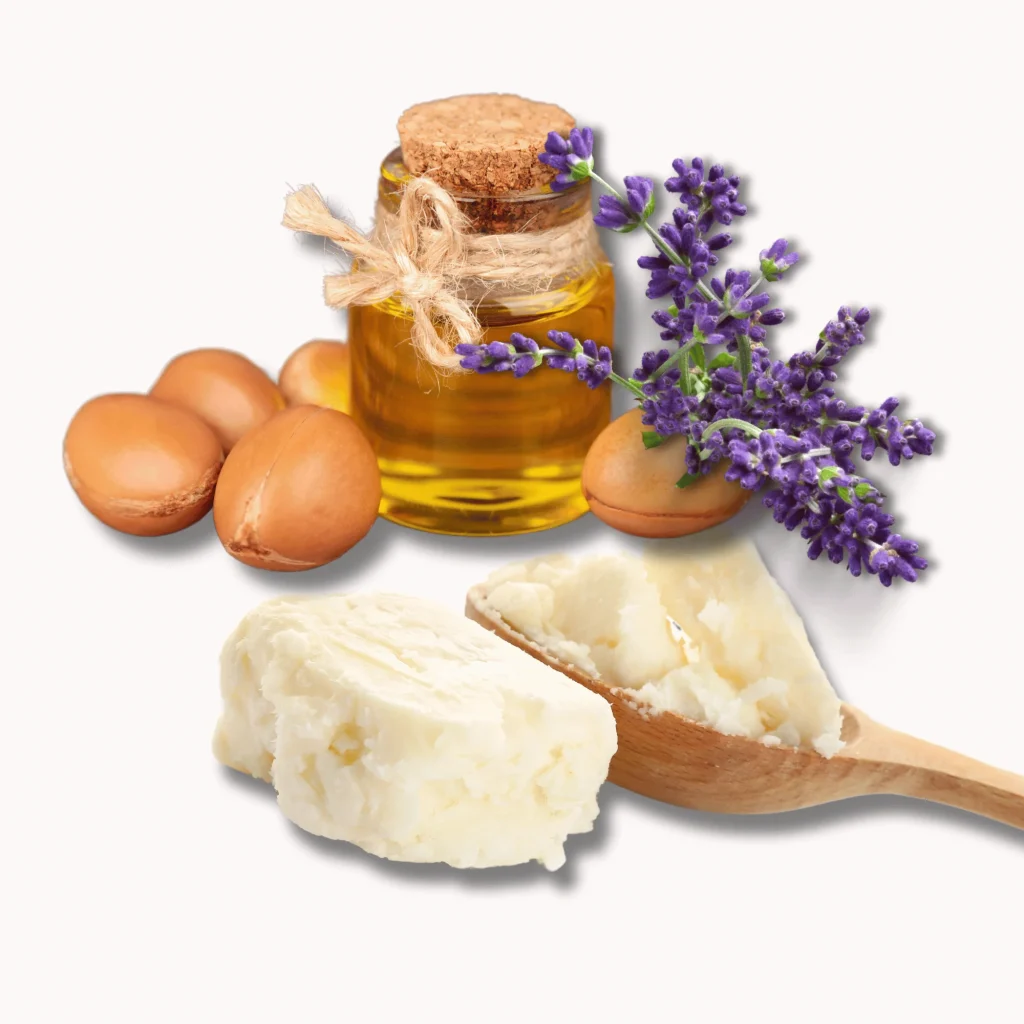
This mask helps smooth hair cuticles, reducing frizz and preventing split ends. The combination of oils provides intense hydration for your thirsty strands.

WHAT YOU NEED:

  • 2 tablespoons shea butter
  • 1 tablespoon argan oil
  • 5 drops lavender essential oil

WHAT TO DO:

  1. Melt the shea butter using a double boiler or microwave in short bursts.
  2. Once melted, remove from heat and add argan oil and lavender essential oil.
  3. Mix well and allow to cool slightly (but not solidify).
  4. Apply the mixture to damp hair, paying extra attention to frizzy areas.
  5. Comb through to ensure even distribution.
  6. Leave on for 30 minutes, then rinse thoroughly and style as usual.

  1. The Scalp Soother Mask

While focusing on hair care, don’t forget about your scalp! This mask helps balance pH levels and can alleviate itchiness often associated with dry scalp.

WHAT YOU NEED:

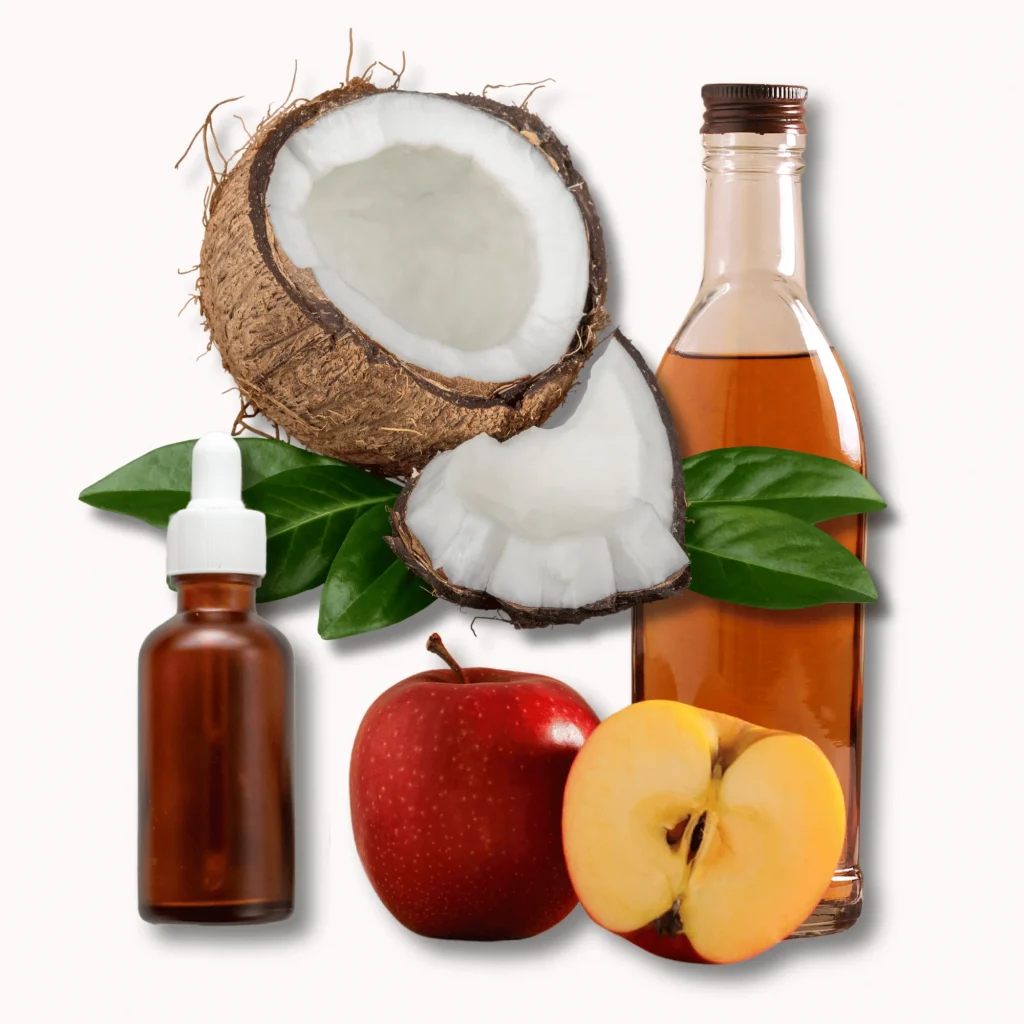
  • 2 tablespoons coconut oil
  • 1 tablespoon apple cider vinegar
  • 5 drops tea tree oil

WHAT TO DO:

  1. In a small bowl, mix coconut oil, apple cider vinegar, and tea tree oil.
  2. Part your hair into sections and apply the mixture directly to your scalp.
  3. Gently massage the mixture into your scalp for 5 minutes.
  4. Cover with a shower cap and leave on for 20 minutes.
  5. Rinse thoroughly, then shampoo and condition as normal.

  1. The Shine Enhancer Mask

This mask not only provides deep conditioning but also leaves your hair with a beautiful shine. The potassium in bananas helps strengthen hair and prevent split ends.

WHAT YOU NEED:

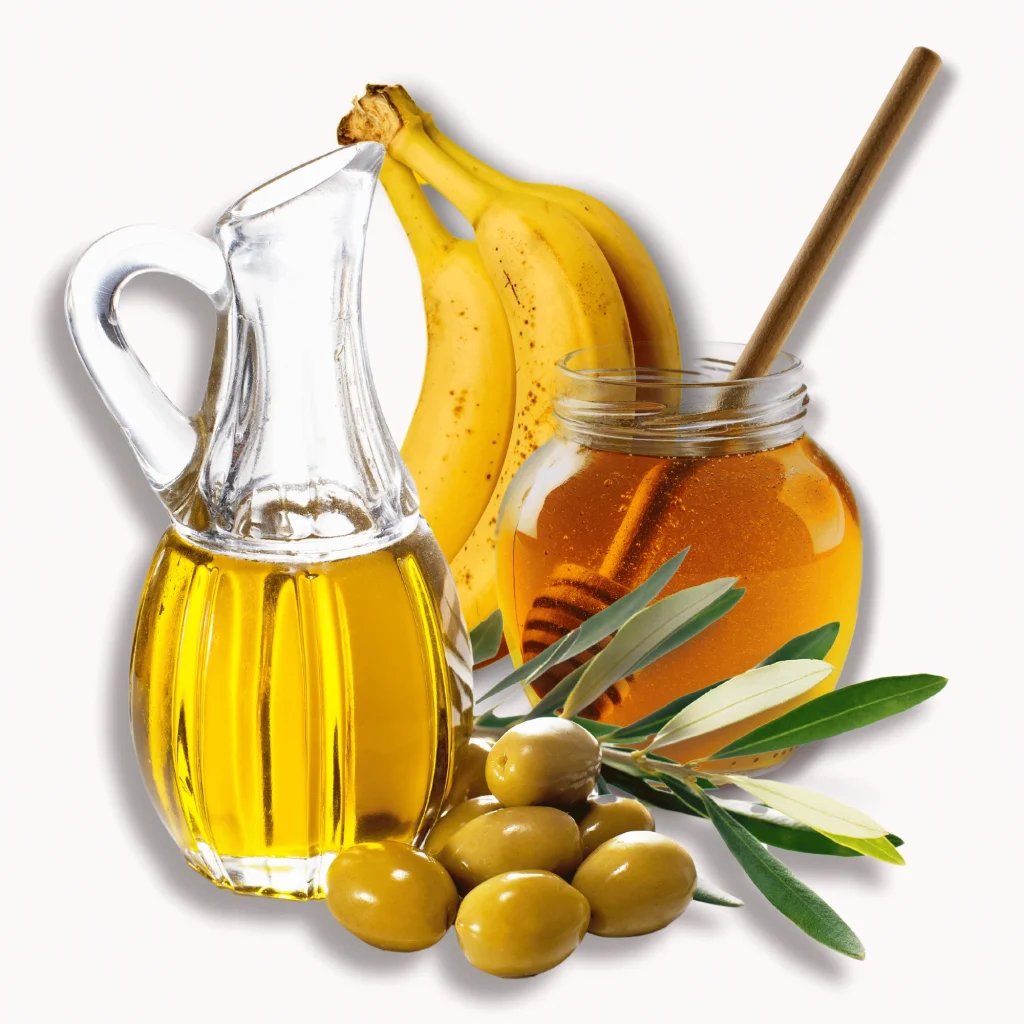
  • 1 ripe banana
  • 1 tablespoon olive oil
  • 1 teaspoon honey

WHAT TO DO:

  1. Mash the banana in a bowl until there are no lumps.
  2. Add olive oil and honey, mixing until well combined.
  3. Apply the mask to damp hair, ensuring even coverage from roots to ends.
  4. Cover with a shower cap and leave on for 30 minutes.
  5. Rinse out thoroughly with cool water, then shampoo and condition as usual.

Tips For Using These Masks

  • Be patient – it may take a few applications before you see significant improvements in your hair’s health and appearance.
  • Perform a patch test before applying any new ingredients to your hair or scalp.
  • Use these masks once a week for best results.

Additional Tips for High Porosity Hair Care

  • Limit heat styling to prevent further damage.
  • Use protective styling when possible to shield your hair from environmental stressors.
  • Always use a heat protectant when heat styling is necessary.
  • Be gentle with your wet hair, as it’s more prone to breakage.
  • Consider incorporating regular protein treatments into your hair care routine.
Beauty hair
Can You Do A Keratin Treatment On Bleached Hair? The Ultimate Guide

If you’ve ventured into the world of bleached hair and are now considering a keratin treatment, you’re in the right place.

Let’s explore whether these two hair processes can work together to give you the luscious locks you’re after.

The Bleach Effect: Understanding Your Hair’s Current State

First, let’s talk about what bleaching does to your hair. Bleaching opens up your hair cuticles and strips away both artificial and natural colours, along with a significant amount of your hair’s natural oils and proteins.

The result?

Hair that’s more porous, fragile, and often drier than before.

Keratin Treatments: A Potential Solution?

Now, let’s introduce keratin treatments. Keratin is a protein that’s naturally present in your hair, skin, and nails. Keratin treatments work by infusing your hair with this protein, aiming to smooth the hair cuticle, reduce frizz, and add shine.

According to a study, “Both the naturally damaged hair and those partially damaged by bleach treatment showed gain in their diameter after keratin treatment.’”

In fact, bleach-treated hairs increased to an average of 139 μm, a gain of nearly 49%.

To put this in perspective, that’s like your hair strands growing half as thick again!

And it’s not just about thickness. The study also noted a “significant improvement in the smoothness of the hair surface after the treatment”, making your hair so much easier to manage.

Sounds promising for bleach-stressed strands, doesn’t it?

This increase in diameter and smoothness could mean fuller-looking, more manageable hair that’s easier to style and less prone to tangling.

The Big Question: Can You Use Keratin On Bleached Hair?

The short answer is: YES, you can. However, there are some important factors to consider.

Bleached hair can actually benefit from a keratin treatment in several ways:

  1. Damage Control: Keratin can help repair some of the damage caused by bleaching.
  2. Moisture Retention: The treatment can help your hair retain moisture better.
  3. Frizz Reduction: It can significantly reduce the frizz that often accompanies bleached hair.
  4. Improved Manageability: Keratin can make your hair easier to style.

However, there are potential risks to be aware of:

Potential Risks To Consider

  1. Further Damage: If your hair is severely damaged from bleaching, the heat used in keratin treatments could cause more harm.
  2. Colour Changes: Some keratin treatments can slightly alter the colour of your bleached hair.
  3. Protein Overload: Too much protein can lead to brittleness and breakage.
  4. Allergic Reactions: Some people may be sensitive to the chemicals used in keratin treatments.

How To Safely Apply Keratin to Bleached Hair

If you decide to proceed with a keratin treatment, here’s how to approach it safely:

  1. Assess Your Hair’s Health

Before considering a keratin treatment, evaluate your hair’s condition. If it’s breaking easily, feels gummy when wet, or is extremely dry and brittle, it might be best to postpone the treatment and focus on hair health first.

  1. Consult a Professional

When it comes to chemically treating already processed hair, it’s best to seek professional help. A skilled stylist can assess your hair’s condition and recommend the best course of action.

  1. Choose The Right Treatment

Not all keratin treatments are created equal. Some are gentler and more suitable for bleached hair. Ask your stylist about options like Brazilian Blowout, Cezanne, or Keratin Complex.

  1. Prepare Your Hair

In the weeks leading up to your treatment:

  • Deep condition regularly
  • Avoid heat styling
  • Use protein-rich hair masks
  1. Timing is Key

If you’ve recently bleached your hair, wait at least two weeks before getting a keratin treatment. Your hair needs time to recover.

  1. Aftercare is Crucial

Post-treatment care can significantly impact your results. Follow your stylist’s instructions carefully, which typically include:

  • Waiting 48-72 hours before washing your hair
  • Using sulphate-free shampoos
  • Avoiding swimming in chlorinated water
  • Avoiding hair ties and clips for a few days

What To Expect: The Results

If done correctly, a keratin treatment on bleached hair can provide:

  • Smoother, shinier hair
  • Reduced frizz
  • Easier styling
  • Healthier-looking locks

Remember, while the results can be impressive, it’s not a miracle cure. Your hair is still bleached and will require ongoing care.

Maintaining Your Treated Hair

To keep your hair looking its best after a keratin treatment:

  1. Use Appropriate Products: Stick to sulphate-free, colour-safe shampoos and conditioners.
  2. Heat Protection: Always use a heat protectant before styling.
  3. Regular Trims: Keep those ends healthy with regular trims every 6-8 weeks.
  4. Deep Conditioning: Make deep conditioning treatments a part of your routine.
  5. Avoid Over-Washing: Try to extend the time between washes.

Alternatives to Keratin Treatments

If you decide a keratin treatment isn’t right for you, consider these alternatives:

  1. Olaplex Treatments: These can help rebuild the bonds in your hair.
  2. Leave-In Conditioners: For daily moisture and frizz control.
  3. Hair Oils: A little can add shine and smoothness.
  4. Silk Pillowcases: To reduce friction and breakage while you sleep.
  5. Bond-Building Products: Look for at-home treatments that focus on repairing hair bonds.

Conclusion

Can you do a keratin treatment on bleached hair? Yes, but it requires careful consideration, professional help, and ongoing maintenance.

If done correctly, it can significantly improve the look and feel of your bleached hair.

FAQs

Q. How long does a keratin treatment last on bleached hair?
A. Typically, a keratin treatment can last 3 to 6 months on bleached hair, depending on your hair care routine.

Q. Will a keratin treatment darken my bleached hair?
A. It might slightly. Some keratin treatments can add a bit of warmth to your colour. Discuss this possibility with your stylist.

Q. How much does a keratin treatment cost?
A. On average, you can expect to pay anywhere from £150 to £300 for a keratin treatment in the UK. High-end salons in central London might charge £400 or more. Some salons offer mini keratin treatments or express versions which might cost less, starting around £90-£120.

Q. Can I bleach my hair after a keratin treatment?
A. It’s not recommended. Wait at least a month after your keratin treatment before considering any colour services.

Beauty hair
How To Treat Low Porosity Hair: 10 Care Tips

If you’ve ever felt like your hair is beautiful but impossibly difficult to deal with – you might be battling with low porosity hair.

Don’t worry, you’re not alone!

As someone who’s experienced these challenges firsthand, I’m here to share what I’ve learned about caring for low porosity hair.

From understanding the science behind it to discovering effective treatments, this guide will help you develop a hair care routine that works.

Let’s dive in and learn how to make your low porosity hair more manageable and healthy.

What Is Low Porosity Hair?

Before we jump into the care tips, let’s break down what low porosity hair actually is.

Think of your hair shaft as a pine cone. If it’s tightly packed together, barely letting anything in or out, that’s low porosity hair for you.

The cuticles of your hair are like overlapping scales, and in low porosity hair, they’re practically hugging each other.

This tight formation means that water, oils, and hair products have a hard time penetrating the hair shaft. It’s like trying to get into an exclusive club without being on the list – not impossible, but definitely a challenge!

Signs You Might Have Low Porosity Hair

Not sure if you’re in the low porosity club? Here are some telltale signs:

  1. Your hair takes forever to get wet in the shower
  2. Products tend to sit on top of your hair rather than absorbing
  3. Your hair is prone to product buildup
  4. It takes ages for your hair to air-dry
  5. You often deal with dry hair, even after moisturizing

If you’re nodding along to these points, welcome to the club! Now, let’s get to the good stuff – how to treat your low porosity hair…

10 Game-Changing Care Tips for Low Porosity Hair

  1. Embrace the Power of Warm Water

Remember how we said low porosity hair is like an exclusive club? Well, warm water is your VIP pass.

When washing your hair, use warm water to open up those tightly packed cuticles. This allows moisture and products to penetrate the hair shaft more easily.

But don’t go overboard with the heat though, extremely hot water can damage your hair and strip it of its natural oils.

  1. Pre-poo Like a Pro

Pre-pooing is the act of applying oil to your hair before shampooing. This helps to protect your hair from the potentially drying effects of shampoo.

For low porosity hair, lightweight oils are your best friend. Try jojoba oil or grapeseed oil – they absorb easily without weighing down your hair.

  1. Clarify Regularly

Product buildup is the arch-nemesis of low porosity hair.

All those products that don’t quite penetrate can accumulate over time, leaving your hair feeling heavy and looking dull.

Use a clarifying shampoo once a month to remove this buildup. Think of it as a reset button for your hair. Just be sure to follow up with a deep conditioning treatment to restore moisture.

  1. Deep Condition with Heat

Deep conditioning is crucial for low porosity hair, but you need to add heat to the equation.

Apply your deep conditioner, then sit under a hooded dryer or use a heat cap for 20-30 minutes.

If you’re feeling fancy (or just don’t have a heat cap), wrap your hair in a warm, damp towel. The heat helps to lift the cuticles, allowing the conditioner to penetrate more deeply.

  1. Try the ‘Green House Effect’

No, we’re not talking about climate change (though that’s important too!). The Green House Effect is a method of deep conditioning that works wonders for low porosity hair.

Here’s how it works:

  1. Apply your favourite leave-in conditioner or oil to damp hair
  2. Cover your hair with a shower cap or plastic bag
  3. Wrap a warm towel around the cap
  4. Leave it on overnight

The heat generated by your scalp, combined with the products, creates a mini greenhouse effect that helps to deeply moisturise your hair so you can wake up to softer, more manageable locks!

  1. Layer Your Products

When it comes to low porosity hair care, think of your products like a delicious hair care sandwich. Start with the lightest, most water-based products and work your way up to the heaviest.

A good routine might look like this:

  1. Leave-in conditioner
  2. Lightweight oil
  3. Cream
  4. Gel or styling product

This layering technique helps to lock in moisture and ensures that each product has the best chance of being absorbed.

  1. Embrace Protein-Free Products

While protein can be great for some hair types, low porosity hair often doesn’t need much additional protein.

In fact, too much protein can leave your hair feeling dry and brittle. Instead, look for moisturising, protein-free products to keep your hair hydrated without overloading it.

  1. Steam It Up

Remember how warm water helps to open up your hair cuticles? Well, steaming takes that concept to the next level.

Invest in a hair steamer or create your own steam treatment at home. Apply your favourite deep conditioner, then sit in a steamy bathroom for 20-30 minutes. Your hair will drink up the moisture like a sponge absorbing water.

  1. Be Patient with Air Drying

Low porosity hair takes its sweet time to dry. While it can be tempting to reach for the blow dryer, try to embrace air drying when you can.

Heat styling tools can be harsh on your hair, leading to damage and dryness over time.

If you must use heat, always use a heat protectant and keep the temperature on the lower side. Think of it like sunscreen for your hair – a little extra step that goes a long way in protection.

  1. Don’t Overdo It

When it comes to low porosity hair care, less is often more.

It’s easy to fall into the trap of thinking that if a little product is good, a lot must be better. But too many products can overwhelm low porosity hair.

Use products sparingly and focus on techniques that help your hair absorb moisture. Quality over quantity is the name of the game here.

Creating Your Low Porosity Hair Care Routine

Now that we’ve covered the tips for taking care of low porosity hair, let’s put it all together into a hair care routine.

  1. Start with a clarifying shampoo once a month to remove buildup.
  2. On regular wash days, use warm water and a sulphate-free shampoo.
  3. Apply a deep conditioner and use heat for 20-30 minutes.
  4. Rinse with cool water to seal the cuticles.
  5. Apply a leave-in conditioner to damp hair.
  6. Layer on a lightweight oil and cream.
  7. Style as desired, using minimal heat.
  8. Allow your hair to air dry when possible.

Remember, consistency is key. Your hair didn’t become low porosity overnight, and it won’t transform overnight either.

Be patient and give your new routine a little time to work its magic.

Beauty hair
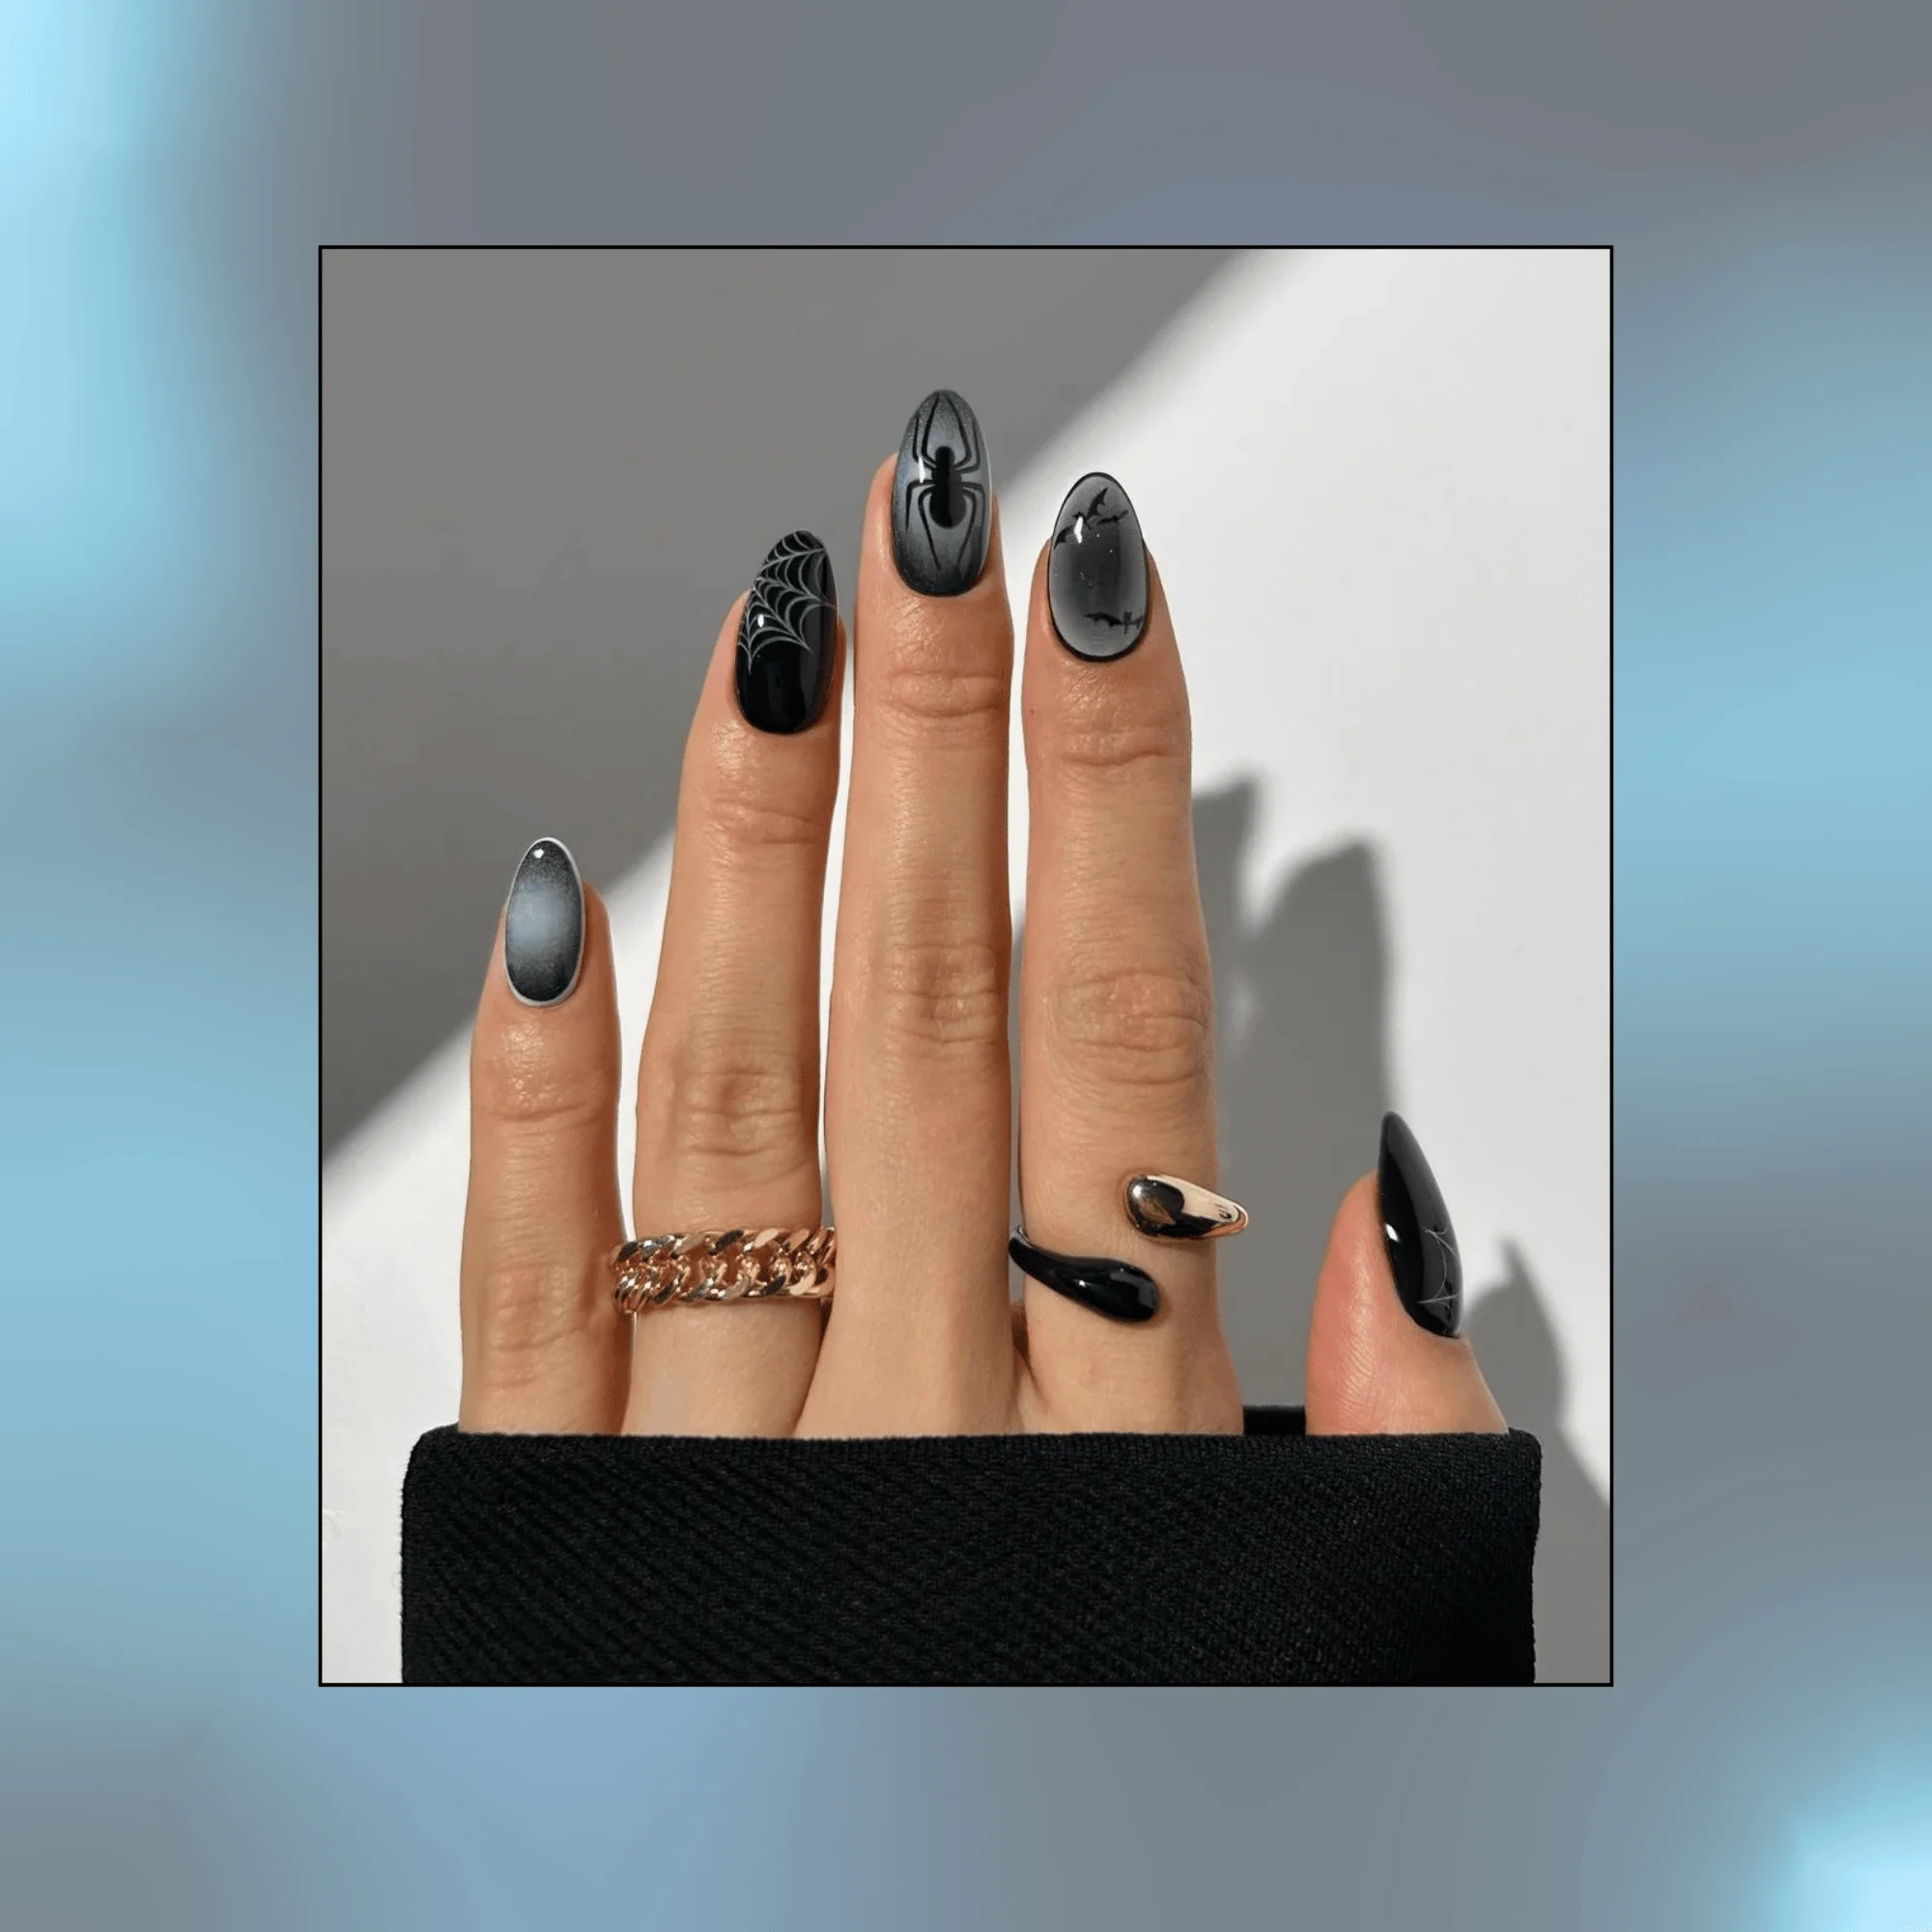
Spooktacular Halloween Nails: 10 Bewitching Designs To Die For

Halloween nails are the perfect way to add a dash of spooky spirit to your October look.

As the leaves turn and pumpkin spice everything takes over, why should your fingertips miss out on all the fun?

From nail art novices to manicure maestros, there’s a Halloween-inspired design out there that’s sure to cast a spell on everyone.

This year, we’re seeing it all – subtle, sophisticated nods to the holiday and full-on fright fest fingertips. Picture miniature jack-o’-lanterns grinning from your ring finger, delicate cobwebs spanning your nail beds, or even some Frankenstein-inspired stitches that are more chic than shriek.

Feeling a bit spooked by the thought of intricate designs? No worries!

We’ve got ideas for every skill level. Simple colour combos that scream “Halloween,” and easy-to-do patterns that’ll have everyone thinking you spent hours at the salon – we’ve got them all.

Ready to get your claws, err… nails, into some frighteningly fabulous designs? Let’s go!

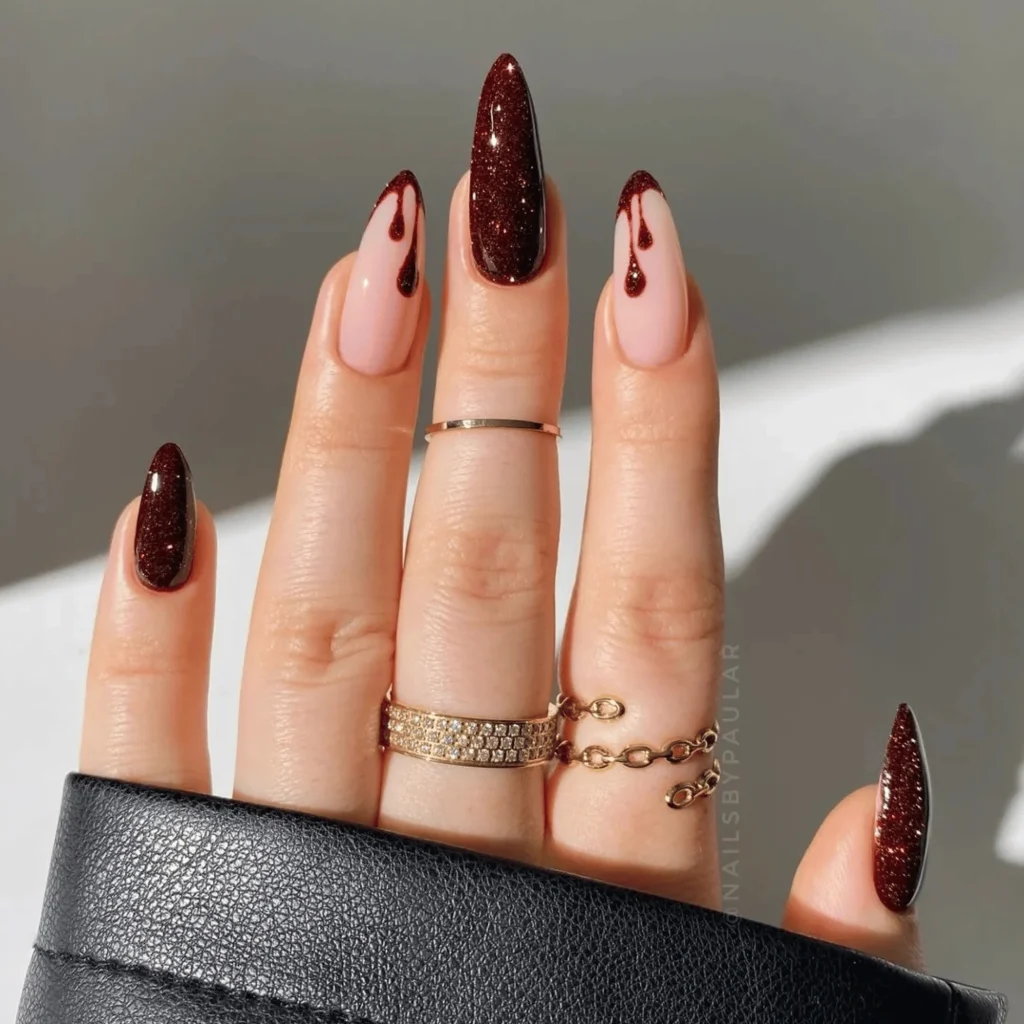
  1. Bloody Glam

This blood-inspired design is perfect for those who like their Halloween with a side of sophistication. The deep burgundy glitter paired with pale pink and those artful “drips” give a nod to vampire chic without going full Dracula.

  1. Minimalist Cat Eyes

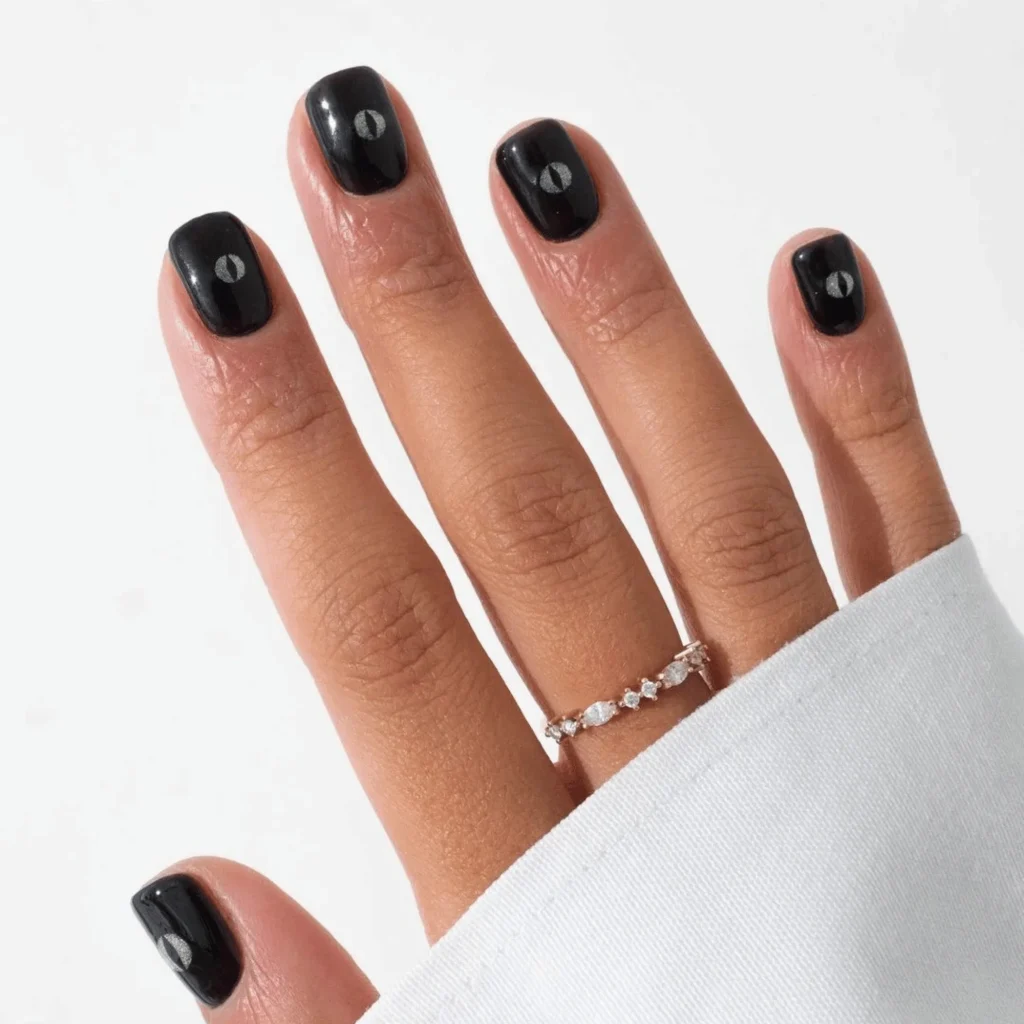
This manicure offers a sleek, modern take on Halloween nails. The base is a glossy black polish, and each nail features a simple, white crescent shape resembling a cat’s eye or a sliver of moon. It’s a subtle nod to the spooky season that could easily transition into everyday wear.

  1. Vampy Red Ombre

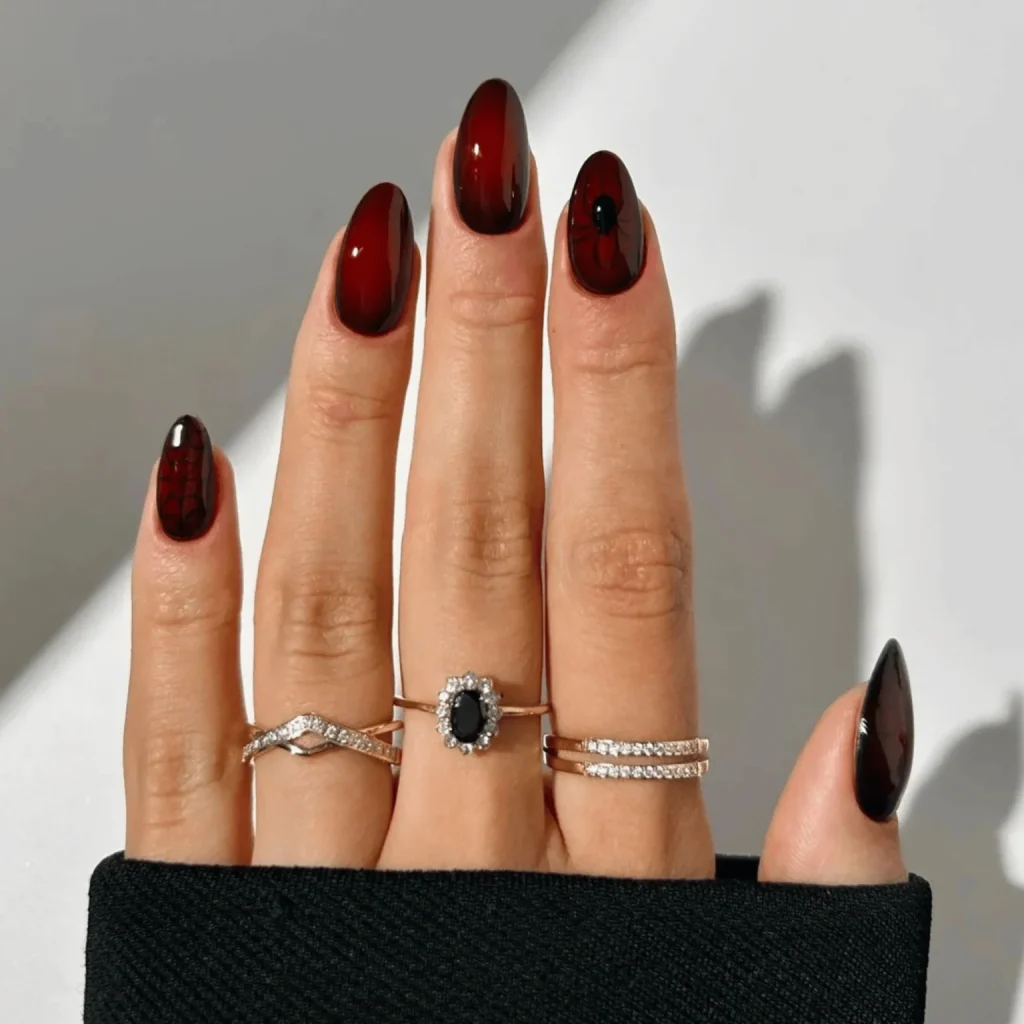
This fiery ombre design is hot enough to make even a vampire blush. The deep red gradient with a delicate spider accent is perfect for those who like their Halloween style more sultry than spooky.

  1. Starry Night Bats

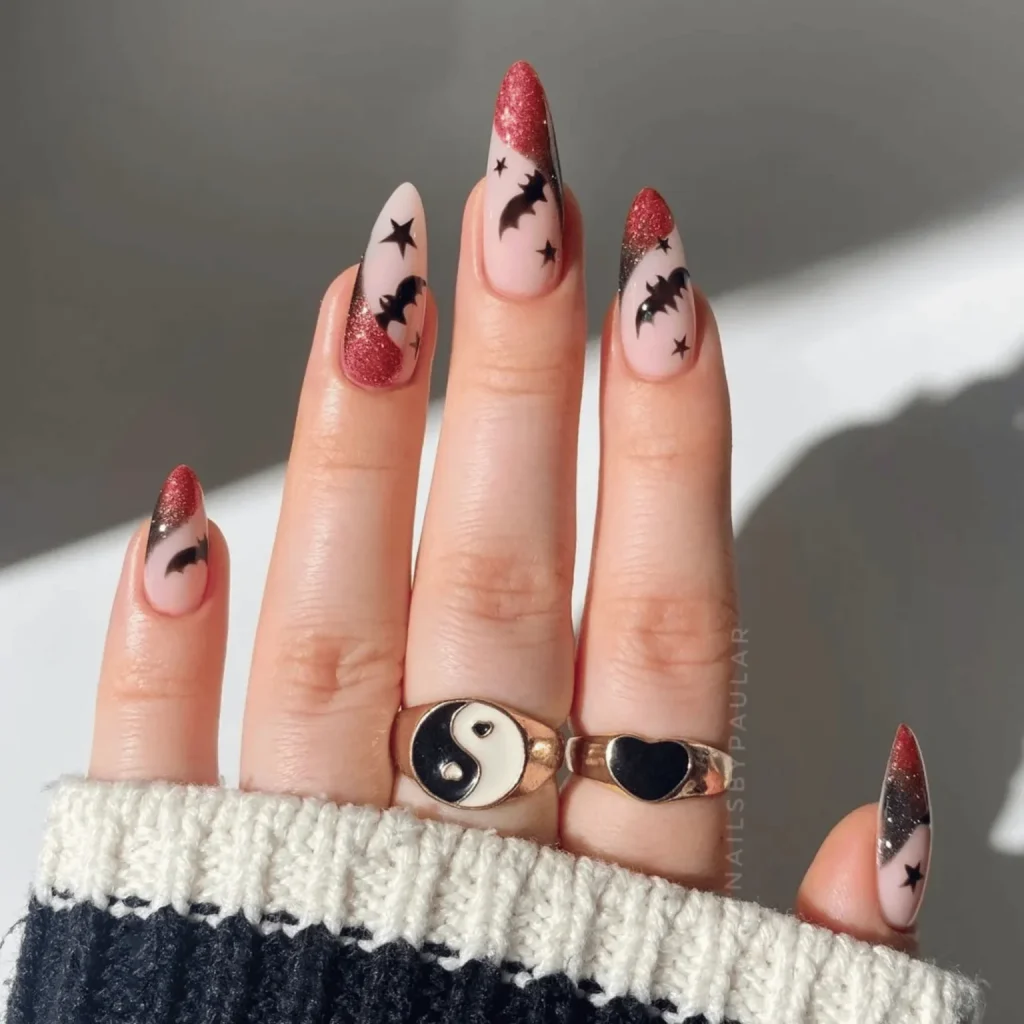
Who says bats can’t be cute? This design, with its glittery tips and playful bat silhouettes, is a sweet take on Halloween nail art.

  1. Whimsical Cats

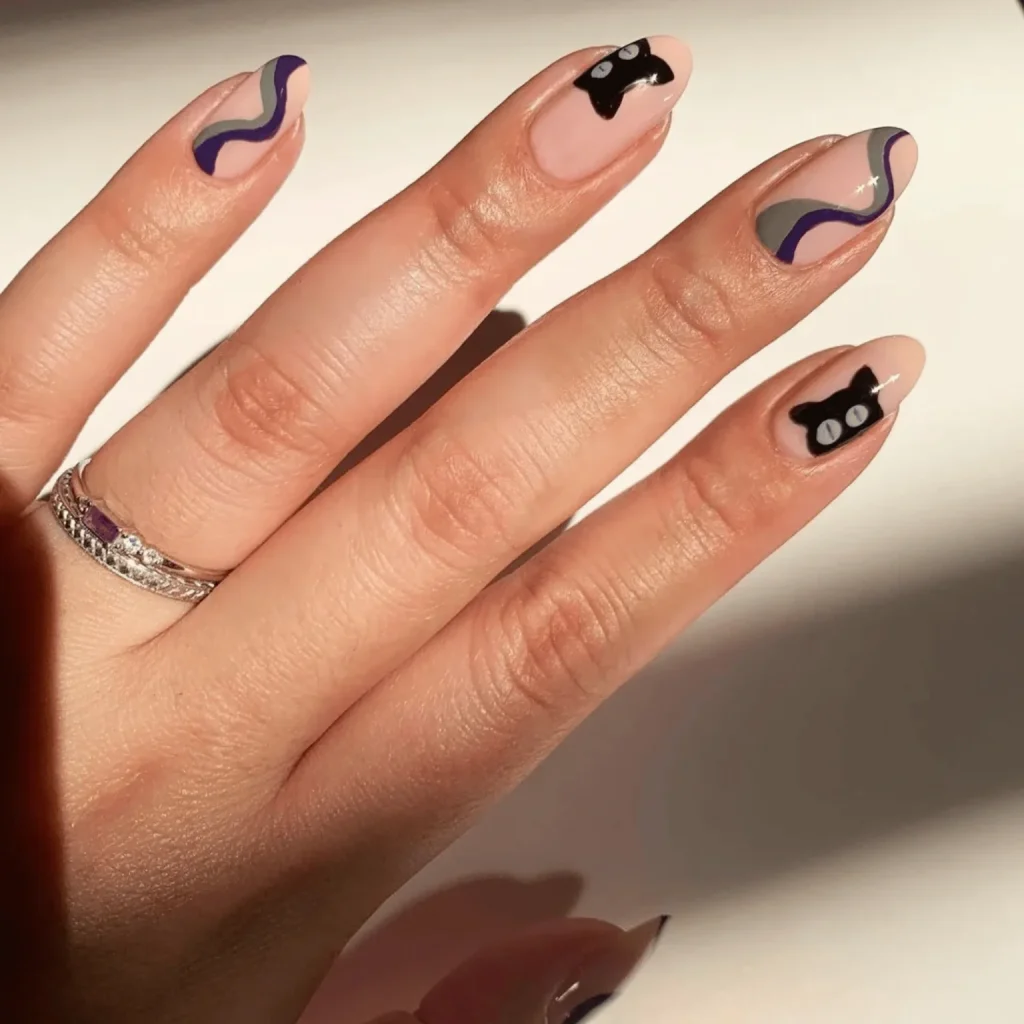
With its swirly patterns and cute black cats, this playful design brings a touch of magic to your fingertips. It’s ideal for those who believe that every day is a good day to pet a black cat and cast a little charm.

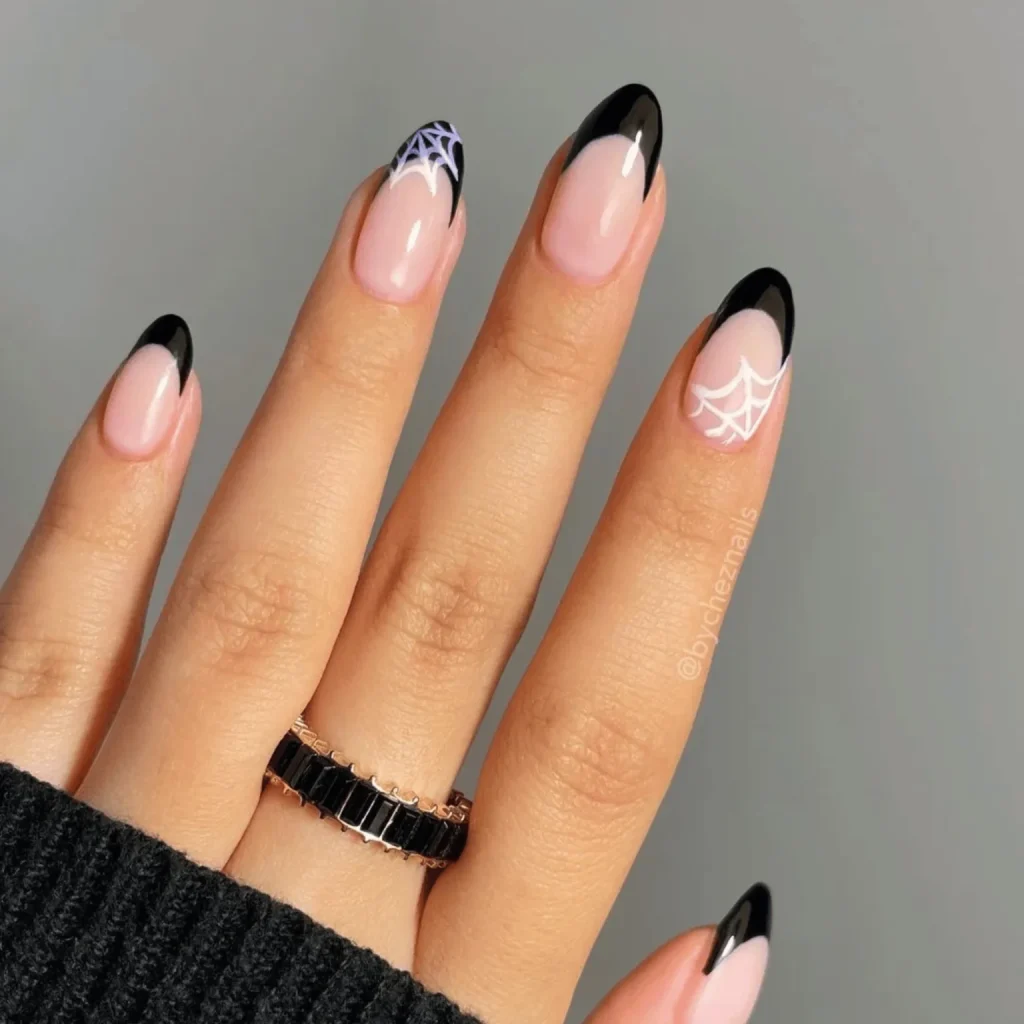
  1. Spiderweb Chic

Who says spiderwebs have to be creepy? This elegant manicure features a classic French tip with a twist – or should we say, a web? The black tips are accented with delicate white cobweb designs, giving it a sophisticated Halloween vibe – perfect for those who want to keep one foot in the office and one in the haunted house!

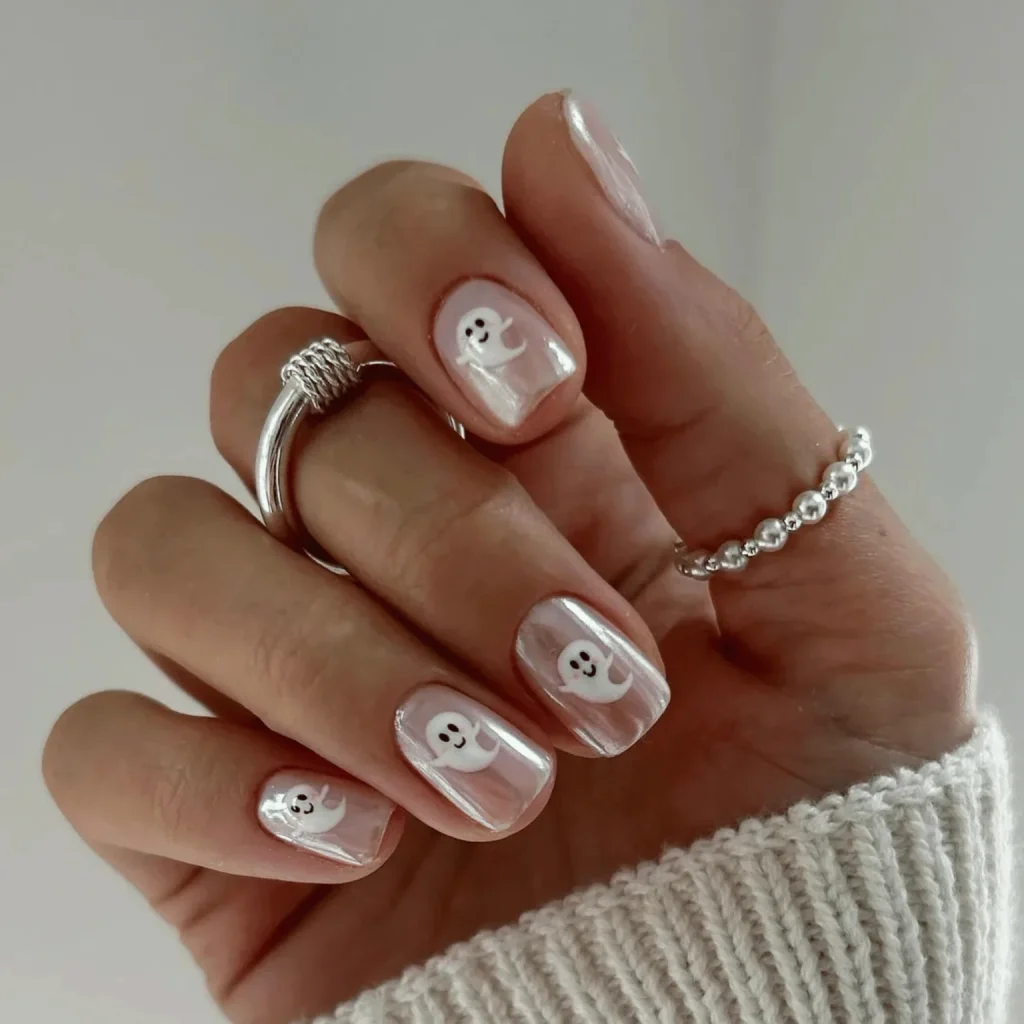
  1. Friendly Phantom French

A pearlescent base sets the stage for adorable little ghosts that look more “boo-tiful” than scary. It’s a playful take on the classic French manicure that’s sure to lift spirits wherever you go!

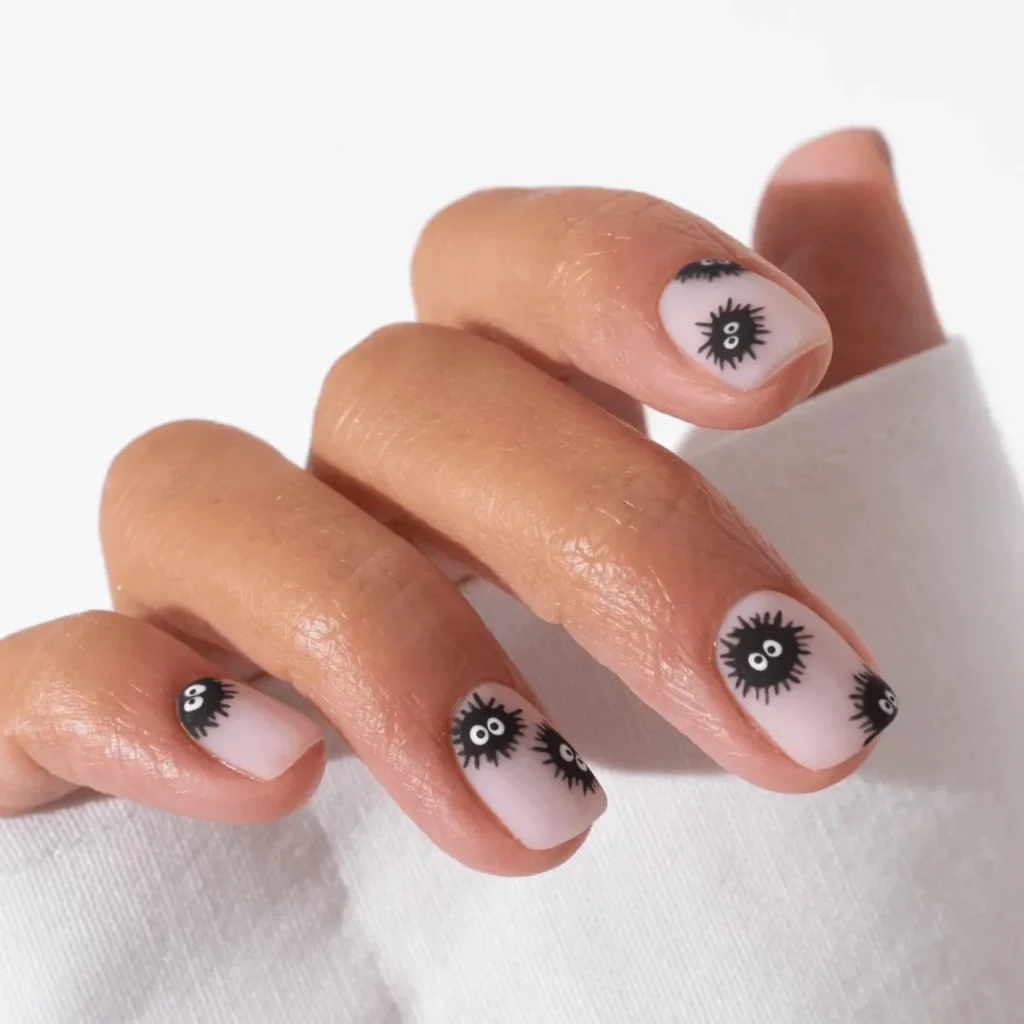
  1. Soot Sprite Sweetness

Calling all Studio Ghibli fans! These nails feature charming little soot sprites (or are they fuzzy Halloween monsters?) on a pale pink base. It’s a whimsical design that’s equal parts cute and spooky.

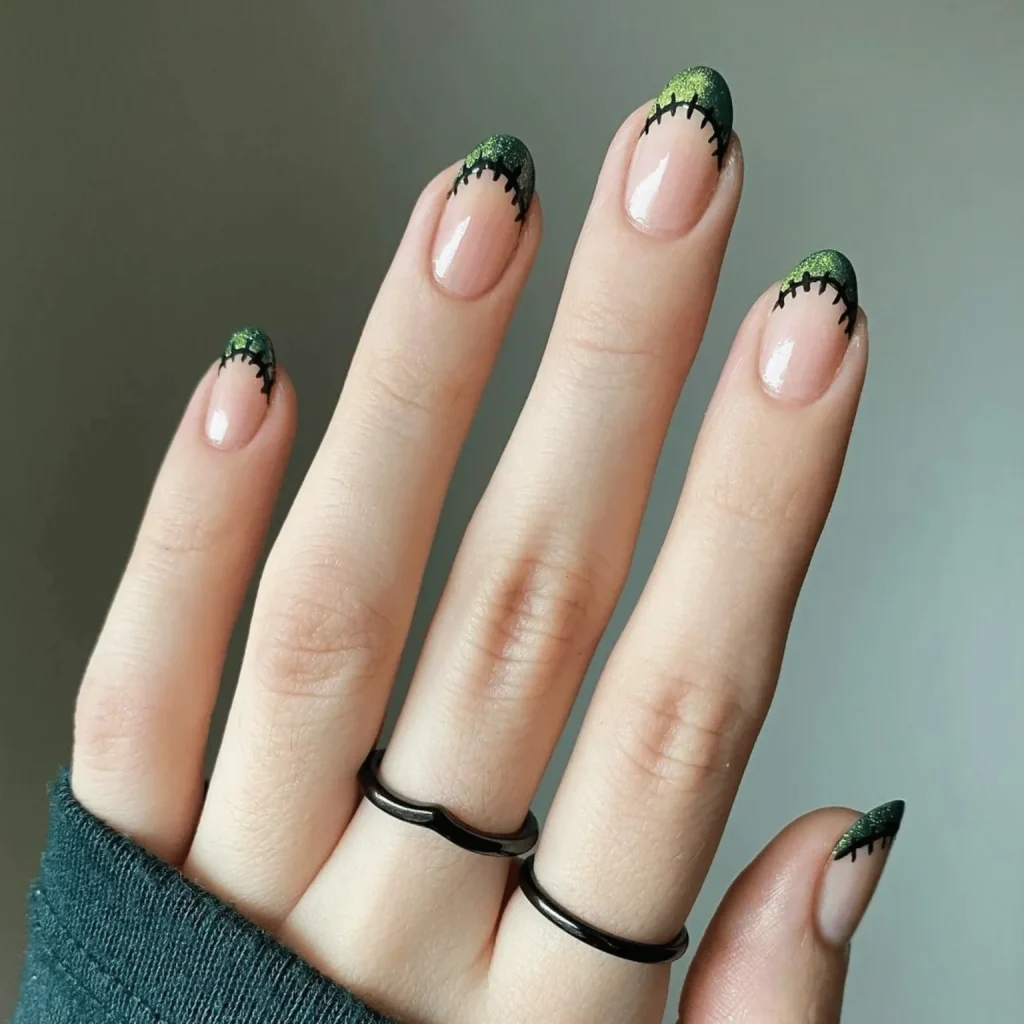
  1. Frankenstein’s Fancy Tips

It’s alive! This nail art brings Frankenstein’s monster to your fingertips with a chic twist. The natural pink base is topped with glittery green tips, complete with tiny black stitches. It’s a subtle nod to the classic monster that’s more high-fashion than high-voltage!

  1. Horror Movie Mani-fest

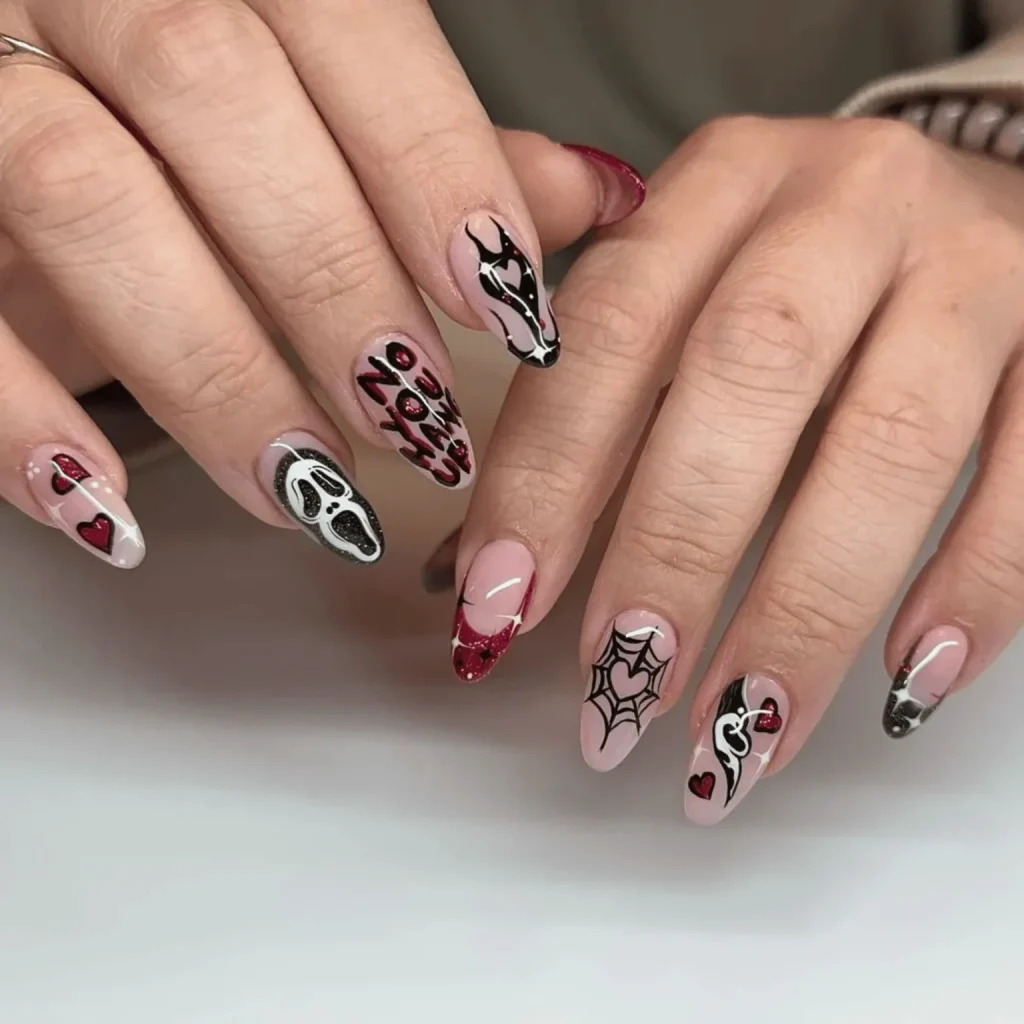
This set is a love letter to classic horror films. Each nail tells a different spooky story – from the iconic “Scream” mask to a blood-red French tip. There’s even a cobweb heart for those who find romance in the macabre.

Beauty Nails
5 Foolproof Ways To Remove Green Tones From Bleached Hair

So, you took the plunge and went blonde, but now your hair’s giving off more mermaid vibes than Marilyn Monroe glamour? Don’t panic!

That greenish tint haunting your tresses is a common side effect of bleaching, but it doesn’t have to be your new permanent look.

Maybe you’ve been swimming in a chlorine-heavy pool, or perhaps your hair just decided to play a cruel prank on you.

Either way, that unwanted green hue can make you want to hide under a hat until your next salon appointment.

But before you resign yourself to looking like you lost a fight with a bottle of food colouring, take a deep breath. We’ve got your back – and your hair!

In this post, we’re exploring the world of hair chemistry (don’t worry, no lab coat required) to bring you five foolproof methods to kick that green tint to the curb.

From kitchen cupboard remedies to salon-worthy treatments, we’ll cover options for every budget and comfort level to remove green tones from bleached hair.

Ready to reclaim your blonde hair?

Let’s turn that green mean machine back into the luscious locks you’ve been dreaming of.

Why Does Bleached Hair Turn Green?

Before we dive into solutions, it’s helpful to understand why this green tint appears in the first place. The science behind it is actually quite simple.

According to the International Journal of Trichology, green hair “is a hair dyschromia characterized by green coloring of the hair due to insoluble copper deposits which fix to the cortex of the hair with “a priori” damage to the cuticle.”

You might think that should be no big deal but for people with bleached hair, those strands are more porous than natural hair, which means it’s more susceptible to absorbing minerals and other substances.

“The most frequent origin of this condition is direct contact with domestic running water or swimming pool water with a high copper content.” Over time, or with exposure to air and other oxidising agents, these copper ions oxidise.

The oxidation process turns the copper green – similar to how the Statue of Liberty turned green over time. This oxidised copper is what gives the hair its greenish tint.

How To Do A Strand Test

Before diving in and treating all your hair, always perform a strand test. This simple step can save you from potential hair disasters.

Here’s how to do it:

  1. Choose a small, hidden section of hair, preferably near the nape of your neck or behind your ear.
  2. Apply your chosen treatment to this small section, following the instructions as you would for your whole head.
  3. Leave it on for the recommended time, then rinse and dry the strand.
  4. Examine the results. Check for any adverse reactions like excessive dryness, breakage, or unexpected colour changes.
  5. If you’re happy with the results and there’s no damage, proceed with treating your whole head. If not, try adjusting the method or consider a different treatment.

Remember, it’s better to spend a few extra minutes on a strand test than to risk damaging all your hair.

Now that we understand the cause of the dreaded green tint, and how to do a strand, let’s move on to the solutions.

5 Easy Ways To Remove Green Tint From Bleached Hair

  1. Ketchup Cure
    Yes, you read that right! The same condiment that goes on your fries can save your hair.
  • How it works: Ketchup contains red pigments that neutralise green tones due to the principle of colour theory. Red and green are opposite on the colour wheel, so they cancel each other out. The acidity in ketchup also helps to break down mineral buildup.
  • What to do: Apply ketchup to damp hair, let it sit for 15-30 minutes, then rinse and shampoo.
  • Pro tip: Use a shower cap to avoid a mess (and to keep from craving burgers).
  1. Baking Soda Blast

Time to raid your pantry for this powerful, yet gentle solution.

  • How it works: Baking soda is a mild abrasive and has a high pH, which helps to open the hair cuticle. This allows it to effectively scrub away mineral buildup and chlorine deposits that cause the green tint.
  • What to do: Mix baking soda with water to form a paste. Apply to damp hair, gently massage, and rinse after 2-3 minutes.
  • Caution: Don’t overdo it – baking soda can be drying if used too often.
  1. Vitamin C Vibes
    Give your hair a dose of this immune-boosting vitamin.
  • How it works: Vitamin C is ascorbic acid, which acts as a reducing agent. It breaks down the chlorine and mineral deposits that cause the green tint. It also helps to strip away some of the oxidized copper particles.
  • What to do: Crush vitamin C tablets and mix with shampoo. Apply to damp hair, leave for 5-10 minutes, then rinse.
  • Bonus: Your hair might smell citrusy fresh!
  1. Apple Cider Vinegar Rinse
    ACV isn’t just for your salad dressing anymore.
  • How it works: ACV is acidic, which helps to balance the hair’s pH after exposure to alkaline substances like chlorine. It also helps to close the hair cuticle, making it smoother and less likely to trap minerals. The acidity can break down mineral deposits as well.
  • What to do: Mix equal parts ACV and water. Use as a final rinse after shampooing.
  • Heads up: The smell dissipates once your hair dries, we promise!
  1. Professional Toning Treatment

When all else fails, it’s time to call in the pros.

  • How it works: Professional toners contain pigments specifically designed to neutralise unwanted tones in hair. For green tints, a toner with red or violet pigments would be used to counteract the green, based on colour theory principles.
  • What to do: Book an appointment with your stylist and let them work their magic.
  • Pro tip: This is a great option if you’re nervous about DIY treatments.

Remember, prevention is key! Use a clarifying shampoo regularly and consider using a swim cap if you’re a pool enthusiast.

Beauty hair
Can You Use Apple Cider Vinegar To Lighten Hair?

What Is Apple Cider Vinegar?

Before we get into whether you can use apple cider vinegar to lighten your hair, let’s get to know our star ingredient a little better.

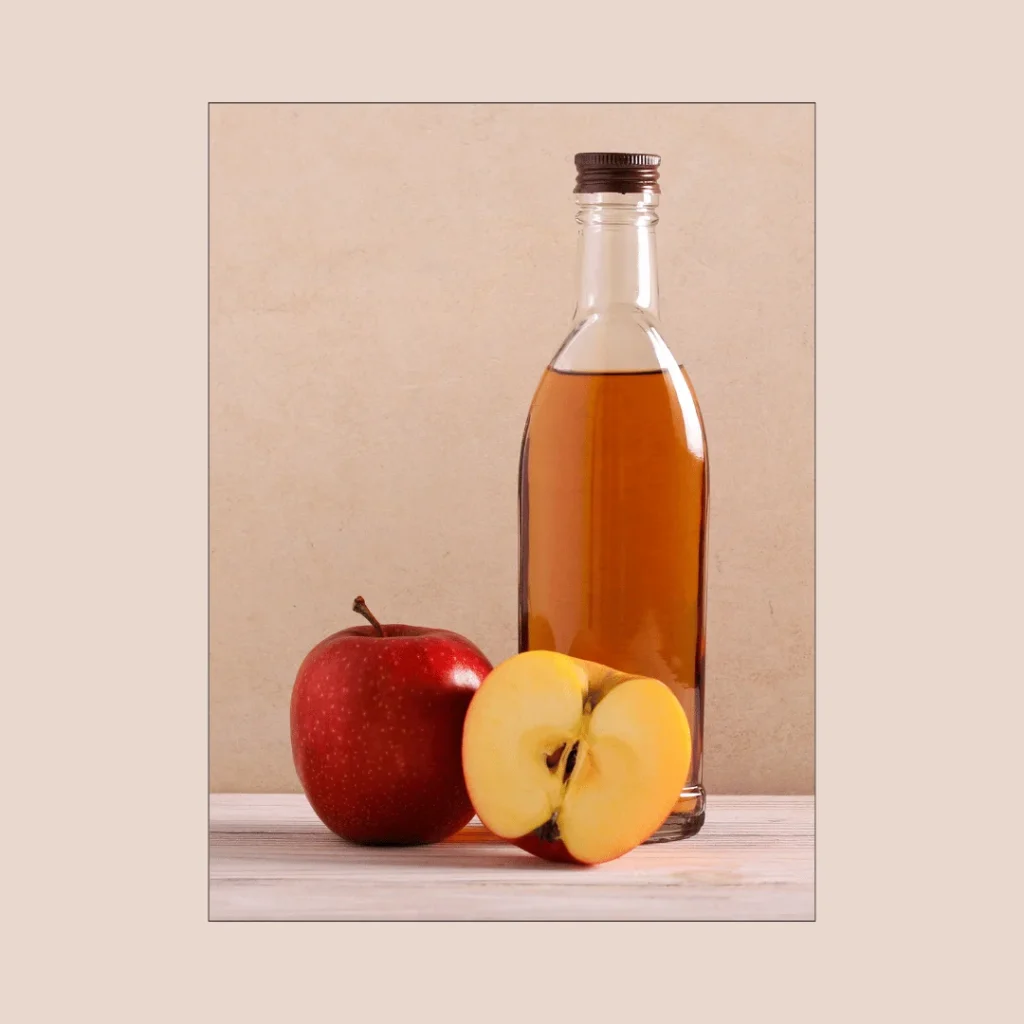
Apple cider vinegar, often called ACV, is a type of vinegar made from fermented apple juice. Here’s a quick breakdown:

  1. How It’s Made: Fresh apples are crushed and their juice is extracted. This juice then undergoes two fermentation processes. The first turns the sugars into alcohol, and the second converts the alcohol into acetic acid.
  2. Composition: ACV is mostly water (about 94%) and acetic acid (around 5-6%). It also contains other acids, vitamins, minerals, and antioxidants.
  3. The “Mother”: Organic, unfiltered ACV contains something called “the mother” – strands of proteins, enzymes, and beneficial bacteria that give the vinegar a cloudy appearance.
  4. pH Level: ACV is quite acidic, with a pH level typically between 2 and 3. This acidity is key to how it interacts with our hair.

For hair care purposes, it’s best to use raw, unfiltered, organic apple cider vinegar to ensure you’re getting all the beneficial properties without unnecessary additives.

Is Apple Cider Vinegar Safe To Use On Our Hair?

It’s pretty normal to be sceptical about putting any type of vinegar on your hair.

After all, if apple cider vinegar wasn’t as popular as it is, you probably wouldn’t consider it a go-to product for weight loss and clear skin either. But when used correctly, ACV can be a safe and effective treatment for your locks.

Hairstylist Adam Federico, R+Co Vice President of Technical Education says “Apple cider vinegar is wonderful in so many ways. It leaves hair looking healthy and shiny, and restores balance to an irritated scalp.”

However, it’s crucial to use ACV correctly to avoid any potential issues. Here are some key points to keep in mind:

  1. Dilution is key: Never apply undiluted ACV directly to your hair or scalp. A good rule of thumb is to mix one part ACV with two to three parts water.
  2. Frequency matters: Using ACV too often can potentially dry out your hair or irritate your scalp. Start with once a week and adjust based on how your hair responds.
  3. Patch test: Before going all in, do a patch test on a small area of your scalp to check for any adverse reactions.
  4. Rinse thoroughly: Always rinse your hair well after an ACV treatment to avoid any lingering vinegar smell.
  5. Listen to your hair: If you notice any irritation, excessive dryness, or other negative effects, discontinue use and consult a professional.

Remember, while ACV can be beneficial for many people, everyone’s hair is different. What works wonders for your best friend might not be ideal for you. Pay attention to how your hair responds and adjust your routine accordingly.

As with any new hair care regimen, if you have concerns or pre-existing scalp conditions, it’s always a good idea to consult with a dermatologist or trichologist before incorporating ACV into your routine!

So, Can You Use Apple Cider Vinegar To Lighten Hair?

  • Clarifying Action: Apple cider vinegar helps to remove build-up from hair products, hard water minerals, and natural oils. This deep cleansing can make your hair look brighter and feel lighter.
  • Cuticle Effect: ACV’s acidity can help to close the hair cuticle. When the cuticle lies flat, hair reflects more light, appearing shinier and potentially lighter.
  • Subtle Lightening: While the clarifying action can make the hair appear lighter, ACV can also cause some actual lightening over time. This is due to its mild acidic nature, which can gradually break down some of the hair’s pigment.
  • Enhanced Sun Lightening: ACV can make your hair more susceptible to sun bleaching. When you use ACV and then expose your hair to sunlight, you might notice more pronounced lightening effects.

How To Use ACV for Hair Lightening

Alright, let’s get to the fun part – actually using apple cider vinegar to lighten hair. Here’s your step-by-step guide to becoming a kitchen beautician:

  1. The Mix: Start by diluting your ACV. A good rule of thumb is one part ACV to two parts water. If you have sensitive skin or a sensitive scalp, you might want to dilute it even more.
  2. The Application: After shampooing (and skip the conditioner this time), pour the mixture over your hair. You can use a spray bottle for more even application, or just go full-on salon and use an applicator brush.
  3. The Wait: Let it sit for about 15 minutes. This is your perfect excuse to catch up on that TikTok you’ve been meaning to watch or finally reply to those texts you’ve been ignoring.
  4. The Rinse: Rinse it out with cool water. The cool water helps to close the cuticle and lock in the effects.
  5. The Finale: Style as usual.

The Pros and Cons Of Using Apple Cider Vinegar For Hair

Like any beauty treatment, using apple cider vinegar to lighten hair comes with its pros and cons. Let’s break it down:

Pros:

  1. It’s natural and chemical-free
  2. Super budget-friendly
  3. Can improve overall hair health
  4. Gentle lightening effect
  5. May help with dandruff and scalp issues

Cons:

  1. The smell (It’s not exactly a rose garden)
  2. Results can be unpredictable
  3. May be drying for some hair types
  4. Not as effective on darker hair colours
  5. Requires consistency for noticeable results

Other Benefits of ACV for Hair

We kind of touched on it earlier, but ACV might be working some other magic on your mane too. Here’s how:

  1. Shine Booster: Remember how we talked about ACV closing the hair cuticle? This can lead to seriously shiny hair. We’re talking glossy magazine cover vibes.
  2. Dandruff Fighter: The antimicrobial properties of ACV can help combat the yeast that often causes dandruff.
  3. Detox for Your Locks: If you’re a product junkie, ACV can help remove buildup from styling products, hard water minerals, and other gunk that weighs your hair down.
  4. Frizz Tamer: By balancing your hair’s pH, ACV can help smooth the cuticle, potentially leading to less frizz.
  5. Scalp Health: A healthy scalp means healthy hair. ACV’s balancing act can create a better environment for hair growth.

Now, let’s not forget the foundation of fabulous hair – a healthy scalp. While boosting your hair colour might be your main goal, neglecting your scalp is like forgetting to water your garden and expecting prize-winning roses.

Dr Masood Munir tells Sheerluxe, “Apple cider vinegar contains AHA (alpha hydroxy acid) which has natural antibacterial, exfoliating and anti-dandruff properties. Therefore, it’s a great ingredient to clean up your scalp. Moreover, apple cider vinegar is an anti-inflammatory, so it can be used to calm a sensitive scalp, while also being gentle enough not to strip your hair of its natural nutrients.”

The Bottom Line: To ACV or Not to ACV?

So, should you jump on the apple cider vinegar to lighten hair bandwagon? Well, that depends on what you’re looking for.

If you want a natural, gentle way to potentially lighten your hair while improving its overall health, then ACV might be the way to go. It’s especially great if you’re looking for a subtle change or want to enhance your natural highlights.

On the other hand, if you’re dreaming of a dramatic colour change or have very dark hair, you might want to stick with more traditional lightening methods. ACV is more of a supporting actor than the star of the show when it comes to major hair transformations.

Remember, beauty is all about experimentation and finding what works for you. So why not give it a try? Worst case scenario, your hair smells like salad dressing for a day. Best case scenario? You discover a natural, affordable way to give your hair a little extra oomph!

Beauty hair